EasyManua.ls Logo

GE PTW900BPTRS - User Manual

GE PTW900BPTRS
26 pages
Print Icon
To Next Page IconTo Next Page
Loading...
GE is a trademark of the General Electric Company. Manufactured under trademark license.

Questions and Answers

  • E
    Erica RosarioJul 30, 2025
    What to do if my GE Washer won't operate?
    • C
      clarkeangelaJul 30, 2025
      If your GE washer won't operate, there are several possible causes: * Ensure the washer is securely plugged into a working outlet. * Make sure both hot and cold water faucets are fully turned on. * Check that the lid is closed completely and press Start. * Inspect your house circuit breakers/fuses and replace any blown fuses or reset tripped breakers. Ensure the washer has a separate outlet. * Try resetting the electronics by unplugging the washer, waiting 2 minutes, plugging it back in, and pressing Start. * Confirm that you have pressed the Start button.
  • H
    haley27Aug 5, 2025
    How to fix low water flow in my GE PTW900BPTRS Washer?
    • W
      waltoncharlesAug 5, 2025
      If you're experiencing low water flow in your GE washer, here's what you can do: First, turn off the water source and detach the water connection hoses from the upper back of the washer and the water faucets. Clean both the hose screens (if equipped) and the screens in the machine using a brush or toothpick. Reconnect the hoses, turn the water back on, and check for leaks. If the water pressure at the washer inlets is less than 20 psi while filling, it's recommended to call a plumber to evaluate your water supply and make any necessary corrections to increase the water pressure.
  • Y
    yjonesAug 11, 2025
    What to do if there is residue powder in the dispenser or clogging of dispensers in my GE PTW900BPTRS Washer?
    • J
      Jenny DuncanAug 11, 2025
      If you notice residue powder in the dispenser or clogging of the dispensers in your GE washer, it could be due to wash water being too cold or low home water pressure. To address this: * Select a warmer wash temperature to improve detergent dissolving, or switch to liquid detergent. * Ensure siphon caps are free of any debris and are fully pressed into position. * If clogging continues, remove and clean the tray.
  • J
    James MillerAug 17, 2025
    How to properly load my GE PTW900BPTRS to avoid overloading?
    • A
      Ashley KellerAug 17, 2025
      To avoid overloading your GE washer, loosely load clothes no higher than the top row of holes in the washer basket. For optimal results, distribute items around the outside of the basket.
  • L
    Larry SmithAug 22, 2025
    Why is the water not hot enough in my GE Washer?
    • S
      Steve WilsonAug 22, 2025
      If the water in your GE washer isn't hot enough, ensure your house water heater is set to deliver water between 120°F and 140°F (48°C and 60°C).

Summary

SAFETY INFORMATION

IMPORTANT SAFETY INFORMATION

Essential safety precautions and warnings before operating the appliance.

Proper Disposal of your Appliance

Guidelines for responsibly disposing of or recycling your appliance.

PROPER INSTALLATION

Ensuring correct installation for safe operation and longevity of the washer.

START-UP SEQUENCE

Understanding the initial steps and sequences when starting the washer.

AUTOMATIC DRAIN SEQUENCE

Details on how the washer automatically drains under specific conditions.

WHEN NOT IN USE

Precautions for shutting off water supply and other steps when the appliance is not in use.

PARTS AND ACCESSORIES

Information on ordering replacement parts and recommended accessories.

USING THE WASHER

Getting Started Guide

Step-by-step instructions for initial setup and first use of the washing machine.

Control Panel and Display Features

Explanation of the washer's control panel buttons, display, and status indicators.

Understanding Status Lights and Help Indicators

Interpreting display messages, status lights, and consumer help indicator messages.

Wash Cycle Selector Knob

Details on using the cycle selector knob to choose wash cycles for different fabric types.

Wash Cycle Settings and Options

Information on adjusting temperature, soil level, spin speed, and other cycle settings.

Advanced Cycle Options

Overview of specialized cycle options like Deep Fill, Tangle Control, and Delay Wash.

Smart Features and Voice Control

Details on Alexa Voice Assistant and SmartDispense features for enhanced functionality.

Detergent and Bleach Dispensing

Instructions for using the Flex Dispense Drawer and liquid bleach dispenser.

Loading the Washer Correctly

Guidance on properly loading laundry into the washer for optimal performance and care.

Appliance Communication and WiFi

Information on connecting the washer to WiFi for smart features and remote control.

CARE AND CLEANING

Exterior and Interior Cleaning

Instructions for cleaning the outside and inside of the washing machine.

Special Component Cleaning

Specific cleaning instructions for microphones and detergent tank on certain models.

Maintenance and Storage

Guidance on hose inspection, long vacations, and moving or storing the appliance.

INSTALLATION INSTRUCTIONS

Pre-Installation Steps and Requirements

Covers initial checks, tools, parts, and preparation before installing the washer.

Washer Placement and Water Supply Setup

Guidance on selecting a location and setting up water supply connections.

Connecting Drain and Water Hoses

Detailed steps for connecting the washer's drain and water hoses to household fixtures.

Electrical Connections and Final Checks

Instructions for electrical hookup, grounding, leveling, and the final installation checklist.

TROUBLESHOOTING

General Washer Operation and Water Issues

Addresses common problems like low water level, slow flow, siphoning, leaks, and pauses.

Detergent and Dispensing Problems

Covers issues with detergent dissolving, dispenser clogging, and incorrect dispensing.

Fabric Appearance and Damage Issues

Solutions for problems like colored spots, grayed clothes, lint, pilling, and fabric damage.

Washer Sounds and Movement

Identifies and explains various operational sounds and washer movement issues.

LIMITED WARRANTY

GE Appliances Washer Limited Warranty Details

Explains the terms, coverage periods, and exclusions of the washer's limited warranty.

CONSUMER SUPPORT

GE Appliances Support Resources

Information on website, registration, service scheduling, and parts ordering.

Extended Warranties and Connectivity

Details on purchasing extended warranties and assistance with remote connectivity.

Contact Information

Provides contact details for customer service and resolving satisfaction issues.

Overview

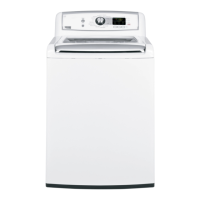
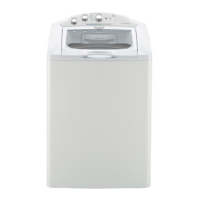
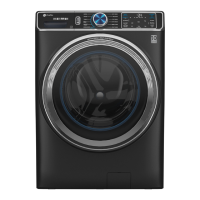
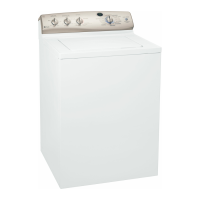
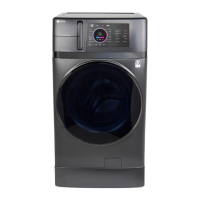
This document is an Owner's Manual & Installation Instructions for GE Profile Washers, specifically models PTW905, PTW900, PTW705, PTW700, PTW605, and PTW600. It provides comprehensive information in English, French, and Spanish, covering safety, operation, installation, troubleshooting, and maintenance.

Function Description:

The GE Profile Washer is designed for household laundry, offering various wash cycles and options to accommodate different fabric types and soil levels. It features advanced technologies like SmartDispense™ for automatic detergent dispensing, Alexa voice assistant integration (on select models), and a Consumer Help Indicator (CHI) for troubleshooting. The washer aims to provide efficient and effective cleaning while minimizing wear on garments and optimizing energy usage.

Important Technical Specifications:

  • Power Supply: 2 wire plus ground, 120 Volt, single phase, 60 Hz, alternating current.
  • Circuit: Individual, properly polarized and grounded 15 or 20 amp circuit breaker or time-delay fuse.
  • Water Pressure: Must be 20 psi minimum to 120 psi maximum (dynamic pressure at the water valve inlet while actively filling).
  • Hot Water Temperature: Household water heater should be set to deliver water at 120°F to 150°F (50°C to 66°C) when hot wash is selected.
  • Drain Discharge Height: Must be a minimum of 30 inches and no more than 8 feet above the base of the washer. Standpipe must be 1-1/2 inches minimum inside diameter and open to atmosphere.
  • Installation Clearances: Minimum 0" on either side, 2" front, 3" rear. Vertical space from floor to overhead shelving, cabinets, ceiling, etc. = 60".
  • Detergent Capacity (SmartDispense™ models): Bulk detergent reservoir holds approximately 75 ounces of liquid detergent, sufficient for about 50 average laundry loads.

Usage Features:

  • Wash Cycles: Includes Normal, Colors, Whites, Delicates, Jeans, Bulky, Quick Wash, Sanitize with Oxi, Drain & Spin, and Downloaded cycles (via SmartHQ App).
  • Cycle Selector Knob: Allows selection of wash cycles and can be turned in either direction. Changing the knob after starting a cycle will stop the washer and change the cycle/options.
  • Start/Pause Button: Initiates or pauses a cycle. The lid must be closed to start a cycle (except Bulky). During load sensing, the lid locks and "SEnSing" scrolls. Pressing Pause unlocks the lid and blinks the Start indicator.
  • Display and Status Lights: Shows approximate time remaining, "scrolling" washer status (BALANCING, DELAY, End, FILL, H2O SUPPLY, Lid, SEnSing, PAUSE), and cycle status lights (Pre-wash, Delay, Fill, Soak, Wash, Rinse, Spin).
  • Cycle Options:
    • Deep Fill: Adds extra water to the wash load. Press once for 3 additional gallons, hold for 3 seconds for deepest fill.
    • Power Pre-wash (on some models): Brief wash, soak, and drain cycle for heavily soiled loads.
    • Tangle Control™ (on some models): Adjusts wash cycle to prevent tangling.
    • Auto Soak: Brief agitation followed by a specified soak period (15, 30 min, 1, 2 hours).
    • Deep Rinse: Provides a deep rinse, recommended when using fabric softener.
    • Delay Wash: Delays cycle start from 1 to 9 hours.
    • Extra Rinse: Adds an additional rinse for extra detergent or bleach.
    • Smart Wash (on some models): Automatically senses soil level and adjusts wash cycle.
    • Smart Rinse (on some models): Senses soil and detergent to determine if additional water is needed for thorough rinse.
    • My Cycle Settings (on some models): Allows users to save custom Temp, Soil, and Spin settings for each cycle.
    • Sound (on some models): Adjusts end-of-cycle signal and system tones volume.
    • Control Lock: Locks controls to prevent accidental selections (press and hold Rinse and Spin buttons for 3 seconds).
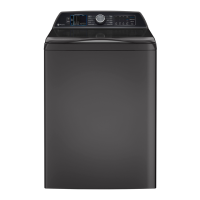
  • SmartDispense™ (PTW905 and PTW900 models only): Automatically adds detergent based on load size. Can be manually set to Less, Auto, or More, or disabled (Off).
  • Alexa Voice Assistant (PTW905 and PTW900 models only): Integrated voice assistant for setting washer cycles and handling stains via SmartHQ App.
  • Flex Dispense Drawer: Compartments for liquid fabric softener/conditioner, pre-wash detergent (Custom Add), detergent packets (Laundry Packs), and main HE detergent.
  • Liquid Bleach Dispenser: Dedicated dispenser for liquid chlorine bleach (maximum 1 cup).
  • WiFi Connect (on some models): Allows remote connectivity and control via the SmartHQ App.

Maintenance Features:

  • Interior Cleaning: Run the Bulky cycle with 1 cup (250 ml) of bleach once a month to control soil and detergent accumulation.
  • Exterior Cleaning: Wipe spills immediately with a damp cloth.
  • Microphone Cleaning (PTW905 and PTW900 models only): Gently wipe audio ports with a damp cotton swab to remove contaminants.
  • Detergent Tank Clean-Out (PTW905 and PTW900 models only): Empties and cleans the bulk detergent reservoir. Press and hold Smart Dispense and Smart Wash buttons for three seconds to initiate.
  • Flex Dispense Drawer Cleaning: Drawer can be easily removed and washed in warm, soapy water. Siphon caps should be pushed fully back into place after cleaning.
  • Water Supply Hoses: Periodically inspect for leaks, wear, cuts, corrosion, and bulges. Replace every 5 years.
  • Water Valve Screens: Clean if low water flow is detected by turning off water, removing hoses, and cleaning screens with a brush or toothpick.
  • Long Vacations: Turn off water faucets and drain all water from hoses and water filter pump area if freezing temperatures are expected.
  • Moving and Storage: Ask a service technician to remove water from the drain pump and hoses. Do not store where exposed to weather. If moving PTW905/PTW900 models with detergent in the tank, flush it out first.
  • Troubleshooting Tips: Comprehensive guide for common issues like water level, suds, leaks, temperature, and sounds, with suggested solutions.
  • Warranty: One-year limited warranty on parts and labor, and an additional nine-year limited warranty on the motor (parts only, labor costs apply). Extended warranties are available.

GE PTW900BPTRS Specifications

General IconGeneral
BrandGE
ModelPTW900BPTRS
CategoryWasher
LanguageEnglish

Related product manuals