GE MEDICAL SYSTEMS
D
IRECTION 2300164-100, REVISION 7 VIVID™ 3 PRO/VIVID™ 3 SERVICE MANUAL
3-6 Section 3-3 - Receiving and Unpacking the Equipment
CAUTION: When using sharp tools to open packing materials, take care to avoid cutting or damaging
the contents.
Note: Unless otherwise specified, referenced items are shown in
Figure 3-1 on page 3-4.
1) Cut and remove the three securing steel strips (item 16).
2) Release the eight Clip-lok
TM
clips (item 15) securing the front wall (item 13) and remove the front
wall. (Refer to the procedure described in
Section 3-3-1-1 on page 3-4).
3) Release the eight Clip-lok
TM
clips securing the back wall (item 14) and remove the back wall.
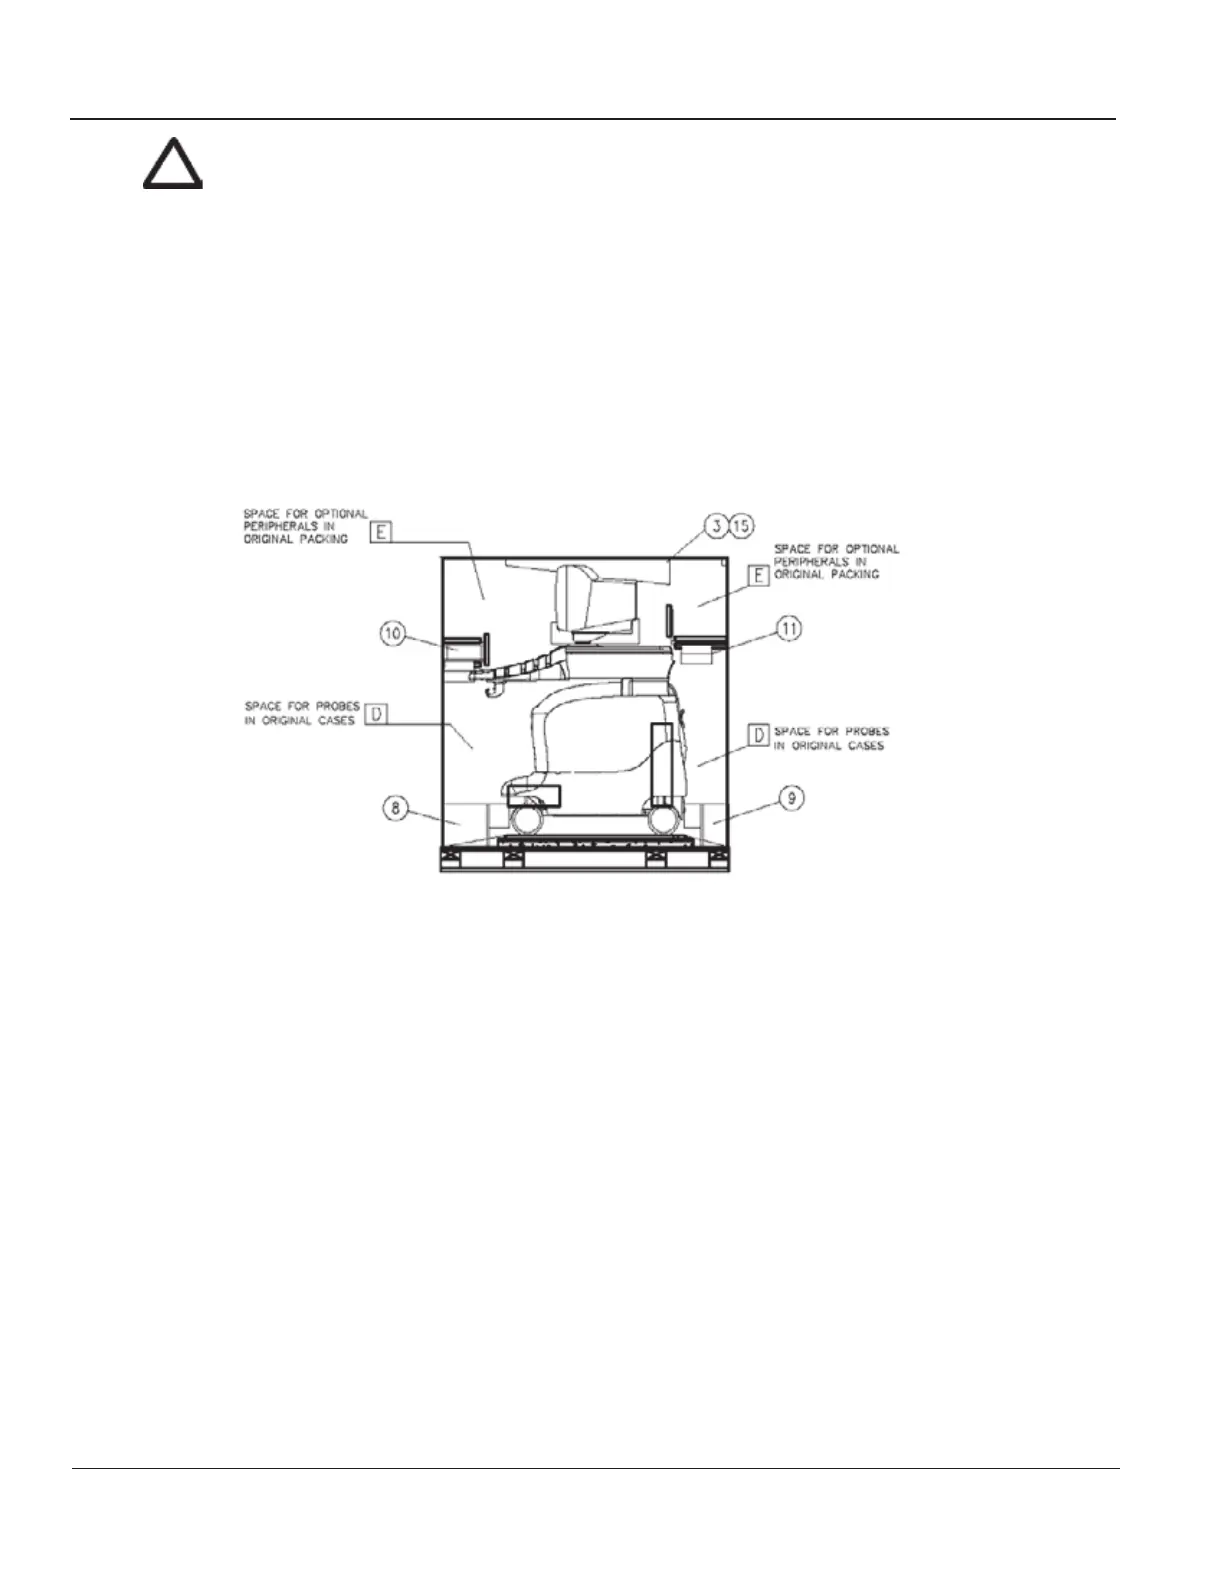
4) Remove the small cartons containing the probes and peripheral options (items D and E in
Figure 3-3
below) from the wooden crate.
5) Remove the console control support back foam (item 11 in Figure 3-3, above).
6) Remove the keyboard support foam located in front of the keyboard (item 10 in
Figure 3-3, above).
7) Remove the back support foam located in front of the rear wheels (item 9 in
Figure 3-3, above).
8) Remove the top cover by opening the six clips fastening it to the right and left walls. For details on
opening the clips, refer to Section 3-3-1-1 on page 3-4.
9) Remove the right wall (item 6) and the left wall (item 7) by opening the three clips fastening each to
the base.
10) Cut and remove the antistatic sheet (item 2 in
Figure 3-4 below) that is wrapped around the unit,
taking care not to damage the antistatic cover.
11) Remove the antistatic cover (item 4 in
Figure 3-4).
Figure 3-3 Probes and Peripherals in Original Packaging
Artisan Technology Group - Quality Instrumentation ... Guaranteed | (888) 88-SOURCE | www.artisantg.com
 Loading...


