– 23 –
Drain Pump
The drain pump is coupled to a 120 VAC, 60 Hz, 85
watt motor. The pump motor has an approximate
resistance value of 12 Ω.
The main control monitors the pump for proper
operation. If no current is detected, or current
detected is stable, exhibiting no change during pump
out, the control will initiate a field service error code.
Note: If a wash cycle has started and the customer
stops the washer by holding the Start/Pause button
for 3 seconds, the pump will not drain any water in
the tub. The washer will go through a spin algorithm
to de-energize the mode shifter and shut down. The
water stays in the tub.
To remove the pump:
Note: Water will remain in hoses even when the tub
appears empty. Use care to avoid water spills.
Disconnect power to the machine.
Lower the drain hose into a small bucket to
remove any water remaining in hose.
Remove the front panel. (See Front Panel.)
Disconnect the pump wires.
Pinch off the black sump hose to prevent water
spills.
Remove hose clamps and hoses from the pump.
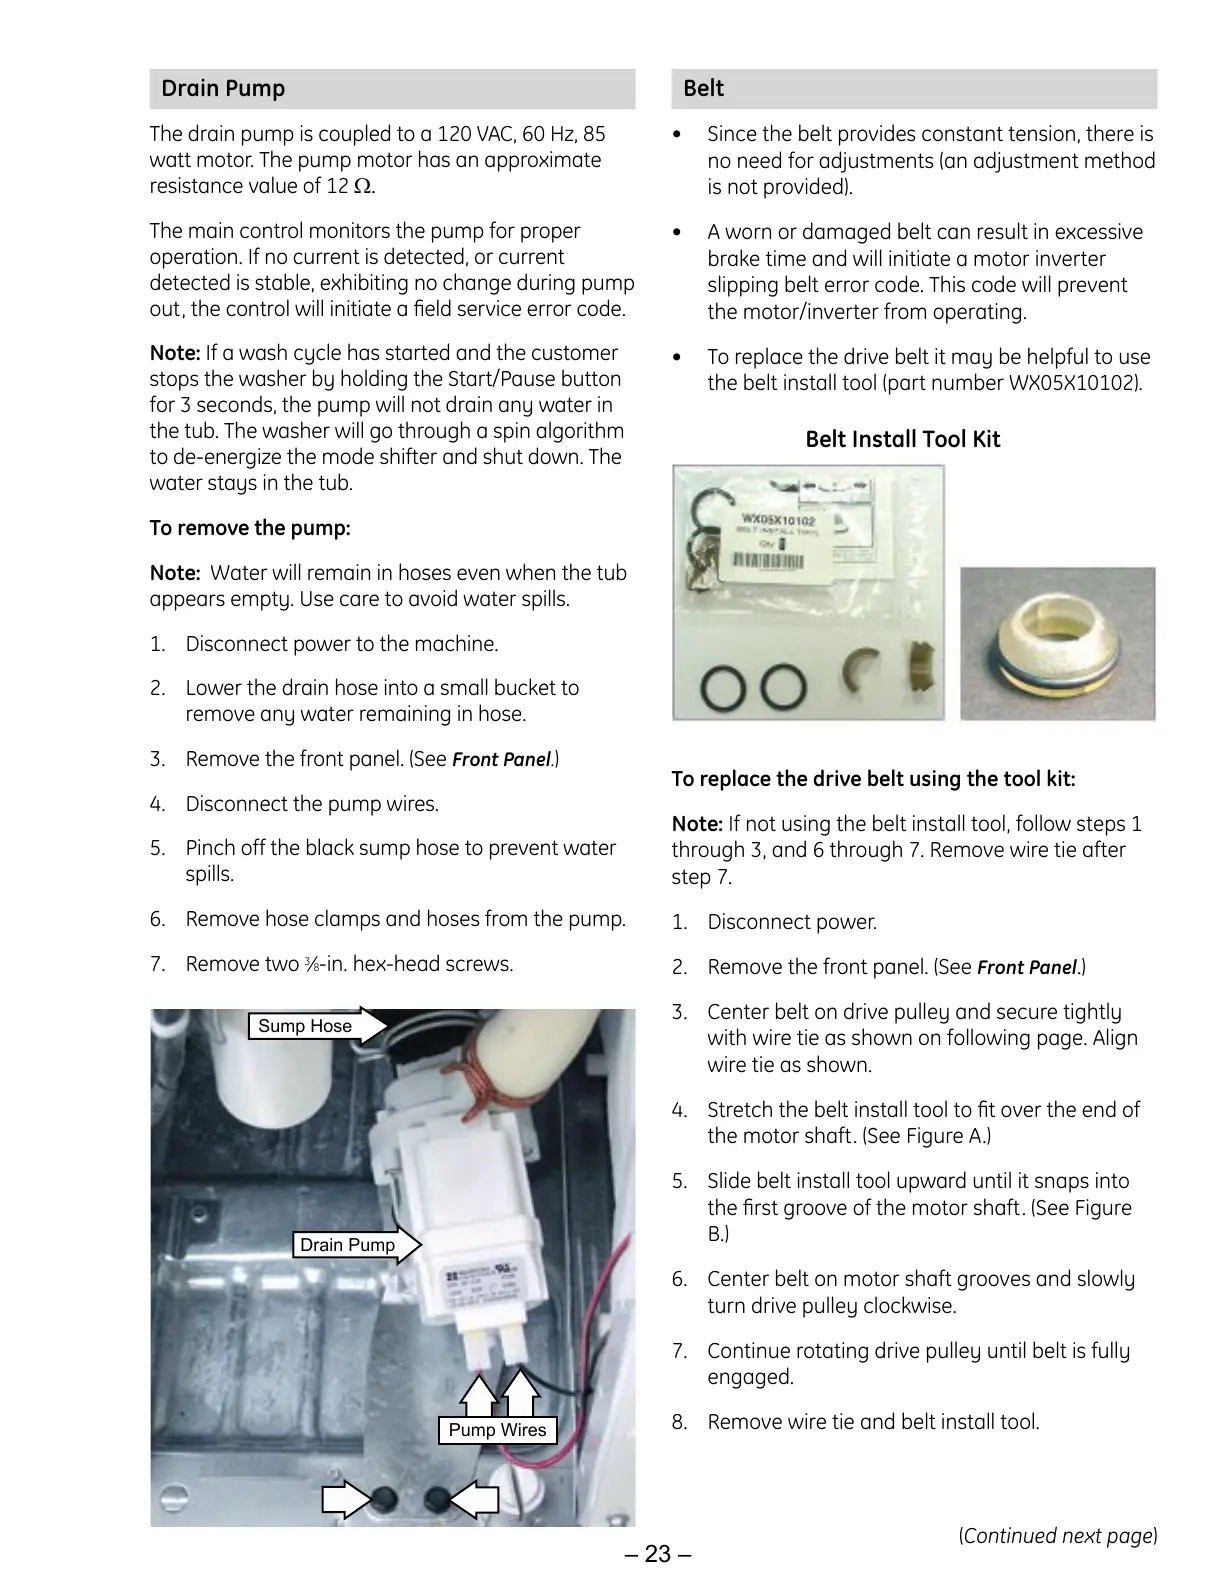
Remove two
3
/
8
-in. hex-head screws.
1.
2.
3.
4.
5.
6.
7.
Sump Hose
Drain Pump
Pump Wires
Belt Install Tool Kit
To replace the drive belt using the tool kit:
Note: If not using the belt install tool, follow steps 1
through 3, and 6 through 7. Remove wire tie after
step 7.
Disconnect power.
Remove the front panel. (See Front Panel.)
Center belt on drive pulley and secure tightly
with wire tie as shown on following page. Align
wire tie as shown.
Stretch the belt install tool to fit over the end of
the motor shaft. (See Figure A.)
Slide belt install tool upward until it snaps into
the first groove of the motor shaft. (See Figure
B.)
Center belt on motor shaft grooves and slowly
turn drive pulley clockwise.
Continue rotating drive pulley until belt is fully
engaged.
Remove wire tie and belt install tool.
1.
2.
3.
4.
5.
6.
7.
8.
Belt
Since the belt provides constant tension, there is
no need for adjustments (an adjustment method
is not provided).
A worn or damaged belt can result in excessive
brake time and will initiate a motor inverter
slipping belt error code. This code will prevent
the motor/inverter from operating.
To replace the drive belt it may be helpful to use
the belt install tool (part number WX05X10102).
•
•
•
(Continued next page)
 Loading...