ZXADJB30PSS,ZXADJB36PSS,ZXADJB48PSSAccessory Installation
ACCESSORIES--30" TO 36" ADJUSTABLE BACKSPLASH (not included)
WARNING:
To prevent ignition of combustible materials,
the entire back wall above the range must be
protected by a backsplash constructed of non-
combustible material.
BEFOREYOU BEGIN
Read these instructions completely
and carefully.
IMPORTANT: Save these instructions for local
inspectoCs use.
IMPORTANT: OBSERVEALL GOVERNING CODES
AND ORDINANCES.
NOTE TO INSTALLER: Be sure to leave these
instructions with the Consumer.
NOTE TO CONSUMER: Keep these instructions
with your Owner's Manual for future reference.
• This backsplash adjusts to fit the space between
the top of the range and the bottom of the hood,
from 30" Min. to 36" Max. height.
• Maximum shelf load-bearing weight is 40 Ibs.
TOOLS AND MATERIALS REQUIRED
•Gloves to protect against sharp edges
• T-15 and #2 Phillips screwdrivers
• Drill with 3/32" and 9/6/4" bits
• Safety glasses
• Level Top
• Pencil with Shelf
Top Wall
Support
This Kit Includes
• Top wall support
•Bottom wall support
• Top cover with shelf
• Bottom cover
• Hardware package with
- 9 Stainless Steel Torx 15 #8
self-tapping screws
- 9 Phillips #2 pan head wood #10 screws
- 3 Stainless Steel #2 truss head
#10 screws (for alternate
installation method)
Bottom Wall Support
Hardware
Package
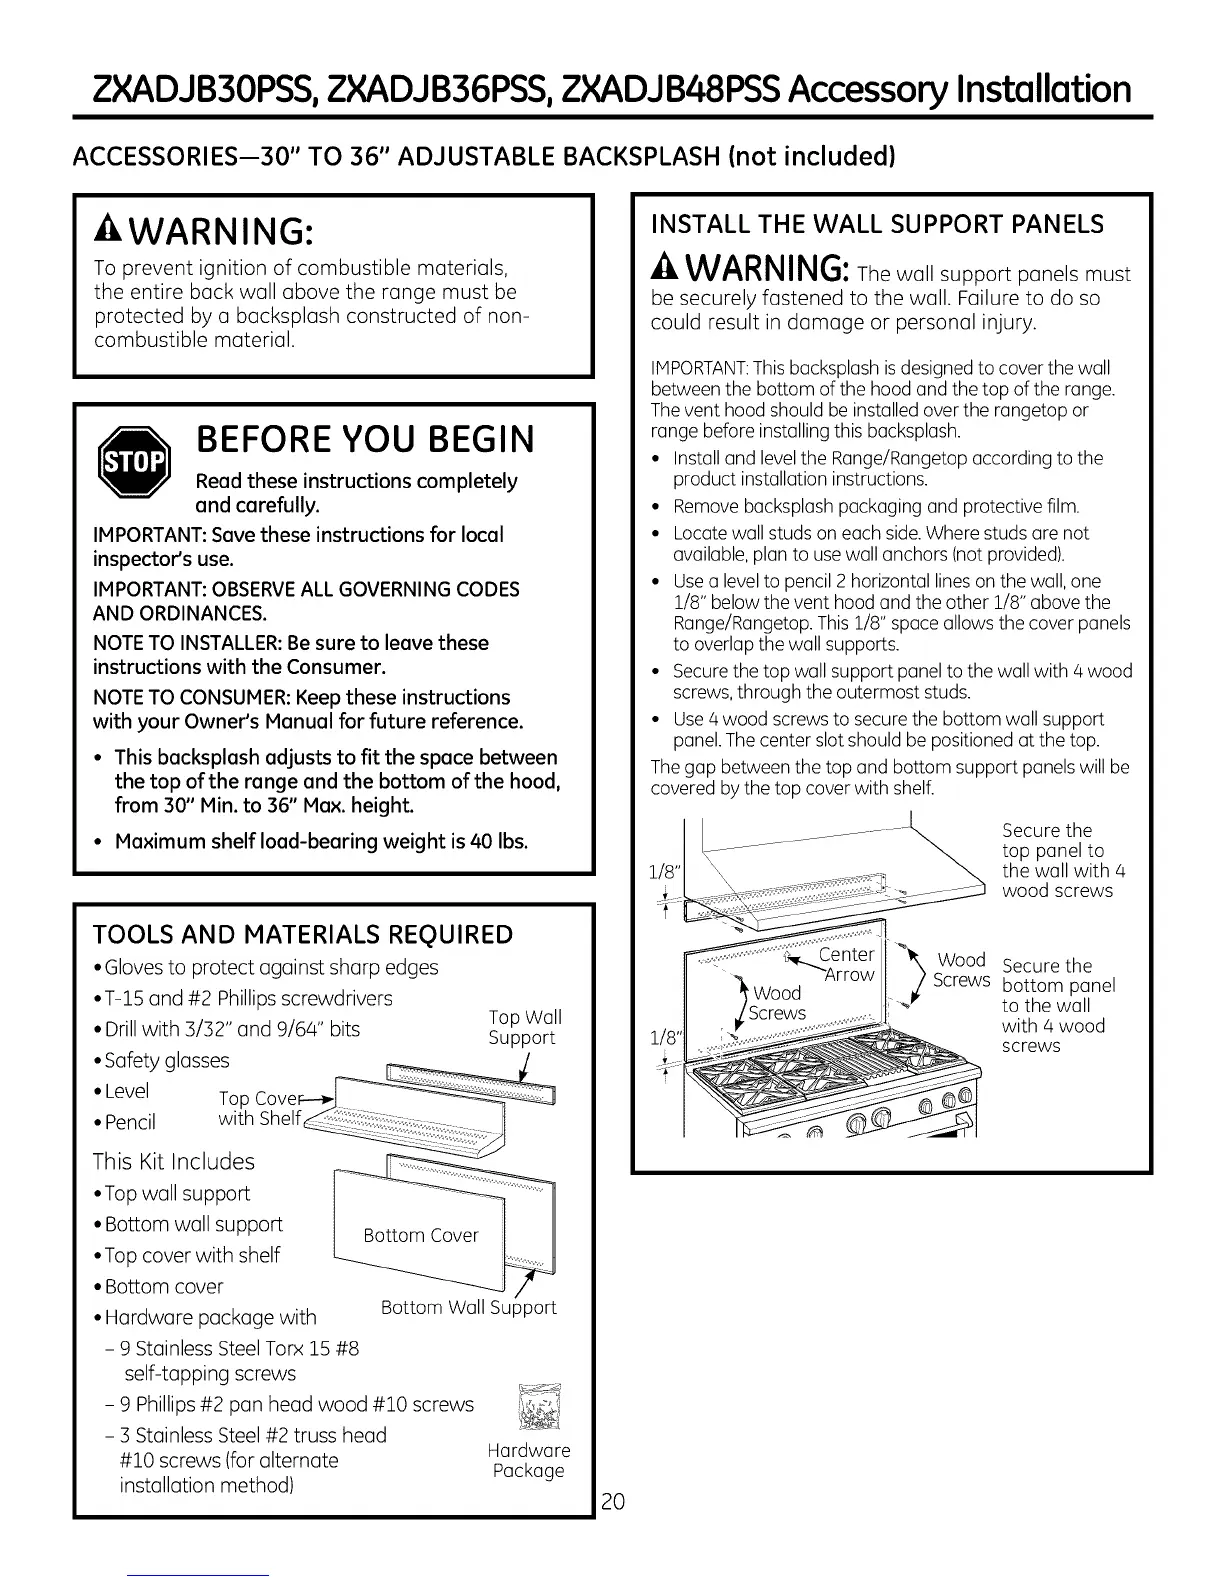
INSTALL THE WALL SUPPORT PANELS
WARNING: The wall support panels must
be securely fastened to the wall. Failure to do so
could result in damage or personal injury.
IMPORTANT:Thisbacksplash is designedto cover the wall
between the bottom of the hood and the top of the range.
Thevent hood should be installed over the rangetop or
range before installing this backsplash.
• Installand level the Range/Rangetop according to the
product installation instructions.
• Removebacksplash packaging and protective film.
• Locatewall studs on each side.Where studs are not
available, plan to use wall anchors (not provided).
• Usea level to pencil 2 horizontal lines on the wall, one
1/8" below the vent hood and the other 1/8" abovethe
Range/Rangetop.This 1/8" space allows the cover panels
to overlapthe wall supports.
• Securethe top wall support panel to the wall with/4 wood
screws,through the outermost studs.
• Use/4wood screws to secure the bottom wall support
panel.Thecenter slot should be positioned at the top.
Thegap between the top and bottom support panelswill be
covered bythe top cover with shelf.
Secure the
top panel to
the wall with/4
wood screws
Wood
Wood
Screws
Secure the
bottom panel
to the wall
with/4 wood
screws
20