ZX12B30PSS, ZX12B36PSS, ZX12B48PSS Accessory Installation
OPTIONAL ACCESSORIES--12" HIGH BACKSPLASH
AWARNING:
To prevent ignition of combustible materials,
the entire back wall above the range must
be protected by a bocksplosh constructed
of non-combustible material.
This stainless steel backsplash accessory
must be installed in combination with a custom,
non-combustible backsplash built beyond
the 12" height of the bocksplosh.
BEFORE YOU BEGIN
Read these instructions completely
and carefully.
IMPORTANT: Save these instructions for local
inspector's use.
IMPORTANT: OBSERVE ALL GOVERNING CODES
AND ORDINANCES.
NOTE TO INSTALLER: Be sure to leave these
instructions with the Consumer.
NOTE TO CONSUMER: Keep these instructions
with your Owner's Manual for future reference.
This kit provides for the installation of a 12"
high backsplash for 30", 36" or 48" Monogram
Professional Ranges and Rangetops.
TOOLS AND MATERIALS REQUIRED
• Gloves to protect against sharp edges
• T-15 and #2 Phillips screwdrivers
• Drill with 3/32" and 9/64" bits
• Safety glosses
• Level
•Pencil
Wall Support
Panel
This Kit Includes
• Wall support panel
• Cover panel
• Hardware package with
- 5 Stainless Steel Torx 15 #8
self-tapping screws
- 5 Phillips #2 pan head wood
#10 screws
Hardware
Package
INSTALL 12" BACKSPLASH
-AWARNING: Thisbocksploshmust
be securelyfastenedtothe wall.Failuretodo
so couldresultindamage or personalinjury.
• Installand leveltherangeorrangetopand
therange hood accordingtotheinstallation
instructions.
• Remove the backsplash packaging and
protective film.
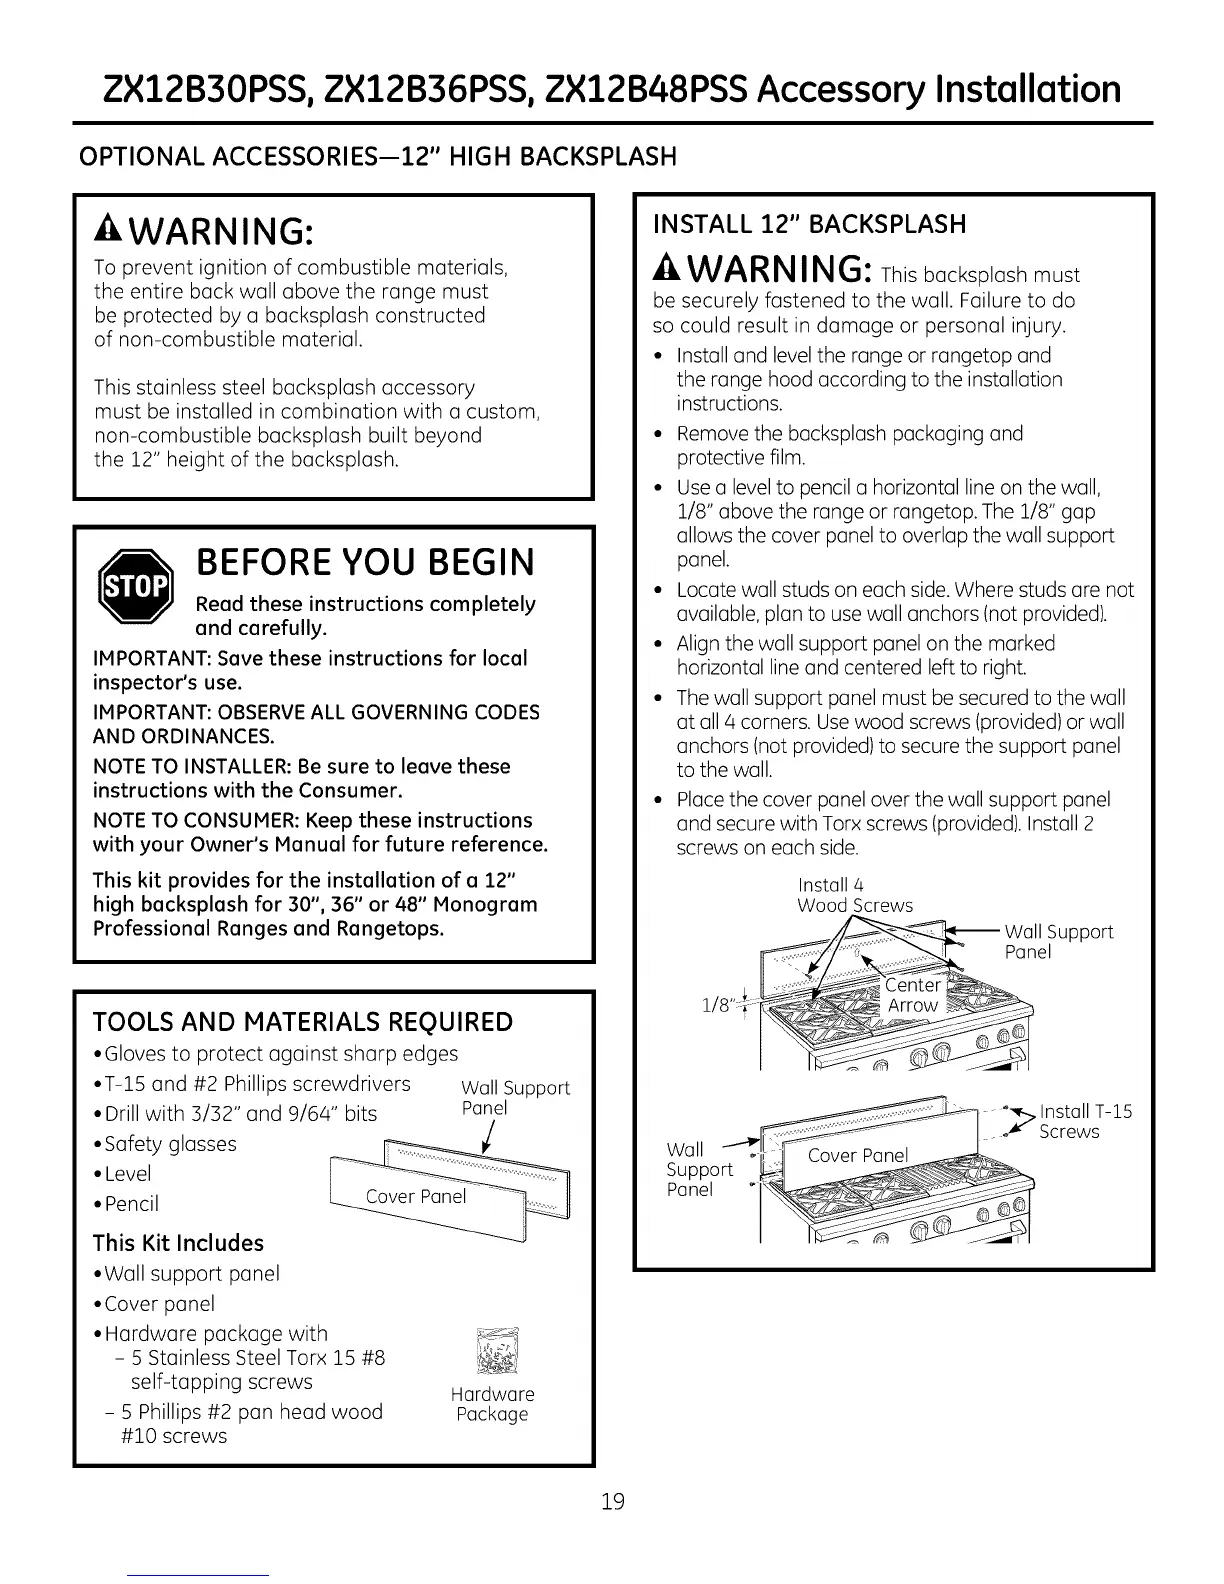
• Use a level to pencil a horizontal line on the wall,
1/8" above the range or rangetop. The 1/8" gap
allows the cover panel to overlap the wall support
panel.
• Locate wall studs on each side. Where studs are not
available, plan to use wall anchors (not provided).
• Align the wall support panel on the marked
horizontal line and centered left to right.
• The wall support panel must be secured to the wall
at all 4 corners. Use wood screws (provided) or wall
anchors (not provided) to secure the support panel
to the wall.
Place the cover panel over the wall support panel
and secure with Torx screws (provided). Install 2
screws on each side.
Install 4
Wood Screws
Support
Panel
Wall
Support
Panel
Cover Panel
"°.'_'7Install T-15
o_" Screws
19