www.gemu-group.com20 / 24GEMÜ 8500
15 Inspection and maintenance
15 Inspection and maintenance
WARNING
Danger of burning from hot surfaces!
▶ Solenoid coil heats up during opera-
tion.
● Allow the solenoid coil and piping to
cool down before servicing work.
WARNING
The equipment is subject to pressure!
▶ Risk of severe injury or death.
● Depressurize the plant.
● Completely drain the plant.
1. Use appropriate protective gear as specified in plant oper-
ator's guidelines.
2. Shut off plant or plant component.
3. Secure against recommissioning.
4. Depressurize the plant or plant component.
NOTICE
● Only use genuine GEMÜ spare parts.
● When ordering spare parts, please state the complete or-
der number of the pilot solenoid valve.
The operator must carry out regular visual examination of the
valves dependent on the operating conditions and the poten-
tial danger in order to prevent leakage and damage. The valve
also has to be checked for wear in the corresponding inter-
vals.
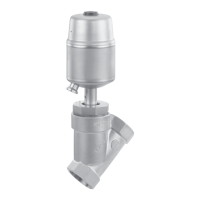
15.1 Solenoid coil replacement
Fig.6: Solenoid coil replacement
NOTICE
▶ When replacing the solenoid coil, the pilot solenoid valve
cannot be operated electrically, but only manually via the
manual override 8.
1. Disconnect the plug 2 from power supply.
2. Undo the fastening nut 7.
3. Pull the plug 2 off the solenoid coil 10.
4. Place a new solenoid coil 10 on the bush.
5. Place the plug 2 back onto the solenoid coil 3.
6. Tighten the fastening nut 7 manually.
7. Push the plug 2 and gasket onto the solenoid coil 10 and
tighten with the fixing screw (60 Ncm).
16 Disassembly
Disassembly is performed observing the same precautionary
measures as for installation.
1. Disassemble the pilot solenoid valve (see chapter "Install-
ation").
2. Disconnect the pneumatic line(s) (see chapter "Pneumatic
connection").
3. Disconnect the electric wire(s) (see chapter "Electrical
connection").
17 Disposal
1. Pay attention to adhered residual material and gas diffu-
sion from penetrated media.
2. Dispose of all parts in accordance with the disposal regu-
lations/environmental protection laws.
Parts Disposal
Valve bodies, valve covers in accordance with material
identification
Screws, armatures, bushes,
compression springs
as metallic core scrap
O-rings, diaphragms, sealing
and plastic parts
as domestic waste type com-
mercial waste
Solenoid coil as electrical scrap
Flex plate in accordance with material
identification