MIDI In MIDI Out
MIDI In
MIDI Out
AS1 connection Page1
release notes Genesys series
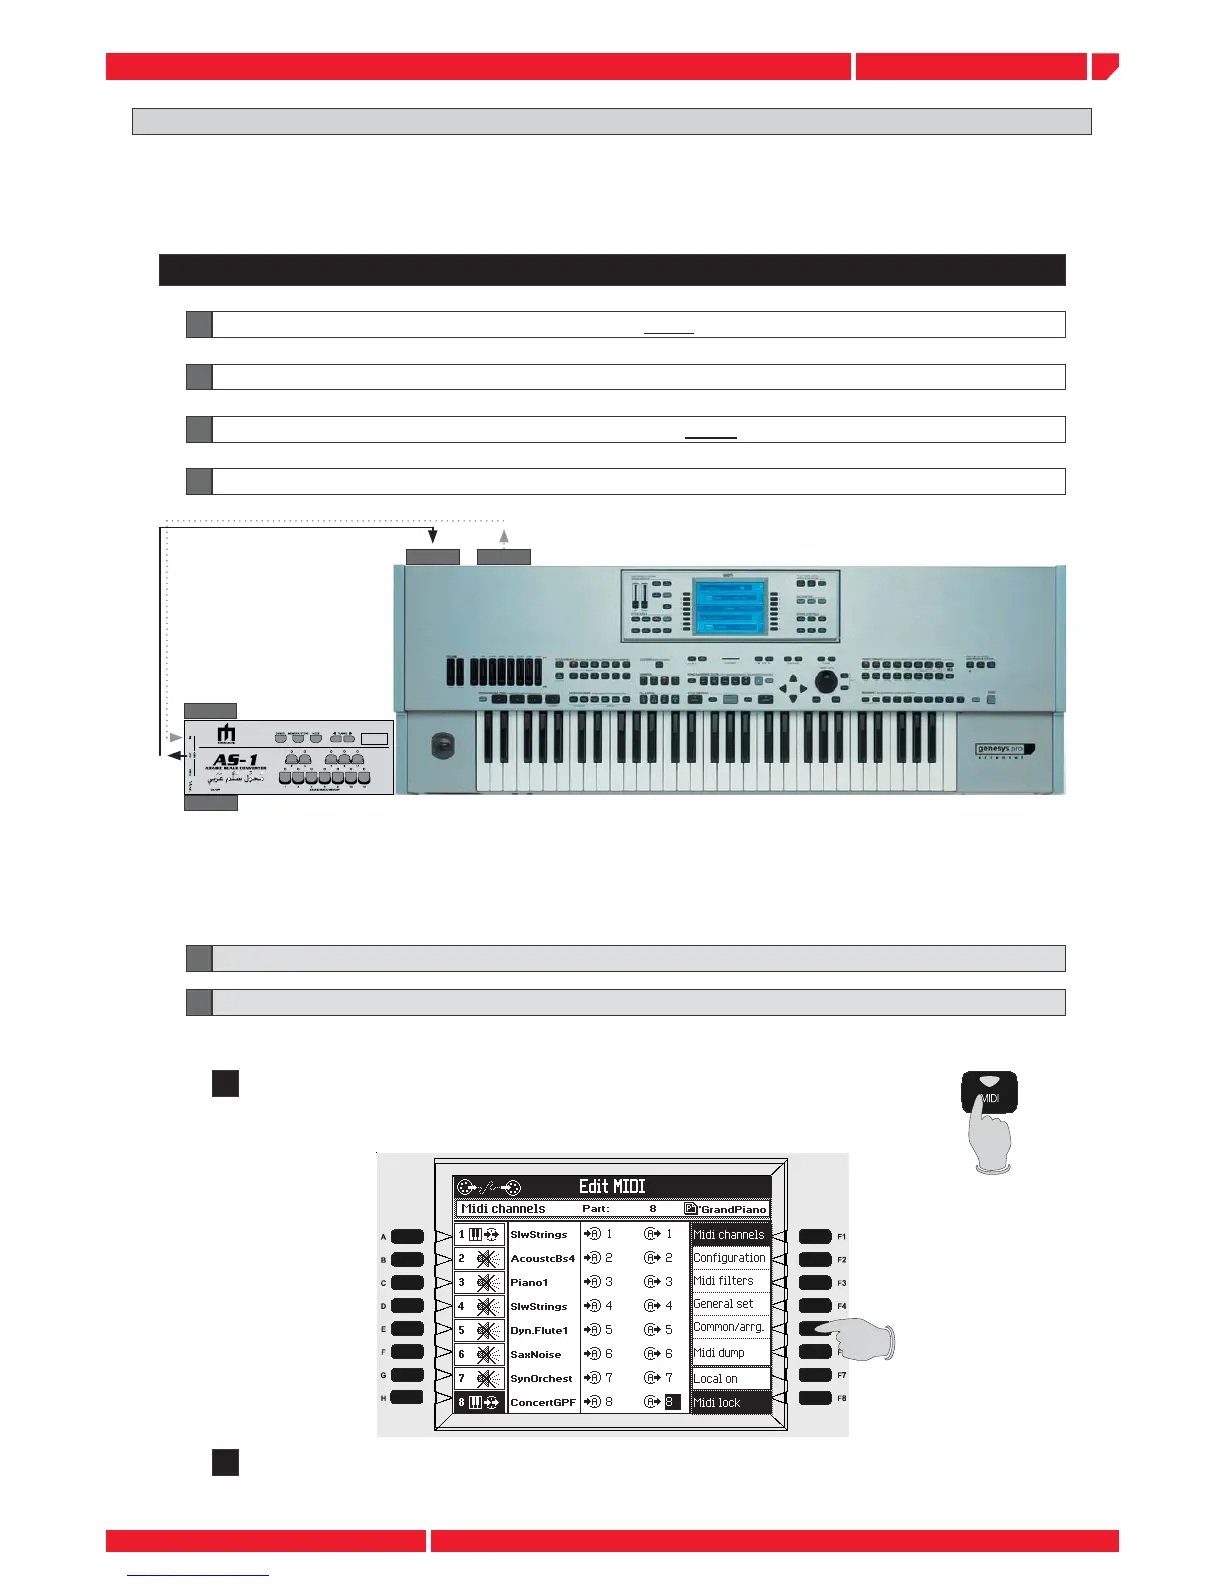
CONNECT THE GENESYS TO THE AS1
The AS1 is an important (optional) accessory allows you to perform using the arabic (and ethnic) scales, for all
details please refer to the AS1 owners manual.
STEPS
3
2
1
4
Connect the Genesys and AS1 MIDI terminal
Connect the Genesys to the AC power (please do not switch ON the keyboard at this point!)
Connect the Genesys to the a speaker system (or to an headphones)
Connect the AS1 adapter to the AC power, (please do not switch ON the AS1 at this point!)
Please connect the AS1 MIDI Out to the Genesys MIDI In as a main connection. It is also possible to connect
a second MIDI cable from the Genesys MIDI Out to the AS1 MIDI In. This connection is facultative and serves
only as a means of observing AS1 command panel changes when sequenced data is played back on the
Genesys. For further details please refer to the relative chapter of the AS1 owners manual.
5 START THE GENESYS
6 TUNE THE GENESYS MIDI COMMON CHANNEL
To properly work with the AS1 the Genesys COMMON CHANNEL has to be set on channel 16.
A Press the button MIDI on the panel
The display shows the relative screen
B Press the function button [F5], COMMON/ARRG.
AS1 Genesys is an optional accessory and have to be purchased separately. Please skip this chapter if you don’t have
an AS1
 Loading...