EasyManua.ls Logo

Gemini 931T User Manual

Gemini 931T
8 pages
To Next Page IconTo Next Page
Page #1 background imageLoading...
Page #1 background image
Made in Italy
AC 2800 Rev. 00 - 02/11
UK
INSTALLATION AND
USE MANUAL
INSTALLATION CERTIFICATE
The undersigned qualified installer attests to have personally fitted the here described vehicle
security system following the manufacturer instructions
.
................................................
..........................................................................................................................
By :
Sold on :
T:ype of product
Vehicle :
GEMINI Technologies S.p.A.
Via Luigi Galvani 12 - 21020 Bodio Lomnago (VA) - Italia
Tel. +39 0332 943211 - Fax +39 0332 948080
Web site: www.gemini-alarm.com
Reg. n.532-A
UNI EN ISO 9001:2008
931T
931T
Gemini permanently fitted aftermarket equipment must be installed by qualified and authorised
installers
.
.
Thatcham recommends to its insurer members that the installations of certified products within the
aftermarket are registered with an independent installation registration system which can be
accessed by insurance companies.
Thatcham administers the Thatcham Recognised Installer scheme, on behalf of the British motor
insurance industry, providing independent registration of installations to vehicle owners.
Details of the Thatcham Recognised Installer scheme can be found at www.thatcham.org.
To ensure consumers insurance cover is not adversely affected it is highly recommended that all
installations are carried out by Thatcham recognised installers and that all installs are registered
providing the vehicle owner with a Thatcham recognition of installation for presentation to insurers.
Thatcham recommends to its insurer members that the installations of certified products within the
aftermarket are registered with an independent installation registration system which can be
accessed by insurance companies.
If seeking insurer recognition for the fitment of this product it is likely that the installation will have to be
carried out by a Thatcham recognised installer.
Afull list of Thatcham recognised installers is available at www.thatcham.org
Question and Answer IconNeed help?

Do you have a question about the Gemini 931T and is the answer not in the manual?

Gemini 931T Specifications

General IconGeneral
BrandGemini
Model931T
CategorySecurity System
LanguageEnglish

Summary

1.0 - PRELIMINARY ADVICE

2.0 - OPERATING DESCRIPTION

2.1 - Complete system arming

Describes the process of fully arming the alarm system.

2.2 - System arming with sensor and comfort control exclusion

How to arm, excluding internal sensors or comfort features.

2.3 - Passive arming

Details the automatic arming feature after ignition off.

2.4 - Arming inhibit time

Explains the delay period before the system is fully armed.

2.5 - System armed

Describes the state when the system is fully armed.

2.6 - Alarm, inhibit time between alarms and alarm cycles

Behavior during and between alarm events.

2.7 - System disarming

Instructions for disarming the alarm system.

2.8 - Emergency disarming by electronic key

Procedure for emergency disarming.

2.9 - Alarm memory

How the system records and displays alarm history.

3.0 - WARRANTY CONDITIONS

4.0 - WASTE ELECTRICAL AND ELECTRONIC EQUIPMENT (WEEE) DIRECTIVE

5.0 - TECHNICAL SPECIFICATIONS

6.0 - CONNECTORS TABLES

6.1 - 20-way connector

Pin configuration and wire functions for the 20-way connector.

6.2 - 8-way connector

Pin configuration and wire functions for the 8-way connector.

7.0 - COMPLETE ELECTRIC DIAGRAM

8.0 - WIRING DIAGRAMS FOR TURN INDICATORS

8.1 - Standard connections

Standard wiring for turn indicators.

8.2 - Connections for vehicles with separate lines

Wiring for vehicles with split indicator circuits.

8.3 - Connection to hazard push-button

How to connect the hazard warning lights.

9.0 - SELECTION OF CENTRAL DOOR LOCKING CONNECTIONS TO ARM/DISARM THE SYSTEM

9.1 - Connections and management by CAN-BUS line

Controlling the system via the vehicle's CAN-BUS.

9.2 - Connections to door lock motor unit

Connecting to the vehicle's door lock actuators.

9.3 - Connections to turn indicators

Using turn indicators for arming/disarming.

9.4 - "Mixed" connection option

Combining multiple control methods.

10.0 - VEHICLE CODE PROGRAMMING

11.0 - SELF-LEARNING OF TURN INDICATORS FLASHES

12.0 - SYSTEM PROGRAMMING

12.1 - Optical signals

Programming visual feedback signals.

12.2 - Acoustic signals

Programming audible feedback signals.

12.3 - Passive arming

Configuration of the passive arming feature.

12.4 - Enabling of siren (art. 7725T) output

Activating the special siren output.

12.5 - Doors switch polarity selection

Setting door sensor input polarity.

13.0 - SYSTEM PROGRAMMING EXAMPLE

14.0 - ADDITION OF NEW DEVICES

15.0 - DELETION OF PROGRAMMED DEVICES

16.0 - ULTRASONIC VOLUMETRIC PROTECTION

16.1 - Connections and positioning

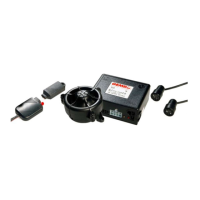
How to connect and place ultrasonic sensors.

16.2 - Sensor adjustment

Fine-tuning the sensitivity of the sensors.

17.0 - SYSTEM RESET

Related product manuals