SECTION 6: ELECTRIC STARTER
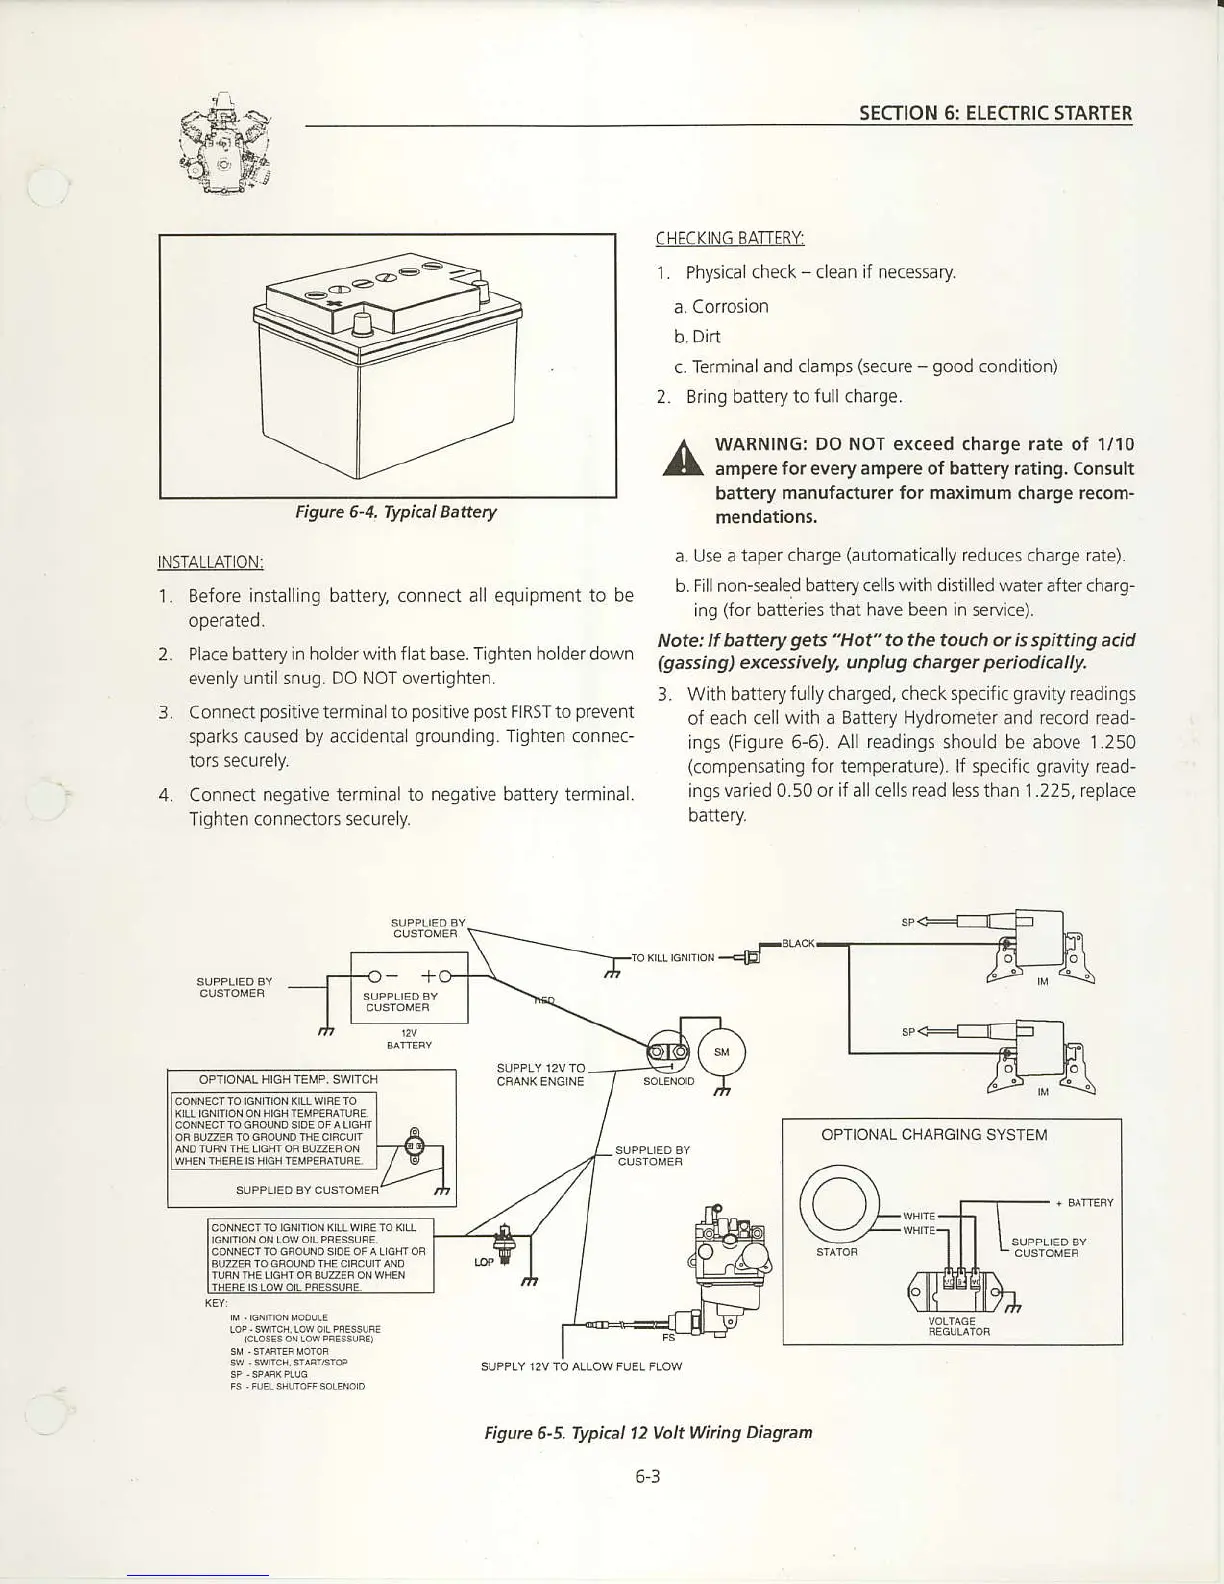
Figurc 6-4 Typical BatEry
C
NECK NG BATTERY:
1. Physicalcheck
-clean
if necessary.
a.
Cofiosion
b. Din
c.
Te minalard
(lamp1(\p.urc
-
good
(orditior'
2.
gring
battery to full charge.
WARNING:
DO NOT exce€d rharge rate
of 1/10
ampere {or every ampere ot batt€ry .ating. Consult
battery
manu{acturer for maximum
charqe
recom-
INSTALL"ATON:
l.
Before installing battery connect all equipment to be
operated.
2.
Place battery in holderwith flat base. Tighten ho der down
evenly
untilsnug. DO NOT overughten.
3. Connect
posiUve
ierminalto
politive post
FlRSTto
prevent
sparks caused by accd€nta
gfounding.
Tlghten conne.-
tors securely.
4.
Connect
negative termlnal to negative battery teminal.
Tighten connectors 5ecurcly.
a. Use a taper
charge
(automatically
reduces charge rate).
b. Fillnon-sealed batterycelk
with
distilled watefafter charg-
ing
(for
batteries that have been in seNice).
Note: ll battery
get5
"Hot" to
the
touch or is spifting acid
(gassing)
ex.essively, unplug charyer
peiodi.ally.
3. With batieryfullycharged,
check specific
gravity
rcadings
of each
cell with a Battery Hydrometer and record read-
ings
(Figure
6-6).
All
rcadings should be above ] 250
(compensating
for temperature). lf specfic
aravity
read-
inqs varied 0.50 or if allcells read less than 1.225, replace
battery
OPTIONAL CNAFG]NG
SYSTEM
Figurc 6-5. rypical 12 Volt Wiring
Diagran
63
 Loading...