Do you have a question about the Genie PCG500ML and is the answer not in the manual?
Ensure proper ceiling support for the power head unit mounting.
Verify secure fastening of the header bracket to the wall above the door.
Confirm clear mounting space for STB system brackets with wood surface.
Assess door material for need of additional support bracing.
Ensure a 110-120 Volt power supply is available within 3 feet of the mounted power head.
Disable all door locks prior to operator installation to prevent damage.
Verify the garage door is properly balanced and moves freely.
Consider an emergency release kit if the garage lacks a separate entry door.
Rolling code system enhancing security by changing access codes.
Controls one, two, or three garage doors from a car.
Operates the door operator from inside the garage.
Console with security lock, LED indicator, and light control.
Stops/reverses door if beam is interrupted; provides self-diagnostic codes.
Stops and reverses door upon contact with an object.
Opens closing door if it fails to close within 30 seconds.
Adjustable open/close force settings for safety.
Stops/reverses door if closing relay malfunctions.
Stops/reverses door if Safe-T-Beam® has operational problems.
Provides light up to 100 Watts when door is activated.
Manually releases door from operator for manual opening/closing.
Essential for reaching high mounting points.
Used for creating mounting holes.
Specific drill bit size for pilot holes.
Tool for tightening nuts and bolts.
Socket sizes for common fasteners.
Used for marking measurements.
Ensures accurate horizontal alignment.
Used for measuring distances.
For driving Phillips head screws.
Versatile tool for various fastener sizes.
Used for preparing wire ends.
Common screw for mounting components.
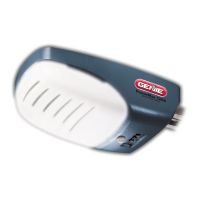
Interior control unit for the operator.
Contains safety and maintenance information.
Remote for operating one garage door.
Remote for operating multiple garage doors.
Safety label warning about entrapment hazards.
Used for securing various parts.
Electrical wiring for connections.
Used to secure wires along walls.
Screw for mounting wall button.
Basic interior button to operate the door.
Component of Safe-T-Beam system emitting a red light.
Component of Safe-T-Beam system detecting a green light.
Bracket for mounting Safe-T-Beam system components.
Standard bolt for assembly.
Heavy-duty screw for mounting into wood.
Nut for 3/8" bolts.
Nut for 1/4" bolts.
Secures pins and bolts.
Small screw for specific applications.
Screw that drills its own pilot hole.
Pin used for connecting components.
Bolt for heavier duty connections.
Bolt for mounting operator.
Nut for 5/16" bolts.
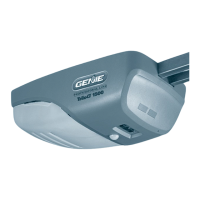
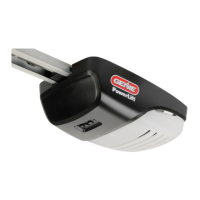
The main unit containing the motor and electronics.
The rail system for a one-piece garage door.
The track for a one-piece door operator.
The rail system for a sectional garage door.
Bracket that attaches the rail to the header wall.
Bracket that attaches the door arm to the door.
Part of the safety beam system.
Part of the safety beam system.
The remote control for the garage door opener.
Interior control for the operator.
Advanced interior control unit.
Highlights potential dangers associated with garage doors.
Indicates severe injury or death from failure to follow instructions.
Indicates severe injury or death from failure to follow instructions.
Indicates property damage or injury from failure to follow instructions.
Prepare the rail assembly on a clean, flat surface.
Distinguish between first, middle, and end rail sections.
Align rail sections by ensuring arrows point towards the door.
Securely fasten rail clamps to the rail joints with bolts and nuts.
Connect the rail strap to the rail using bolts and nuts.
Insert the carriage into the rail slot with the lever in the release position.
Connect the assembled rail to the power head unit.
Install the emergency release cord, knob, and tag.
Mount the OPEN and CLOSE limit switches onto the rail.
Connect the limit switch wires to the power head terminals.
Critical safety and operational notes before proceeding.
Instructions for locating and preparing mounting bracket positions.
Determine the correct height and position for the header bracket.
Explanation of sectional and one-piece door mechanisms.
Securely attach the header bracket to the wall or studs.
Instructions for mounting the door bracket to the garage door.
Determine the optimal location for the door bracket on the door.
Fasten the door bracket using appropriate screws.
Position the rail and power head assembly for mounting.
Attach the rail strap and secure the power head to the ceiling.
Set the correct height for the emergency release knob.
Connect the curved and straight door arms to the door and carriage.
Fasten the door arms together, adjusting for overlap and length.
Connect the straight and curved arms to the door and carriage.
Fasten the door arms together, adjusting for overlap and length.
Position and fasten the STB brackets to the door frame or wall.
Install the STB source and sensor modules onto their brackets.
Route and connect the STB system wiring.
Make wire attachments at the STB components and power head.
Verify beam path, lens height, and alignment.
Choose a convenient and safe location for the wall control.
Connect the wall control wires to the power head and the control itself.
Securely fasten the wall control to the wall.
Instructions for plugging the operator into a grounded outlet.
Instructions for electricians to wire the operator permanently.
Connect the operator's power cord to a grounded outlet.
Verify the alignment of the Safe-T-Beam system.
Set the OPEN and CLOSE limit switches for proper door travel.
Set the force required to open the garage door.
Set the force required to close the garage door.
Test the door's ability to stop and reverse on contact.
Troubleshoot and adjust settings if reverse function fails.
Step-by-step guide to program a single-button remote.
How to use the programmed remote control.
Guide to programming each button on a multi-button remote.
How to use the multi-button remote.
Erase all programmed remote control codes.
Steps to replace the battery in the remote control.
How to attach the visor clip to the remote control.
Recommendations for installing the light bulb.
Steps to install the protective lens for the light.
Emphasizes the importance of reading and following all instructions.
Keep children away from door controls and remotes.
Maintain visibility of the moving door and ensure clear paths.
Warning against being under a stopped or partially open door.
Regular testing of the operator's safety features.
Caution regarding the use of the emergency release.
Importance of maintaining proper door balance for safety.
Advise to save the safety instructions for future reference.
Regular maintenance tasks to perform monthly.
Inspect door springs and hardware for damage or wear.
Test and ensure the door is properly balanced.
Test and adjust the contact reverse feature.
Maintain the Safe-T-Beam system for safe operation.
Troubleshooting steps when the operator doesn't respond to the wall control.
Issues causing the door to stop prematurely during opening.
Problems preventing the door from moving when the operator runs.
Causes for the operator activating unexpectedly.
Issues causing the door to stop prematurely during closing.
Problems that only allow the door to operate in the closing direction.
Problems that only allow the door to operate in the opening direction.
Troubleshooting for the automatic lighting system.
Issues affecting the operating range of the remote control.
Diagnosing why the remote control is not working.
Identifying and resolving sources of noise during operation.
Troubleshooting guide for STB system issues.
Legal compliance information for transmitters.
Details of what is covered by the product warranty.
Specifies the length of the warranty for different parts.
Identifies the consumer eligible for warranty service.
Defines where the warranty is applicable.
Explains how Genie will handle warranty claims (repair or replace).
Lists exclusions and limitations of the warranty.
Instructions on how to claim warranty service.
Lists items and conditions not covered by the warranty.
Information on legal rights varying by location.
| Brand | Genie |
|---|---|
| Model | PCG500ML |
| Category | Garage Door Opener |
| Language | English |