 Loading...
Do you have a question about the GeoVision GV Series and is the answer not in the manual?
| Series | GV Series |
|---|---|
| Category | Security Camera |
| IP Rating | IP66, IP67 |
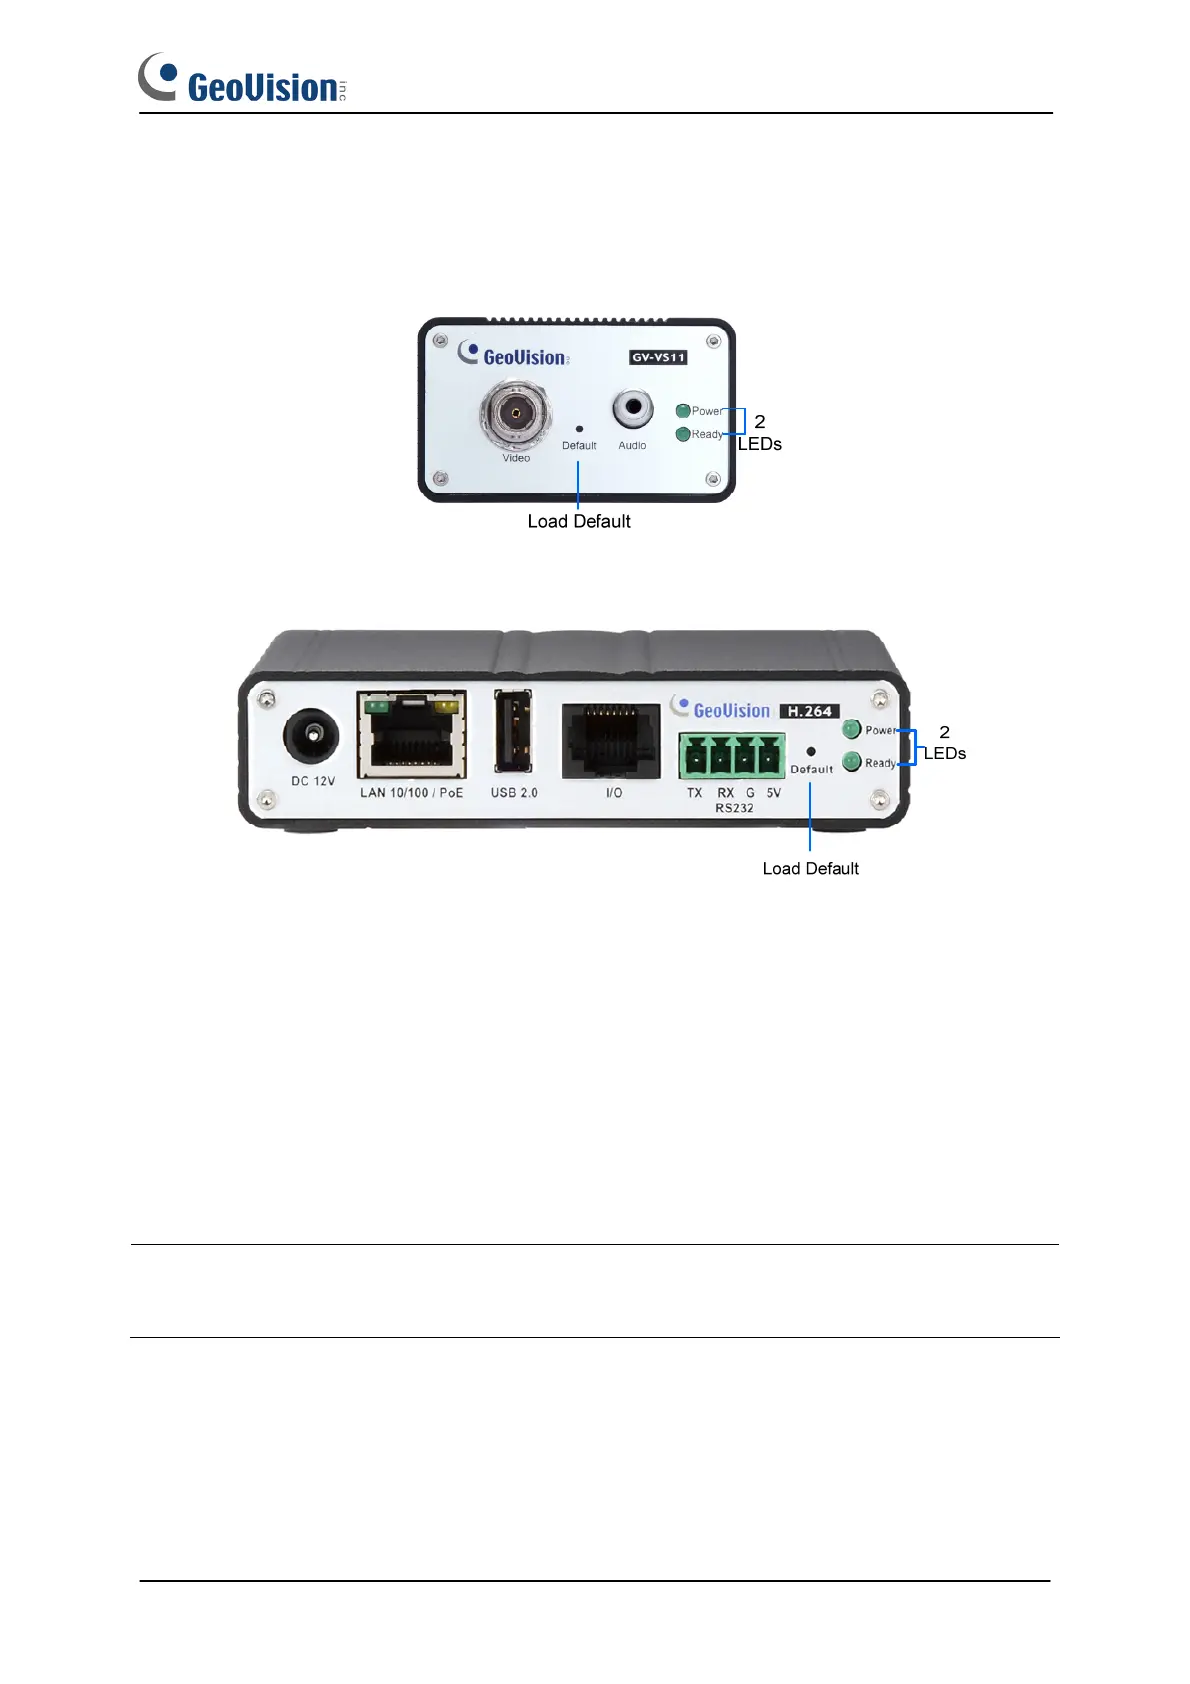
| Power Supply | PoE, 12V DC |
| Video Compression | H.264, H.265 |
| Day/Night Mode | Yes |
| Network Interface | RJ45 |
| Resolution | Varies by model (e.g., 1080p, 4K) |
| Lens | Varies by model (e.g., fixed, varifocal) |
| IR Distance | Varies by model (e.g., 30m, 50m) |