Accessing GV-SV48000
4
4.2 Checking the Dynamic IP Address
GV-SV48000 is a 4-in-1 camera consisting of 4 IP cameras and 4 IP addresses. By default,
when GV-SV48000 is connected to LAN with a DHCP server, each of its 4 cameras is
automatically assigned with a dynamic IP address. Follow the steps below to look up its IP
address.
1. Download and install the GV-IP Device Utility program from the GeoVision website
.
Note: The PC installed with GV-IP Device Utility must be under the same LAN as the
camera you wish to configure.
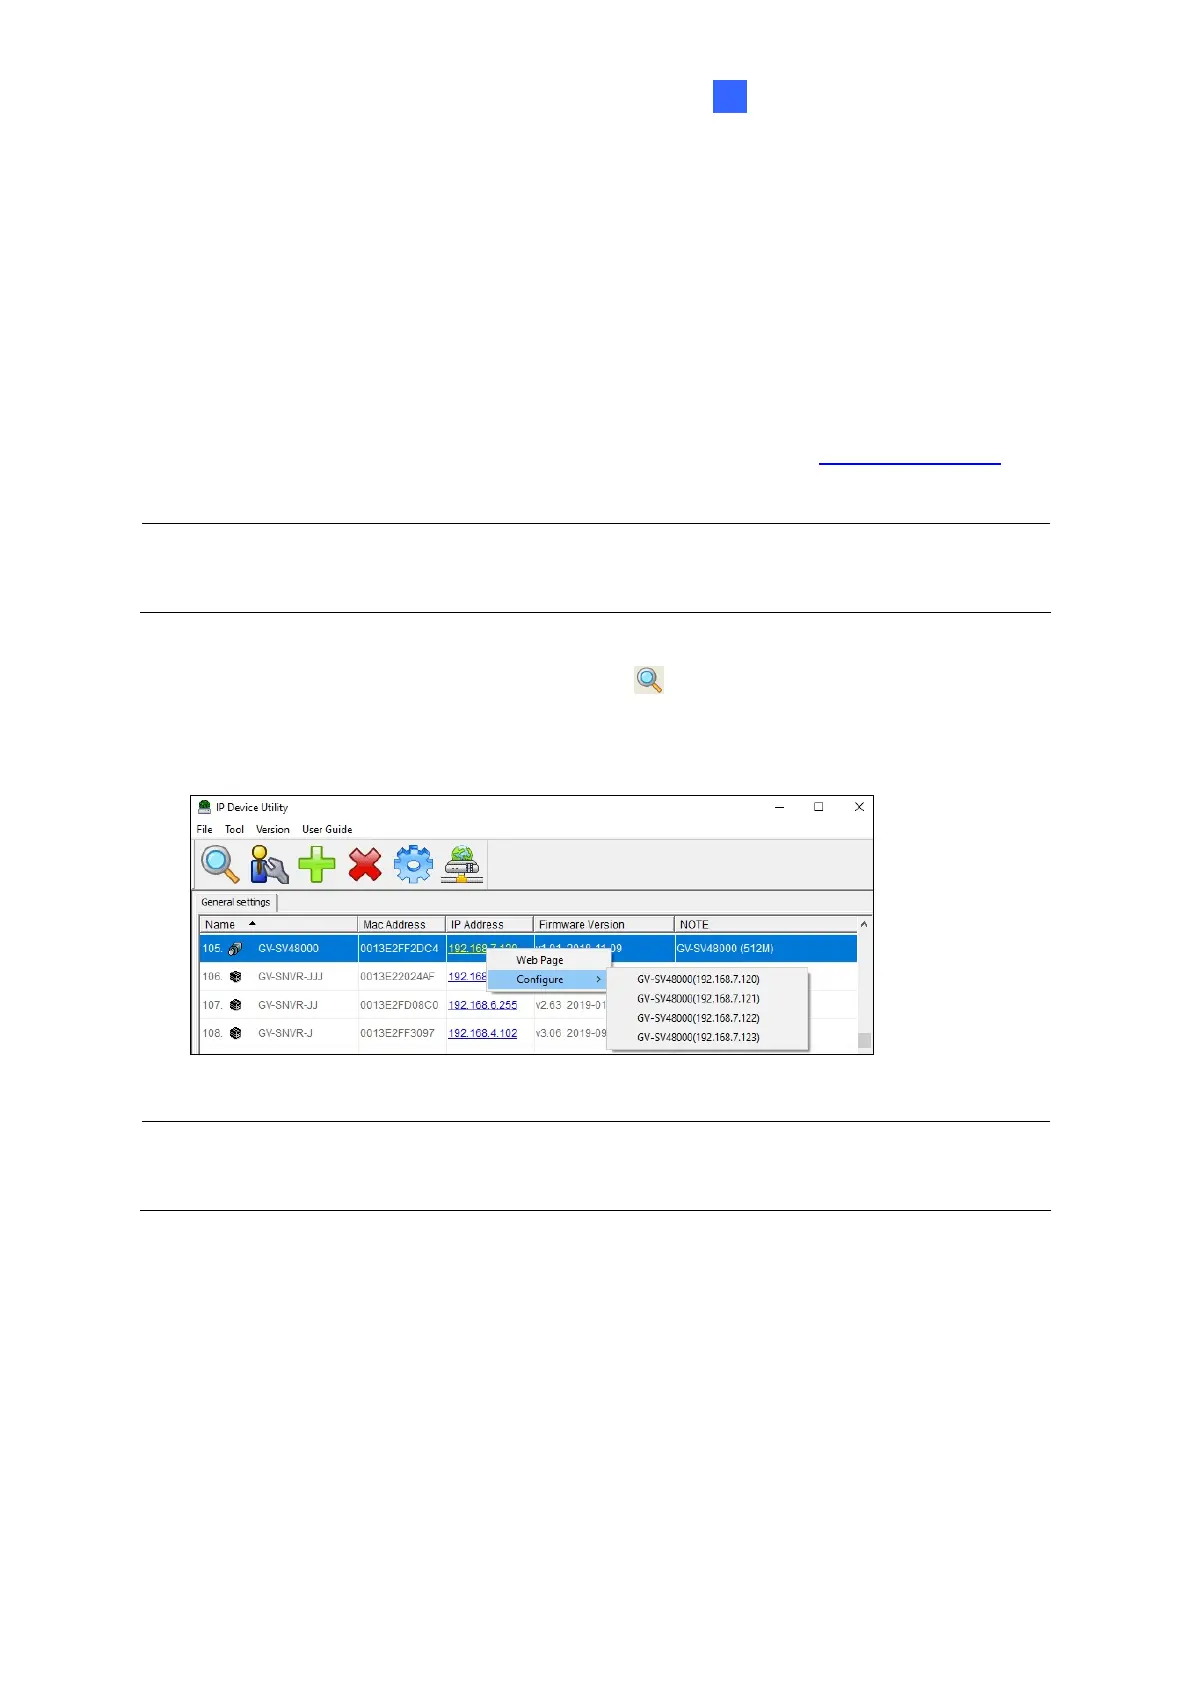
2. On the GV-IP Utility Device window, click the
button to search for the IP devices
connected in the same LAN. Click on the IP address of your GV-SV48000 and select
Configure. The IP address belonging to each of the 4 IP cameras is shown.
Note: The first IP address on the list after selecting Configure is displayed on the GV-IP
Utility Device window as the main IP address.
To login the camera, you can select Web Page after clicking on the IP address of the camera
in the list. The camera uses admin as default ID and password for login.
9

 Loading...