Accessing GV-SV48000
11
4
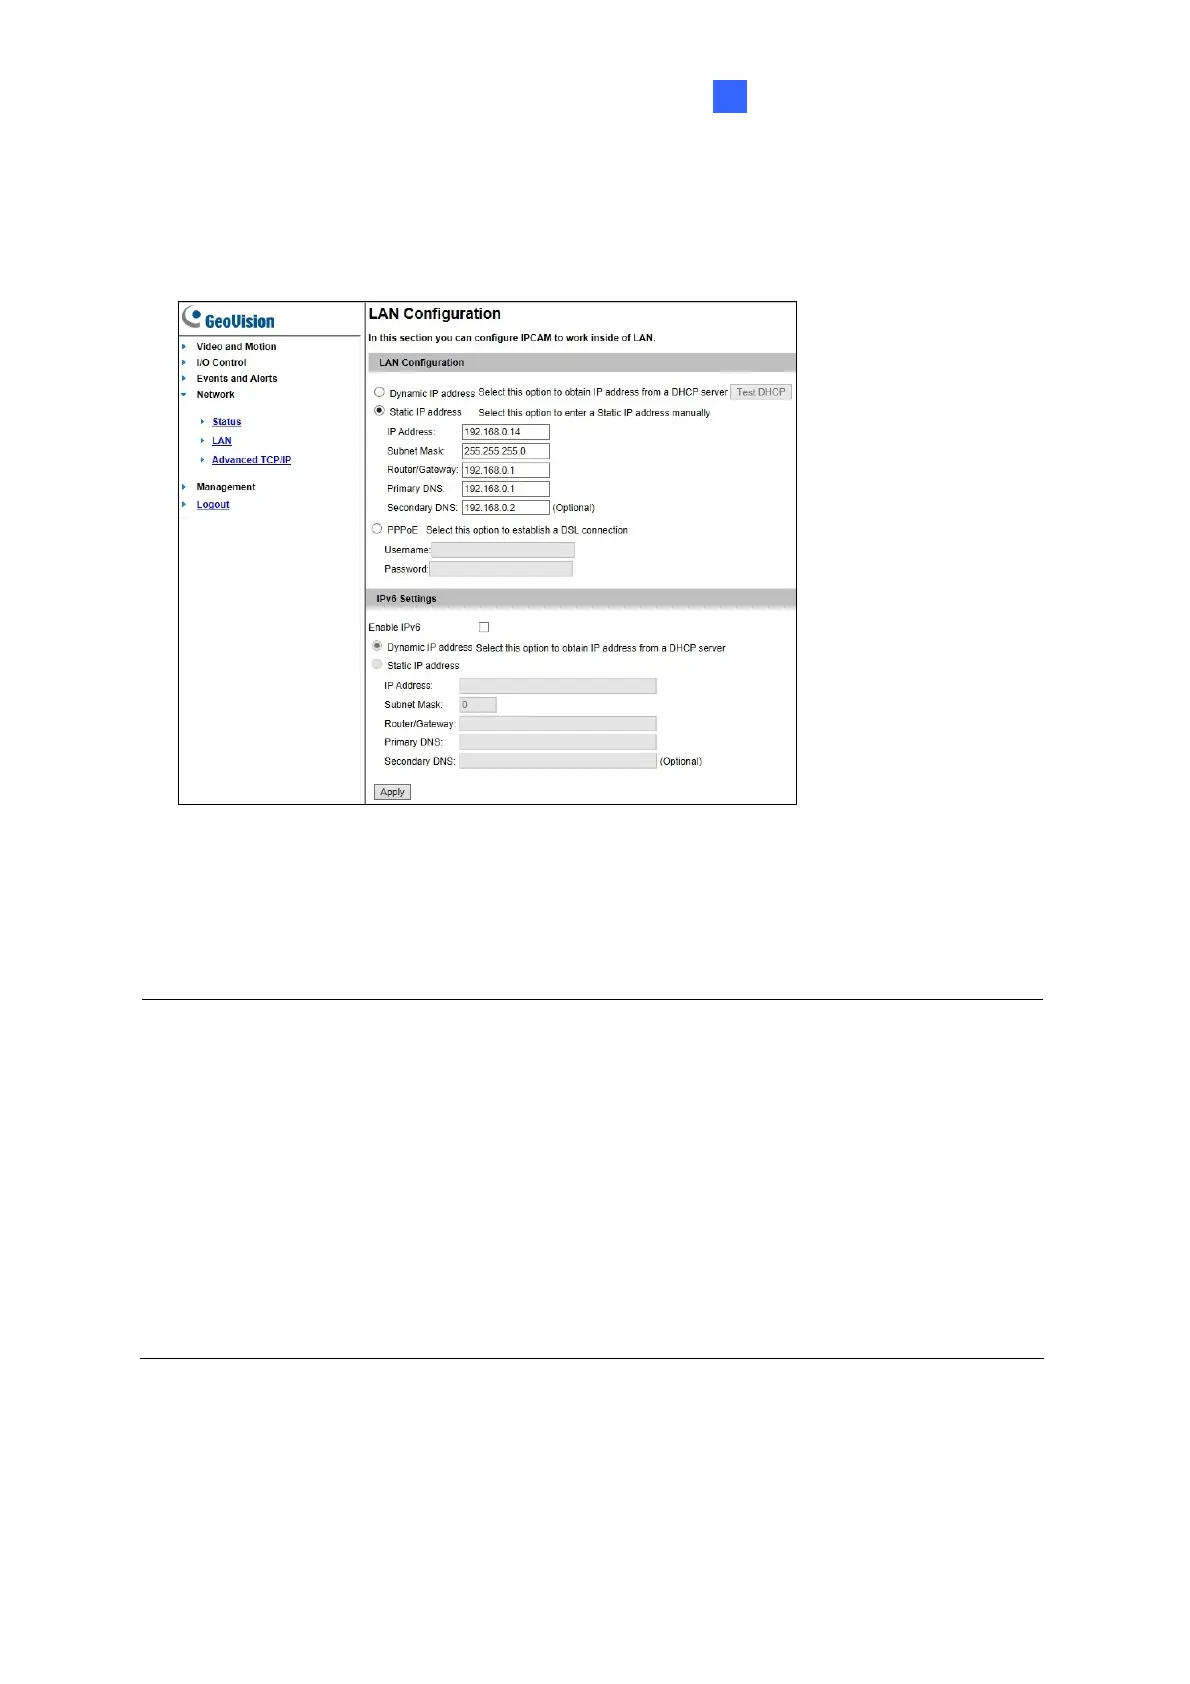
4. To assign a new IP address, click Network and select LAN.
5. Select Static IP address. Type IP Address, Subnet Mask, Router/Gateway, Primary DNS
and Secondary DNS in the LAN Configuration section.
6. Click Apply. The camera is now accessible by entering the assigned IP address on the
. Repeat Step 3 ~ 7 to configure the IP address on each IP camera.
s the
d in a LAN, use the GV-IP
S
ou
et it to the factory default settings and then perform the network
settings again.
Web browser.
7
IMPORTANT:
1. If Dynamic IP Address or PPPoE is enabled, you need to know which IP addres
camera is assigned to log in. If your camera is installe
Device Utility to look up its current dynamic address.
2. If your camera uses a public dynamic IP address, via PPPoE, use the Dynamic DN
service to obtain a domain name linked to the camera’s changing IP address first.
3. If Dynamic IP Address and PPPoE is enabled and you cannot access the unit, y
may have to res

 Loading...