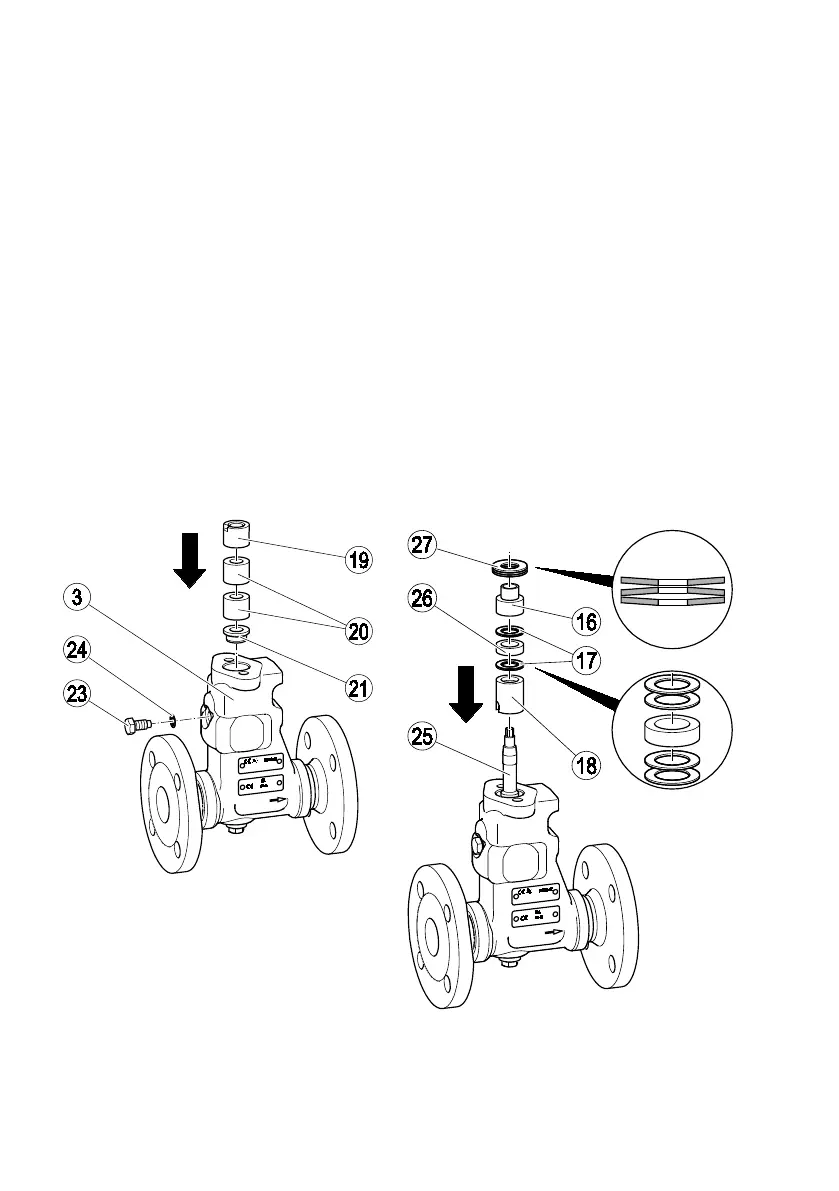
Clean all removed parts and the body.
Inspect all parts to ensure they are in perfect
condition.
Replace damaged parts.
Insert the seat bushing (21) in the body (3) using
adhesive.
The adhesive must have the same properties as
Loctite
®
620.
Insert the two stepped bushings (20) in the
body.
Insert the anti-wear bushing (19) in the body.
Position the anti-wear bushing so that the
retaining groove points towards the hole for the
locking screw.
Insert the sealing ring (24).
Hand-tighten the locking screw (23).
The torque for the locking screw varies depending
on the equipment:
For models with DN 15 to DN 32, the required
torque is 5 Nm.
For models with DN 40 and DN 50, the required
torque is 11 Nm.
Tighten the locking screw to the specified
torque.
Position the guide bushing (18) so that the
retaining groove points towards the locking
screw.
Insert the guide bushing (18).
Insert the new stuffing box comprising the
packing ring (26) and four wipers (17) as
shown.
Coat the thread and sealing surface of the
nozzle needle (25) with lubricant.
The lubricant must have the same properties as
WINIX
®
2010.
Insert the nozzle needle in the body.
Screw the nozzle needle into the guide bushing
by two full turns.
Position the spring bushing (16) on the nozzle
needle.
Position the disc springs (27) on the spring
bushing in the position shown.