Schüttelapparate - Shakers
3012 / 3014 / 3017 / 3018 / 3020
Seite 11 von 24 Rev.1
The Shaker must only be connected to a properly installed power
connection with neuter (PE), according to the local regulations. It
must be secured that power can be cut all-pole (switch or socket).
4. Initiation
Caution,
increased danger of injuries during operation!
Do not reach into the unit during operation!
Caution,
by all means make sure to prevent the shaking procedure
creating an explosive atmosphere
during operation of the Shaker!
To initiate, switch the main switch at the back of the unit to position I, then press switch 1 for
standby operation. Displays 2 and 3 show the memorized set points for running time and shaking
frequency.
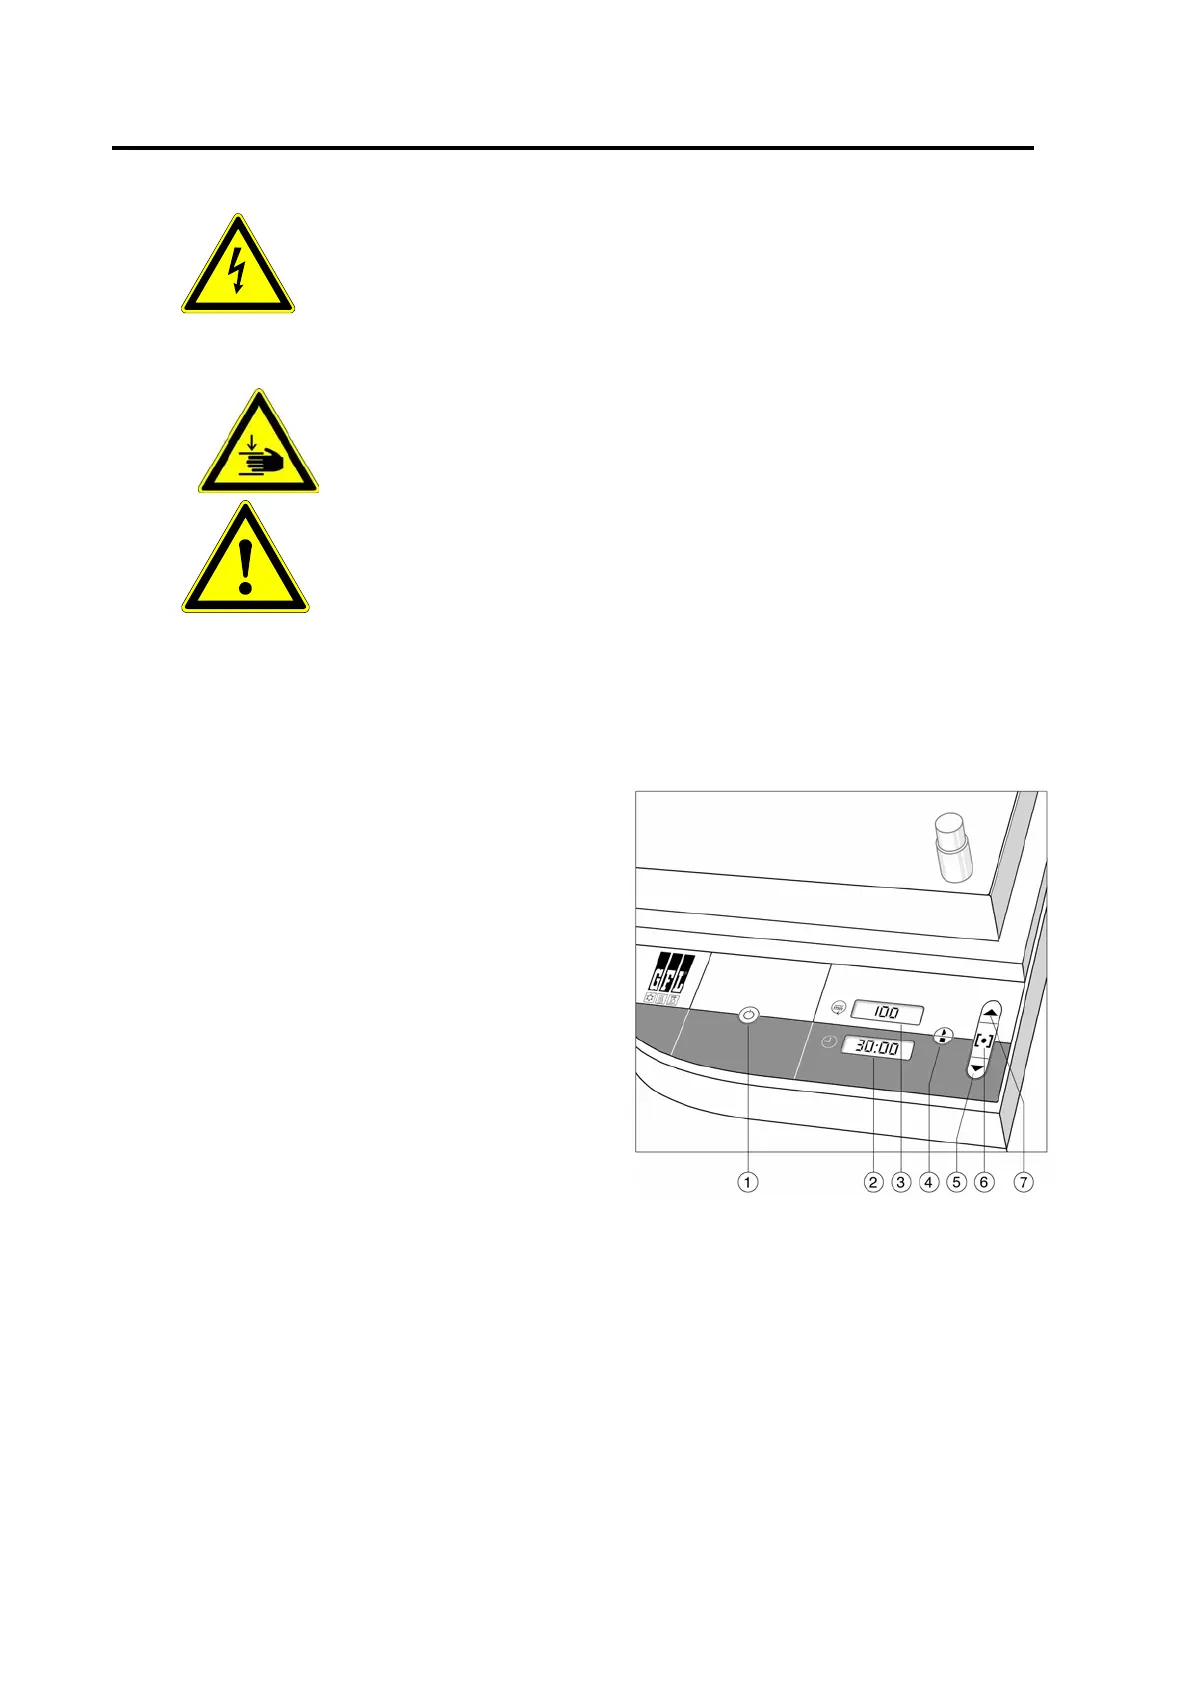
4.1 Operation and display elements on the control panel
-Switch 1- to switch the shaker on and off
(standby operation).
-Display 2- to display the preset running time
and the remaining running time during
operation of the shaker.
-Display 3- to display the preset or actual
shaking frequency.
-Switch 4- to start or to terminate the shaking
motion, and to confirm altered set points of
shaking frequency and running time.
-Switch 5- to set lower shaking frequency and
running time points.
-Change-over key 6- switches to setting
shaking frequency and running time points.
-Switch 7- to set higher shaking frequency and
running time points.
4.2 Setting shaking frequency and running time
After pressing switch 1 to switch on the Shaker, displays 2 and 3 show the last set and
memorized set points of running time and shaking frequency. By pressing switch 6 the setting
mode of the unit alternates between setting modes of shaking frequency and running time.
Displays 2 and 3 show the respective set point, put in flashing brackets. The respective set point
can now be increased using switch 7 or decreased using switch 5.
Altered set points are confirmed using switch 4. The Shaker starts operation.