22
© G host C ontr o l s
®
2 0 2 0
OPEN SYSTEM
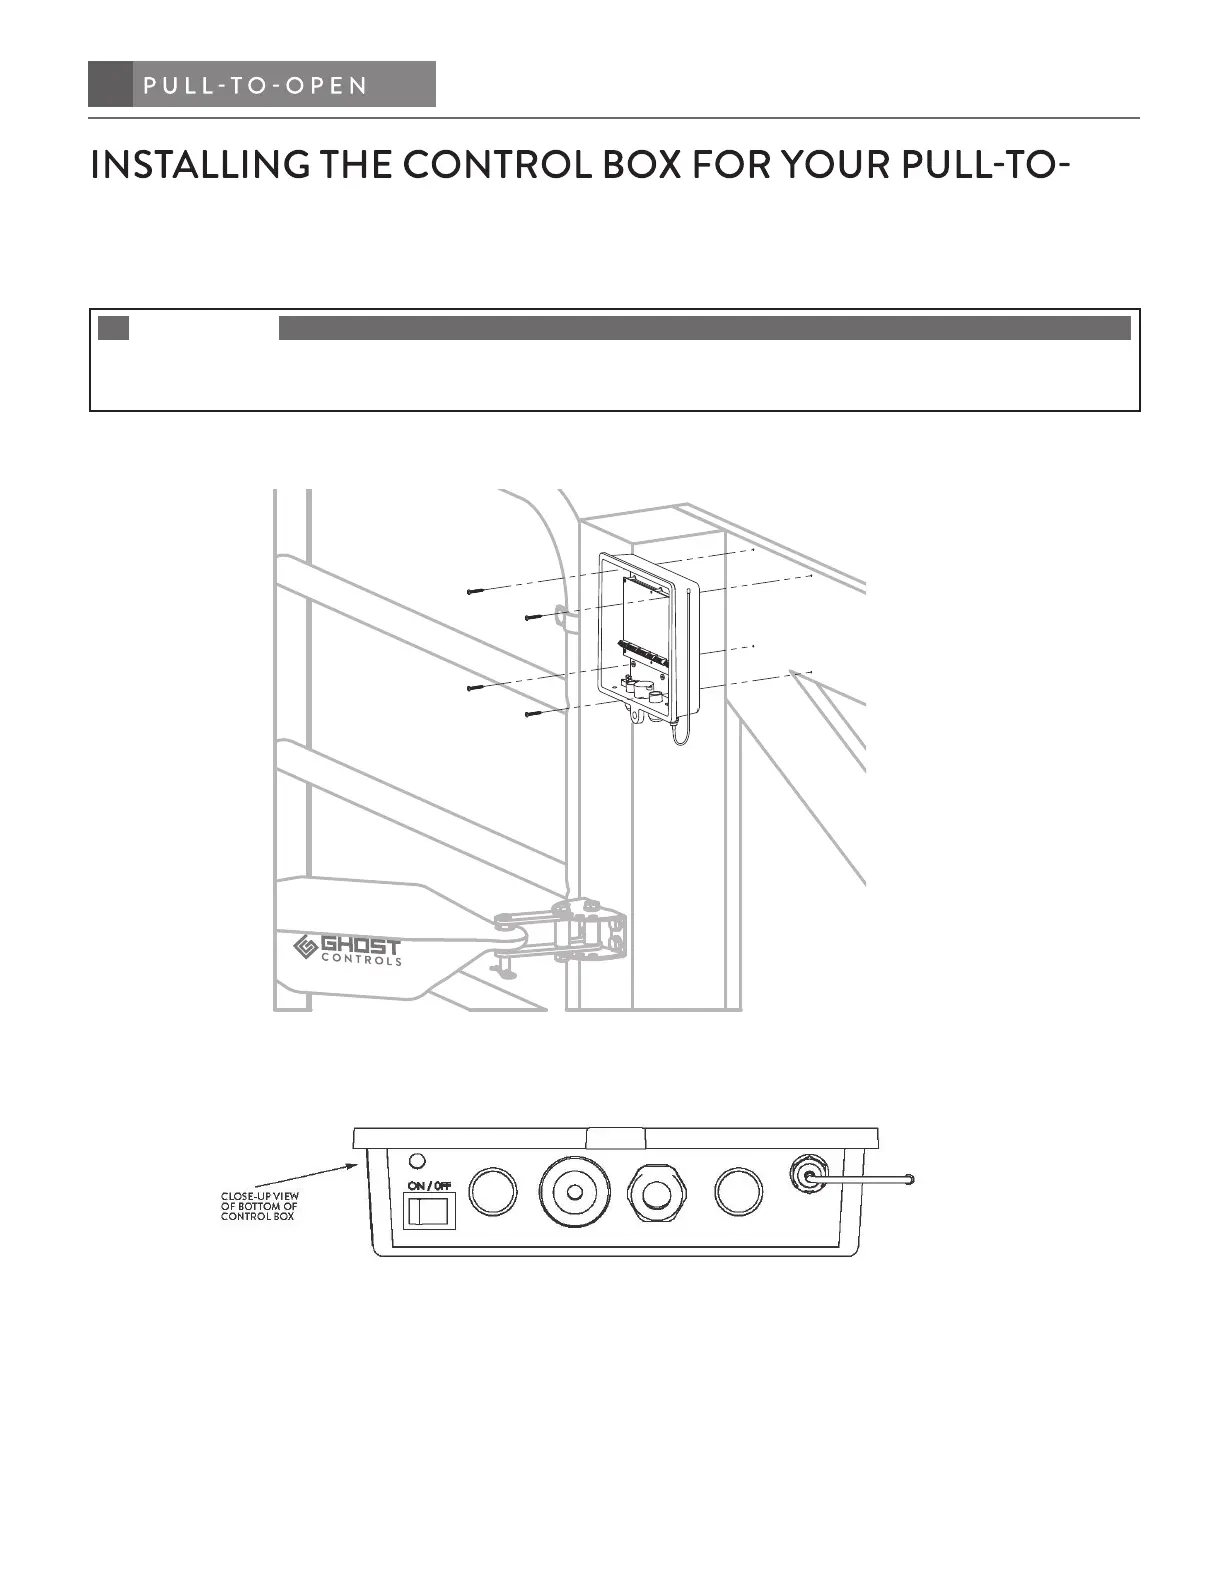
STEP 7. Determine the mounting location of the control box and install.
NOTE
Mount the control box a minimum of 3 feet above the ground to keep dirt and water from damaging the control board
and within 4 feet of the operator arm in order for the operator cable to reach the control box.
A. Pre-drill (4) holes (7/32˝ drill bit) in backside of control box, and through the fencing where you will be
securing the control box to.
B. Now use the (4) supplied phillips screws to mount the control box to the fence.
C. Make sure the on/o switch on the bottom of control box is in the o position.
CONNECTING AND INSTALLING THE BATTERY AND
BATTERY HARNESS
STEP 8. Insert battery harness through strain relief in control box and attach to the control board.
A. Route the battery harness cable through the strain relief on the bottom of the control box and connect the
bullet connectors (red to red, black to black) to the control board harness. See diagram on next page.