EN 4
CHANGING STRINGS
To help maintain consistent neck tension,
replace strings one at a time and tune
each string before proceeding to the next
string. Maestro recommends tuning the two
outside strings first, then tune toward the
center to equalize pressure on the bridge.
Note
A string’s end is sharp and can puncture your skin.
Inserting strings at the bridge
(acoustic guitar)
The string ends that terminate in a ring
insert at the bridge in their associated holes.
Use the bridge pins to hold the string ends
in place, with the pin notch facing the
headstock. Always string the bridge end
before attaching at the headstock.
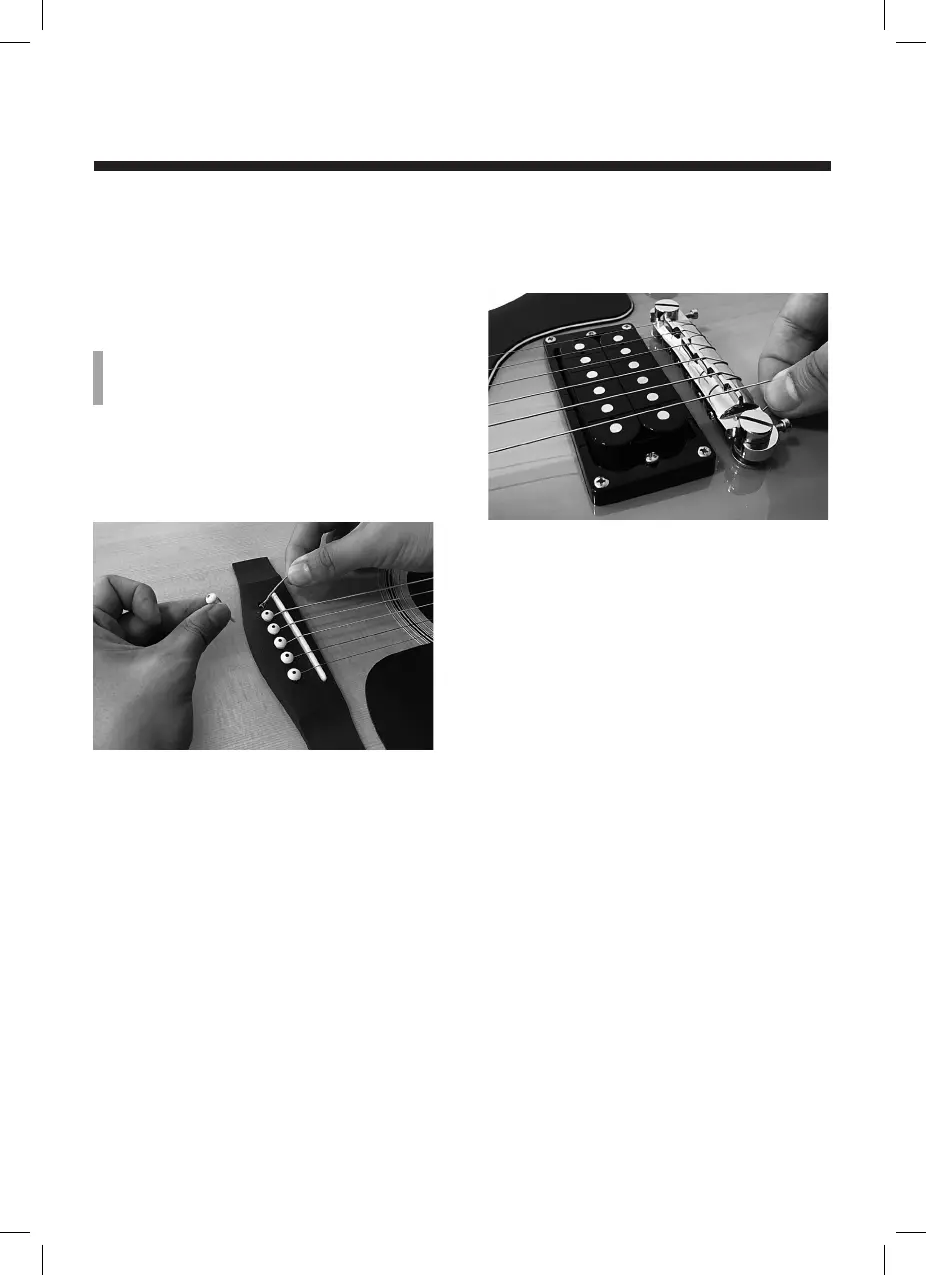
Inserting strings at the bridge
(electric guitar)
Insert the strings through the holes in the
bridge that face the pickup, then wrap them
around over the top toward the headstock.
Each string should pass within a small
corresponding groove in the bridge. Always
string the bridge end before attaching at the
headstock.
Stringing at the headstock’s string
posts
1. Tune the first string to be changed flat
and keep going until it is loose enough
for you to remove.
2. Insert the new string at the bridge as
described above and bring toward the
headstock.
3. Tug the string end slightly to make sure
it’s seated securely in the bridge.
um_maestro_us_2L_170922.indd 4 22/09/2017 13:21:02