EN 5
CHANGING STRINGS (CONTINUED)
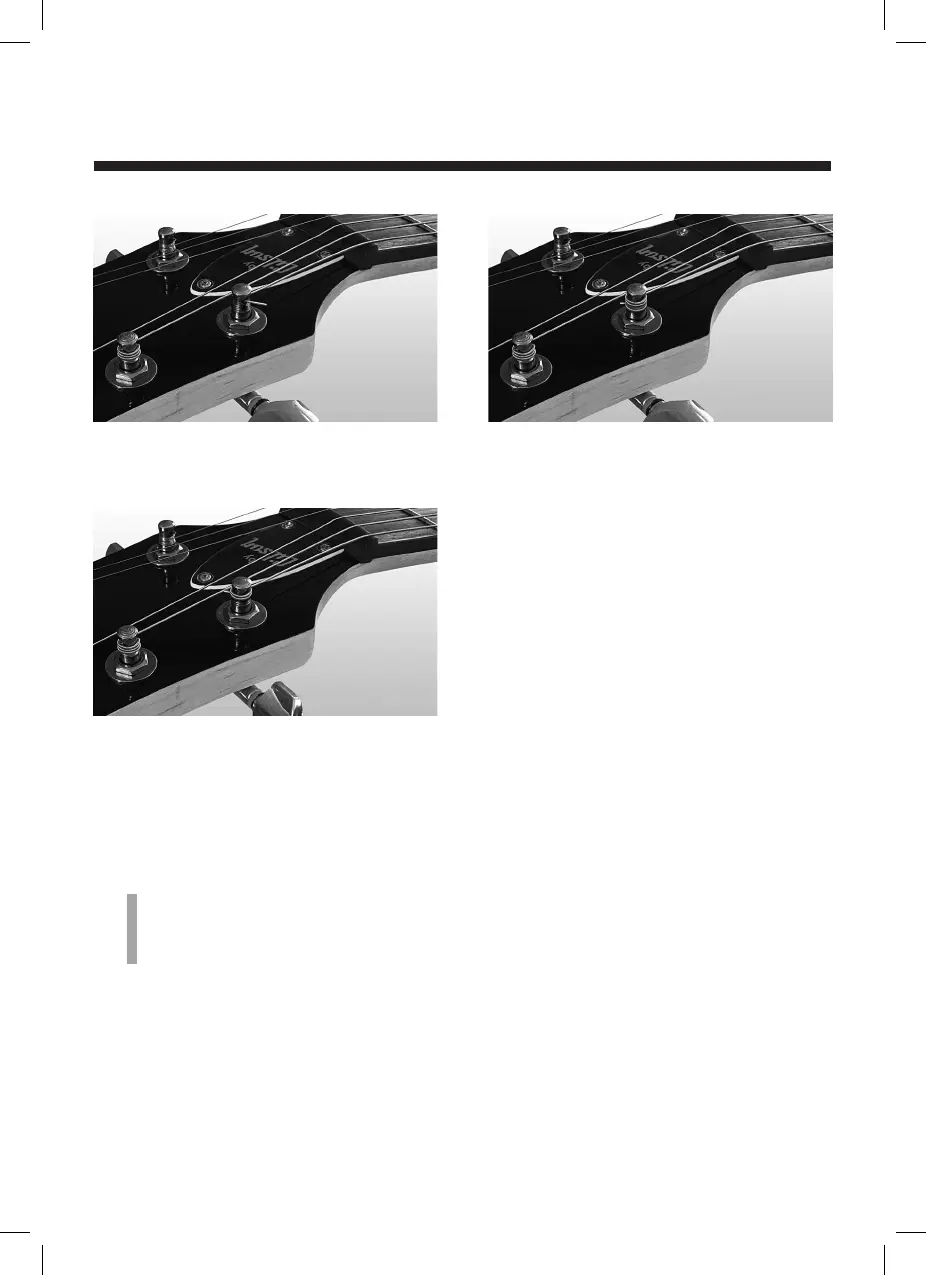
Fig. 1
4. Now feed the string through the hole in
the tuning head (Fig. 1).
Fig. 2
5. Leave just enough slack to wrap a turn
of the string above the hole (Fig. 2). As
you tighten the tuning head, the string
end coming out of the hole will be
squeezed between this winding, helping
to anchor it.
Note
The string should run closer to the inside of
the headstock than the outside.
Fig. 3
6. Start tuning the string up to pitch
(Fig.3).
7. Proceed to the section on Tuning and
tune the string to pitch. When it’s on
pitch, follow the same procedure for
the remaining strings.
8. When you’ve finished tuning your
guitar, use a wire cutter to trim the
string ends to within about 3/8”
(10mm) of the tuning head.
um_maestro_us_2L_170922.indd 5 22/09/2017 13:21:02