SelecttheproperholefortheM.2SSDtobeinstalledandrefastenthescrewandstandoff.
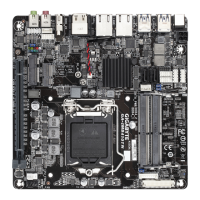
7) M2 (M.2 Socket 3 Connector)
(Note)
TheM.2connectorsupportsM.2SATASSDsandM.2PCIeSSDs.PleasenotethatanM.2PCIeSSD
cannotbeusedtocreateaRAIDseteitherwithanM.2SATASSDoraSATAharddrive.TocreateaRAID
arraywithanM.2PCIeSSD,youmustsetupthecongurationinUEFIBIOSmode.RefertoChapter3,
"ConguringaRAIDSet,"forinstructionsonconguringaRAIDarray.
FollowthestepsbelowtocorrectlyinstallanM.2SSDintheM.2connector.
Step 1:
Use a screw driver to unfasten the screw and nut from the motherboard. Locate the proper mounting hole
fortheM.2SSDtobeinstalledandthenscrewthenutrst.
Step 2:
SlidetheM.2SSDintotheconnectoratanangle.
Step 3:
PresstheM.2SSDdownandthensecureitwiththescrew.
F_USB30
F_U
B_
F_ F_
_
B
BS_
B
SB_
B
_S
S_
_
B
_U
_
B
S
123
123
123
123
1
1
1
1
BSS
S
_S
SSU
1 2 3
S3
BSSS
U
__ 3
F_USB3F
S _
S _
S _
SF
B_
B_
F
_0
S
S
_0F
_F
_
_
__B
U
S _S
_
USB0_B
B_
F_USB3
_
80 60
(Note) The connector is on the back of the motherboard.
8) USIM (USIM Connector)
(Note)
This connector supports a mini PCIe 3G LAN card.
- 15 -
 Loading...