EasyManua.ls Logo

Gladiator GEARTRACK CHANNEL User Manual

Gladiator GEARTRACK CHANNEL
44 pages
To Next Page IconTo Next Page
Page #1 background imageLoading...
Page #1 background image
GEARTRACK
®
CHANNELS, GEARWALL
®
PANELS, HOOKS, BINS
AND BASKETS
Installation Instructions
Instructions d’installation
Instrucciones de instalación
TABLE OF CONTENTS
In U.S.A. call: 1-866-342-4089
Aux É.-U. : 1 866 342-4089
En EE.UU. Ilame al: 1-866-342-4089
W11087876A
In Canada call: 1-800-807-6777
Au Canada : 1 800 807-6777
En Canadá Ilame al: 1-800-807-6777
www.gladiatorgarageworks.com
www.gladiatorgarageworks.ca
GEARTRACK® CHANNELS AND GEARWALL® PANELS INSTALLATION SAFETY ..............................................................................................2
GEARTRACK® CHANNELS AND GEARWALL® PANELS INSTALLATION INSTRUCTIONS..............................................................................................2
Install the GearTrack® Channels.................................................................................................................................................................................4
Install the Gearwall® Panels.......................................................................................................................................................................................
.7
INSTALLATION INSTRUCTION OF HOOKS, BINS AND BASKETS ........................................................................................................................12
WARRANTY .................................................................................................................................................................................................14
TABLE DES MATIÈRES
SÛRETÉ DES INSTALLATIONS DES PROFILÉS GEARTRACK
®
ET DES PANNEAUX GEARWALL
®
..........................16
INSTRUCTIONS D’INSTALLATION DES PROFILÉS GEARTRACK
®
ET DES PANNEAUX GEARWALL
®
....................16
Installation des prolés GearTrack
®
...............................................................................................................................18
Installation des panneaux Gearwall
®
.............................................................................................................................21
INSTRUCTION D’INSTALLATION DES CROCHETS, DES BACS ET DES PANIERS .................................................... 26
GARANTIE ......................................................................................................................................................................... 28
ÍNDICE
SEGURIDAD PARA LA INSTALACIÓN DE CANALES GEARTRACK
®
Y PANELES GEARWALL
®
................................30
INSTRUCCIONES PARA LA INSTALACIÓN DE CANALES GEARTRACK
®
Y PANELES GEARWALL
®
....................... 30
Instale los canales GearTrack
®
......................................................................................................................................32
Instale los paneles Gearwall
®
........................................................................................................................................35
INSTRUCCIONES PARA LA INSTALACIÓN DE GANCHOS, RECIPIENTES Y CESTAS .............................................. 40
GARANTÍA .........................................................................................................................................................................42
Question and Answer IconNeed help?

Do you have a question about the Gladiator GEARTRACK CHANNEL and is the answer not in the manual?

Gladiator GEARTRACK CHANNEL Specifications

General IconGeneral
BrandGladiator
ModelGEARTRACK CHANNEL
CategoryRacks & Stands
LanguageEnglish

Summary

GEARTRACK Channels and GEARWALL Panels Installation Safety

GEARTRACK Channels and GEARWALL Panels Installation Instructions

Parts and Tools

Lists required parts and tools for installation of channels and panels.

Install the GearTrack Channels

Locate Studs and Electrical

Locates studs and marks electrical wiring locations for channel installation.

Measure the Channels

Measures channels based on stud locations for proper mounting.

Cut to Length

Cuts channels to the required length, ensuring square cuts.

Drive First Screw

Drives the first screw through the top slot groove to hold the channel.

Level the Channel

Levels the channel and drives a second screw through the bottom slot.

Predrill Holes

Predrills holes to prevent splitting when driving screws near channel ends.

Drive Remaining Screws

Drives screws in all remaining slots at stud locations for secure mounting.

Inspect Screw Installation

Ensures all installed screws are flush with the channel surface.

Repeat for Additional Channels

Repeats the mounting process for subsequent channels.

Channel Spacing

Details spacing requirements for channels used with different accessories.

Install Ends Caps

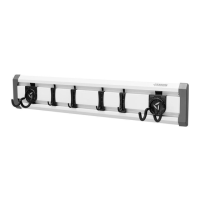
Snaps end caps onto each end of the installed GearTrack® Channel.

Install the GearWall Panels

Measure Ceiling Sag

Measures ceiling sag to determine the lowest point for panel alignment.

Mark Bottom of Wall

Marks the bottom of the wall using a chalk line for panel placement.

Mount First Stud

Installs the first wooden stud as a guide for GearWall panel installation.

Secure First Stud

Secures the first stud to the wall with masonry screws every 18 inches.

Measure Location of Remaining Studs

Measures and marks locations for remaining studs, typically 16 inches apart.

Mount Remaining Studs

Attaches remaining studs to the wall, aligning them with chalk lines.

Locate Studs and Electrical

Uses a stud finder to locate studs and mark electrical wiring for safety.

Orient the Panel

Ensures panels are installed with the interlock tongue up and groove down.

Measure the Panel

Measures panel length based on wall coverage and stud locations.

Cut to Length

Cuts panels to the required length, avoiding windows, doors, and outlets.

Locate the Panel

Places the panel against the wall, aligning with chalk lines.

Drive First Screw

Drives the first screw through the top slot groove into the stud.

Level the Panel

Levels the panel and drives a second screw into the same stud.

Predrill Holes

Predrills holes to prevent splitting when driving screws near panel ends.

Drive Remaining Screws

Drives screws in all slots at stud locations to secure the panel.

Repeat Until Row Complete

Repeats installation steps to complete a row of panels.

Repeat Until Desired Coverage

Continues installing rows of panels until the desired wall coverage is achieved.

Trim Options

Interior Corner

Shows recommended configuration for applying trim to interior corners.

Exterior Corner

Shows recommended configuration for applying trim to exterior corners.

End Cap

Shows recommended configuration for applying trim to end caps.

Windows, Doors, and Outlets

Shows how to apply trim around openings like windows, doors, and outlets.

INSTALLATION INSTRUCTION OF HOOKS, BINS AND BASKETS

Install the Claw Hook Advanced Bike Storage v3.0

Details the installation steps for the advanced bike storage hook.

Install the Fishing Pole Hook

Details the installation of fishing pole holders, vertically or horizontally.

Install the Horizontal Bike Hook

Details the installation of the horizontal bike hook.

Install the Storage Bin Holder

Details the installation of storage bin holders to support bins.

Related product manuals