0020117819_01 - 05/11 - Glow-worm
- 29 -
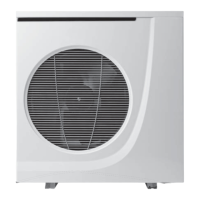
Envirosorb 7 fl ow/pressure curves
A
B
0
10
20
30
40
50
60
720 1440 2160 2880
1
2
3
Key
1 Speed I
2 Speed II
3 Speed III
A Available pressure (kPa)
B Flow in the circuit (l/h)
Envirosorb 12, Envirosorb 14 fl ow/pressure curves
A
B
0
10
20
30
40
50
60
70
80
720 1440 2160 2880
1
2
3
Key
1 Speed I
2 Speed II
3 Speed III
A Available pressure (kPa)
B Flow in the circuit (l/h)
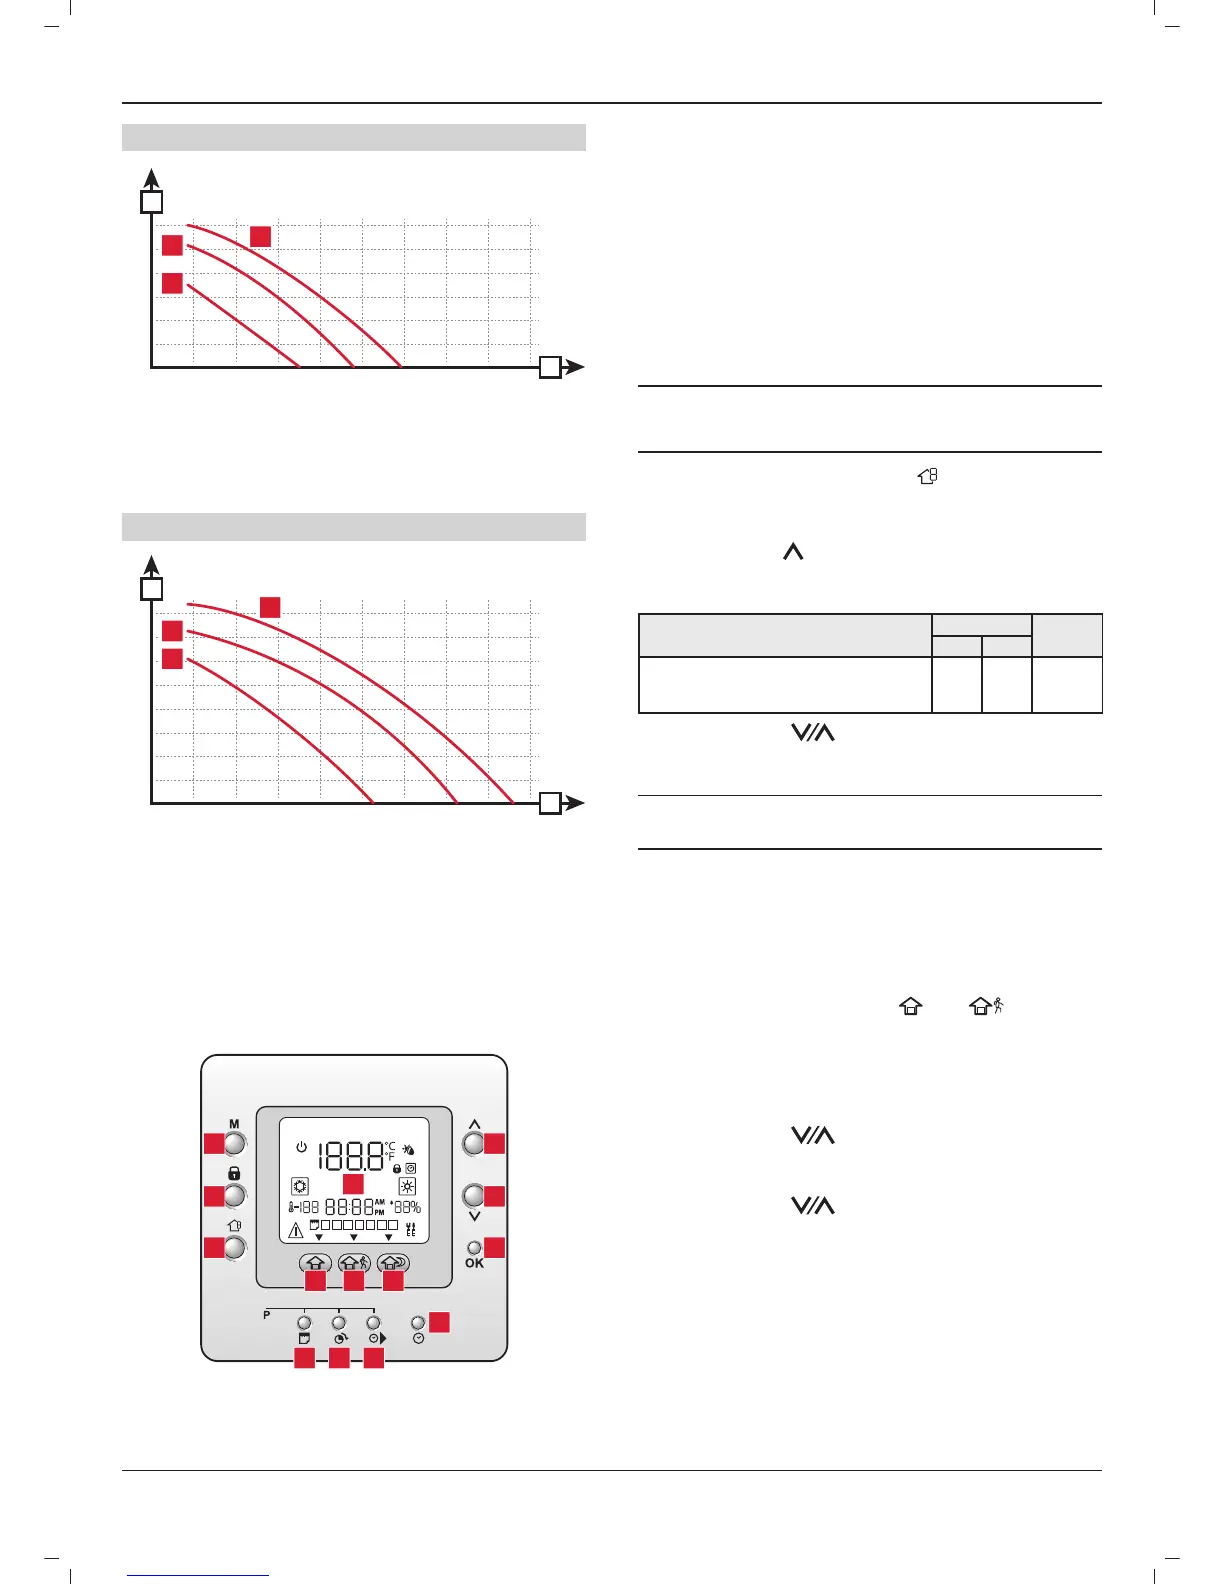
15.2 Settings for the command unit
15.2.1 Overall view
1 2 3 4 5 6 7
14
1
2
3
7
6
5
4
10 9 8
13 12
11
Key
1 Selection of “standby” mode in the weekly programming
2 Hold the selected temperature or runs the scheduled program
3 Choice of functioning mode
4 Display
5 Scroll up
6 Scroll down
7 Validation
8 Temperature Night
9 Temperature Eco
10 Temperature Comfort
11 Setting day/time/minute
12 Programme: time when time interval begins
13 Programme: choice of time interval
14 Programme: group of days
15.2.2 Appliance confi guration parameters
i
If the parameters are changed, it is important to leave
the control box connected for at least 10 seconds so
that the change is properly saved.
• Press simultaneously on the button (
) and (M) for 3
seconds. The parameter number is displayed and its value
blinks.
• Press the button (
) to access the parameter "302".
• Press the button (M). The value of the parameter fl ashes.
Description of parameter 302
Setting
Factory
setting
Min Max
0 = Cooling only
1 = Heating + cooling
2 = Heating only
02 2
• Press the buttons ( ) to modify the value.
• Press the button (M) to confi rm the parameter setting.
i
The other parameters 301, 303, 304, 305 and 306
must not be modifi ed.
• Press the button (OK) to exit the menu and validate the
settings.
15.2.3 Parameters set by the installer
This menu lets you enter the settings intended for the fi nal user.
• Press simultaneously on buttons (
) and ( ) for 3
seconds. The parameter number is displayed and its value
blinks.
• Press the button (M) to access the parameter. The value of the
parameter fl ashes.
• Press the buttons (
) to modify the value.
• Press the button (M) to confi rm the parameter setting.
• Press the buttons (
) to move to the next parameter.
• Perform the previous operations again for the other
parameters.
• Press the button (OK) to exit the menu and validate the
settings.
INSTALLATION
 Loading...