Do you have a question about the Godox QS400II and is the answer not in the manual?
Critical safety warnings to prevent product damage and personal injury.
Precautions to avoid overheating and potential damage during operation.
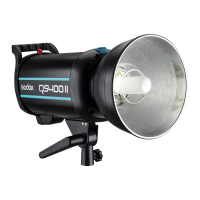
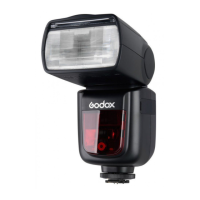
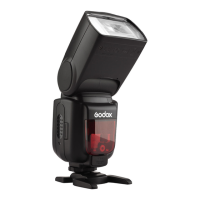
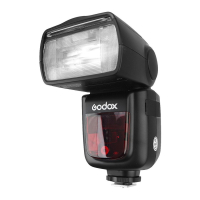
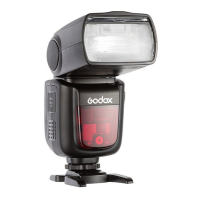
Identification of the main physical components of the flash unit.
Explanation of the LCD display, indicators, and their meanings.
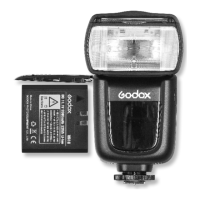
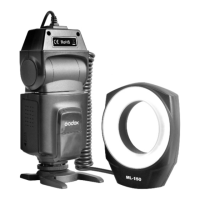
List of standard accessories included with the flash unit.
Optional accessories available for purchase to enhance functionality.
Procedures for setting up the flash unit and attaching accessories.
How to correctly connect the flash unit to a power source.
Managing the modeling lamp's modes and brightness settings.
Adjusting the flash power output levels for desired lighting.
Using the test button for firing and configuration checks.
Connecting and synchronizing the flash with a camera shutter.
Using the GR/CH button for group and channel configuration.
Setting up optical slave trigger modes for synchronized firing.
Managing audible alerts for flash readiness status.
Using key combinations to control wireless transmission.
Understanding alarm codes and error indicators for troubleshooting.
How the unit remembers and restores previous settings.
Configuring wireless channel IDs to prevent signal interference.
Configuring wireless group IDs for controlling multiple flashes.
Step-by-step instructions for safely replacing the flash tube.
Key technical specifications of the QSII series flash units.
General guidelines and precautions for maintaining the flash unit.
The Godox QSII Series Professional Studio Flash is a high-performance strobe designed for professional photographers, offering a comprehensive set of features to achieve desired lighting effects. It is particularly well-suited for wedding, advertisement, portrait, and fashion photography, making it an essential tool for studios and photo workshops.
The QSII series studio flash is built with a robust set of functionalities to provide precise and consistent lighting. At its core, it features a built-in Godox 2.4G wireless X system, enabling seamless integration with other Godox wireless triggers like the X1, XT16, or FT-16. This wireless capability allows for remote control of flash power ratio, modeling lamp on/off, buzzer function, and flash triggering, offering significant flexibility in studio setups.
The flash output is precisely controlled and displayed on an LCD panel, offering 50 steps of adjustment from 1/32 to 1/1 (or 5.0-10.0) in 0.1 increments. This fine-grained control ensures that photographers can achieve the exact light intensity required for their shots. The QSII flash boasts outstanding output stability, maintaining a tolerance of ≤ 2% under the same output, which is crucial for consistent results across multiple shots.
For focusing and previewing light, the flash incorporates a high-quality 150W modeling lamp. This lamp offers a wide range of manual light adjustment from 5% to 100%, allowing photographers to visualize the light's effect before firing the flash. The modeling lamp can operate in different modes: OFF, PROP (proportional to flash power), and Percentage (manual brightness). A unique feature allows the modeling lamp to automatically turn off after 4 hours of continuous lighting to prevent overheating, especially when the user is not nearby.
The QSII flash also includes an anti-preflash function, which is vital for synchronization with cameras that utilize a one-preflash firing system. This ensures that the flash fires correctly in response to the main flash, ignoring any pre-flashes from the camera. Furthermore, the device is equipped with an intelligent memory function that remembers adjusted parameters after 3 seconds and automatically recovers them upon restart, streamlining workflow and saving setup time.
Triggering options are versatile, including sync cord, test button, slave triggering, and wireless control via the built-in 2.4G system. The slave triggering modes (S1 and S2) allow the flash to act as a secondary unit, firing synchronously with a main flash. S1 mode fires with the main flash, while S2 mode intelligently ignores a pre-flash from the main unit, making it compatible with cameras that use pre-flash for exposure measurement.
A buzzer function provides an audible "BI" sound reminder when the flash is fully charged and ready to fire, which can be toggled on or off. The device also features an alarm display to indicate various operational issues such as temperature sensor disconnection, charging problems, overheating, or over-voltage, ensuring user awareness of potential problems.
Setting up the QSII flash involves straightforward steps. Users first install the modeling lamp, glass protection cover, and standard reflector. The standard reflector can be easily attached or removed by pressing a release button and turning it. The flash unit is then mounted onto a light stand, and its angle can be adjusted using the mounting bracket and direction adjusting handle. An umbrella input is provided for attaching various photo umbrellas to modify light.
Power connection is simple, requiring the use of the provided power cord to an AC power source, followed by turning on the power switch. The modeling lamp's mode can be selected by short pressing the Modeling Lamp Button, cycling through OFF, PROP, and Percentage modes. A long press of this button enables or disables the function where the modeling lamp turns off when the flash is triggered. In Percentage mode, the light brightness can be manually adjusted from 5% to 100% using the Select Dial.
Flash power output is controlled via the Select Dial, offering precise adjustments. When adjusting power from high to low, the test button can be pressed to discharge excess power. The test button also allows users to fire the flash without taking a picture and, in combination with the Select Dial, can help adjust flash brightness.
For wireless control, the QSII flash supports both group and channel adjustments. A short press of the GR/CH button allows adjustment of the built-in wireless group (0 to F), while a long press enables adjustment of the built-in wireless channel (1 to 32). These settings are crucial for preventing signal interference when multiple wireless flash systems are in use, ensuring that the master unit and slave units are set to the same channel and group. The built-in wireless transmission can be toggled on or off by synchronously pressing the GR/CH and S1/S2 buttons.
The QSII series flash is designed with user-replaceable components for ease of maintenance. The flash tube and modeling lamp are user-replaceable, and replacement parts can be obtained from the manufacturer. When replacing the flash tube, it is essential to shut down the power, remove the power cord, and wear insulated gloves to prevent burns. The process involves loosening an iron wire, gently pulling out the old tube, transferring the feet casing to the new tube, inserting the new tube into the copper outlets, and securing it with the iron wire.
Regular maintenance practices are recommended to ensure the longevity and optimal performance of the device. Users should avoid sudden impacts to prevent damage to the flash tube and modeling lamp. The lamp should be dedusted regularly to maintain efficiency. It is normal for the lamp to become warm during use, but continuous flashes should be avoided if unnecessary to prevent overheating. If flammable accessories are attached to the flash unit, the modeling lamp should not be kept on for extended periods; it is recommended to cool it down for one minute after 10 minutes of operation. When using a snoot, the modeling lamp should not be kept on for a long time, nor should the flash be fired too frequently (not more than six times per minute) to prevent overheating and potential damage to the strobe housing or studio light.
In case of abnormal operation, the device should be shut down immediately, and the cause investigated. If the product experiences failures or gets wet, it should not be used until repaired by a professional. Disconnecting the power when cleaning the flash or changing components is also crucial for safety. The product comes with a one-year warranty, excluding consumables like the flash tube and modeling lamp, and unauthorized service will void this warranty.
| Maximum Power | 400Ws |
|---|---|
| Color Temperature | 5600K ± 200K |
| Modeling Lamp | 150W |
| Recycle Time | 0.01-2.5s |
| Power Control | 1/32 to 1/1 |
| Triggering | Sync cord, test button |
| Operating Voltage | AC 200-240V |