Modeling Lamp Settings
1. When displaying multiple groups, press the <MOD>
button to control the ON/OFF of the modeling lamp.
2. Press the group button to choose the group when
displaying multiple groups or when displaying one-group,
press the <MOD> button to control the ON/OFF of the
modeling lamp (note: The models that can use one-
group to ON/OFF the modeling lamp are as follows:
AD600Pro, GSII, SKII, QSII, QDII, DEII, DPII series, etc.
The outdoor flash AD200 and AD600 can use this
function after upgrade. The new arrivals with modeling
lamps can also use this function.).
Setting the Flash Trigger
6. Until all the amounts are set. Or during any value setting, short press the <MODE>
button to exit the setting status. No values will blink.
7. In the multi flash setting submenu, short press the <MODE> button to return to main
menu when no values are blinking.
Note: As flash times are restricted by flash output value and flash frequency, the flash
times cannot surpass the upper value that permitted by the system.
The times that transported to the receiver end are a real flash time, which is also
related to the camera’s shutter setting.
CH1
Zm/CH SYNC
MOD
A
B
C
D
E
ALL
--
M
1/128
--
--
--
1. High-speed sync: press the <SYNC> button and is
displayed on the LCD panel. Press the OK button on
OLYMPUS or MENU button on PANASONIC camera to
enter Flash Mode and choose Fill-flash . Then, set the
camera shutter.
2. Press OK button on Olympus camera or MENU button on
Panasonic camera to set second-curtain mode. And set
camera shutter after mode is displayed.
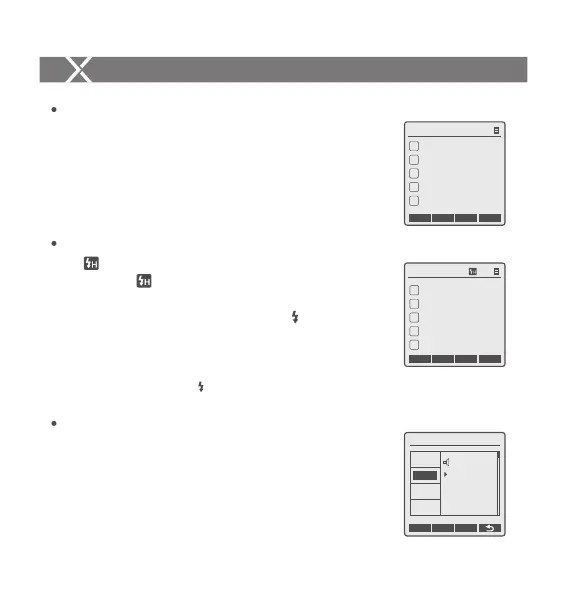
Shutter Sync Settings
Press the <MENU> button to enter C.Fn BEEP and press
the <SET> button. Choose ON to turn on the BEEP while
OFF to turn off it. Press the <MENU> button again to back
to the main menu.
Buzz Settings
Setting the Flash Trigger
ZOOM Value Settings
Short press the <Zm/CH> button and the ZOOM value will be
displayed on the LCD panel. Choose the group and turn the
select dial, and the ZOOM value will change from AUTO/24 to
200. Choose the desired value and press the <Zm/CH> button
again to back to the main menu.
Note: The flash’s ZOOM should be set to Auto (A) mode before responding.
CH1
Zm/CH SYNC
MOD
Zoom 28
A
B
C
D
E
Zoom 24
Zoom 24
Zoom 24
Zoom 24
CH1
A
B
C
D
E
--
M
1/16 + 0.3
--
--
--
Zm/CH SYNC ALL
MOD
C.Fn Ver 9.2
OFF
ON
CLEAR
MIN
LIGHT
STBY
BEEP
2nd-C
- 36 -- 35 -
 Loading...