EasyManua.ls Logo

Gorenje BO5385MX - User Manual

Gorenje BO5385MX
88 pages
Go to English
Print Icon
To Next Page IconTo Next Page
Loading...
Gebrauchsanweisung - Elektronische digitale Zeitschaltuhr
Instructions for use - Electronic digital timer
Οδηγίες Χρήσης - Ηλεκτρονικός χρονοδιακόπτης - προγραμματιστής
Navodila za uporabo - Elektronska digitalna ura
Használati utasítás - Elektronikus digitális programóra
Návod k obsluze - Digitální programovatelné hodiny
Návod na používanie - Elektronický digitálny časovač
Instrukcja obsługi -Elektroniczny zegar programujący
Brugsanvisning - Elektronisk digital timer
Bruksanvisning - Elektronisk digital timer
Käyttöohjeet - Elektroninen digitaaliajastin
Naudojimo instrukcija - Elektroninis skaitmeninis laikmatis
Lietošanas instrukcijas - Elektroniskais digitālais taimeris
Kasutusjuhend - Elektrooniline digitaalne taimer
AT DE
MT
IE GB
DK
SE
NO
FI
LT
LV
EE
CY GR
HU
CZ
SK
PL
SI
Інструкції з експлуатації - Електронний цифровий таймер
Руководство по эксплуатации - Электронный программатор
Инструкция за употреба - Електронен дигитален часовник
Notice d’utilisation - Programmateur électronique
Instrucciones para el uso - Temporizador digital electrónico
Instruções de uso - Cronõmetro Eletrõnico Digital
Gebruiksaanwijzing - Elektronische digitale timer
Istruzioni d’uso - Timer elettronico digitale
Kullanma talimatları - Elektronik dijital gösterge
Upute za uporabu - Elektronski digitalni sat
Uputstva za upotrebu - Elektronski digitalni časovnik
Instrucţiuni de utilizare - Ceas electronic cu indicaţie digitală
UA
RU
BG
LU
BE FR
ES
PT
LU
BE NL
IT
TR
BA HR
BA RS
RO
Question and Answer IconNeed help?

Do you have a question about the Gorenje BO5385MX and is the answer not in the manual?

Overview

This document describes an electronic digital timer, likely integrated into an oven or similar appliance, providing instructions for its use in various languages.

Function Description

The electronic digital timer allows users to program oven operations in three main ways:

  • Cooking time setting: The oven starts immediately and automatically turns off after a preset duration.
  • Cooking end time setting: The oven stops operation at a specified time.
  • Delayed start setting: The oven automatically starts and stops at selected times, combining both cooking duration and end time settings.

Additionally, the timer can function independently as a countdown alarm, sounding an alert after a preset period. It also includes features for setting the current time, adjusting alarm volume, and activating a child lock.

Important Technical Specifications

  • Maximum cooking time setting: 10 hours.
  • Maximum cooking end time setting: 10 hours from the current time of day.
  • Maximum delayed start setting: 24 hours relative to the current time of day.
  • Maximum alarm timer setting: 10 hours.
  • Power failure retention: All settings are retained for power failures lasting less than two minutes.
  • Display dimmer: Between midnight and 6 AM, the display automatically lights with less intensity if no timer function is active.
  • Audible signal: A short beep confirms each press/activation of a sensor key.
  • Volume levels: Four distinct loudness levels for the audible signal, ranging from "oooo" (maximum) to "o" (minimum).

Usage Features

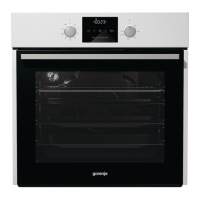
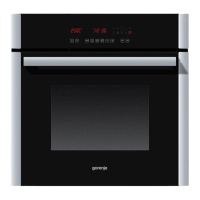
Sensor Keys and Display: The device features three sensor keys (A, B, C) and a digital display (6) with six indicators:

  • Sensor Key A: Settings selection and confirmation.
  • Sensor Key B: Value decrease (minus).
  • Sensor Key C: Value increase (plus).
  • Display Indicator 1: Oven operation duration.
  • Display Indicator 2: Oven operation stop time.
  • Display Indicator 3: Countdown alarm timer.
  • Display Indicator 4: Time of day.
  • Display Indicator 5: Child lock.
  • Display Indicator 6: Clock - time display.

General Operation:

  • To select a setting, press sensor key (A). The chosen symbol flashes quickly, indicating the function can be set or changed. After 5 seconds, the symbol flashes more slowly, and the set time is displayed.
  • Selected functions are indicated by illuminated symbols, though these are not shown on the main time display (6). The most recently made setting is always displayed.
  • Holding down sensor key (B) or (C) increases the rate at which values change.
  • Upon connecting to power or after a power failure, "META" or "GLAS" is displayed briefly, followed by a flashing time display. The current time must be set using keys (B) and (C) to enable oven operation.
  • For optimal responsiveness, touch sensor keys with a larger surface of your finger.

Setting the Time of Day (Clock):

  1. Press sensor key (A) to select the time setting, then choose symbol (4).
  2. Use sensor keys (B) and (C) to set the exact time.
  3. Confirm by pressing sensor key (A) again, or the setting will be automatically confirmed after a few seconds.

Setting the Cooking Time:

  1. Press sensor key (A) to select symbol (1).
  2. Use sensor keys (B) and (C) to set the desired cooking duration (up to 10 hours).
  3. Turn on the oven using its knobs to set the mode and temperature.
  4. The oven will automatically turn off after the set time, and an intermittent beep will sound. Press any key to stop the beep, or it will stop automatically after one minute.
  5. If cooking needs to resume, press sensor key (A) and set a new duration.

Setting the Cooking End Time:

  1. Ensure the current time of day is set correctly.
  2. Press sensor key (A) to select symbol (2). The current time is displayed.
  3. Use sensor keys (B) and (C) to set the desired cooking end time (up to 10 hours relative to the current time).
  4. Turn on the oven using its knobs. The oven starts immediately and stops at the set end time, accompanied by an intermittent beep.
  5. If cooking needs to resume, press sensor key (A) and set a new duration.

Setting the Oven Delayed Start:

  1. Ensure the current time of day is set correctly.
  2. First, set the cooking time: Press sensor key (A) to select symbol (1), then use keys (B) and (C) to set the duration.
  3. Next, set the cooking end time: Press sensor key (A) to select symbol (2). The display will show the sum of the current time and cooking duration. Use keys (B) and (C) to set the desired end time (up to 24 hours relative to the current time).
  4. The timer will wait for the scheduled start time; both symbols (1 and 2) will be lit.
  5. Turn on the oven using its knobs. The oven will start automatically at the calculated time (symbol (2) turns off) and switch off after the set cooking time has elapsed, accompanied by an intermittent beep.
  6. If cooking needs to resume, press sensor key (A) and set a new duration.

Setting the Alarm Timer:

  1. Press sensor key (A) to select symbol (3).
  2. Use sensor keys (B) and (C) to set the alarm duration (up to 10 hours).
  3. An intermittent beep will sound when the time elapses. Press any key to stop it, or it will stop automatically after one minute. Symbol (3) will turn off.
  4. The last minute of the countdown is displayed in second intervals.

Setting the Beep Volume:

  • This can only be adjusted when no other timer function is active (only the current time is displayed).
  1. Press and hold sensor key (B) for approximately three seconds. A volume indicator and a sample sound will appear. "oooo" indicates maximum volume, "o" indicates minimum volume.
  2. Use sensor key (B) to cycle through the four loudness levels.
  3. Confirm by pressing sensor key (A), or the setting will be automatically confirmed and stored after a few seconds.

Setting the Child Lock:

  • The child lock can only be activated after a time function (cooking duration, end time, or alarm) has been set. The oven will operate normally, but settings cannot be changed.
  • Activation: Press sensor key (A) to select symbol (5). Use keys (B) and (C) to activate the child lock; "ON" will be displayed. Confirm by pressing sensor key (A).
  • Deactivation: Press key (B) or (C) to deactivate the child lock; "OFF" will be displayed. Confirm by pressing sensor key (A).

Maintenance Features

Deleting Timer Settings:

  • All timer settings can be deleted at any time by simultaneously pressing and holding sensor keys (B) and (C) for three seconds. This interrupts any active programs, and the timer reverts to displaying the current time.
  • Individual settings can also be deleted by selecting them with sensor key (A), then simultaneously pressing keys (B) and (C).
  • Alternatively, any setting can be deleted by setting its value to "0.00".

Gorenje BO5385MX Specifications

General IconGeneral
BrandGorenje
ModelBO5385MX
CategoryOven
LanguageEnglish

Related product manuals