Do you have a question about the Gorenje IT64ASC and is the answer not in the manual?
Essential safety information for cooktop use, covering electrical, health, hot surface, and cut hazards.
Guidelines and hazards related to the installation process, including electrical shock and cut risks.
Procedures for operating and maintaining the induction hob, covering electrical, health, hot surface, and cut hazards, plus general safety.
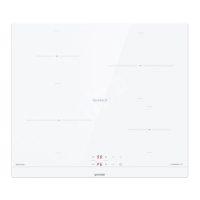
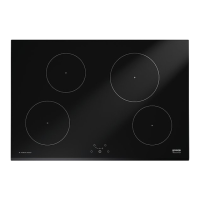
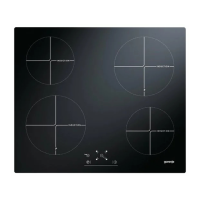
Diagram showing the layout and components of the induction hob.
Explanation of the controls and their functions on the hob.
Explanation of how induction cooking technology works.
Initial steps and checks before operating the hob for the first time.
Details on the hob's power, dimensions, and electrical requirements.
How to use and care for the touch-sensitive control interface.
Guidance on selecting suitable cookware for induction hobs.
Step-by-step instructions for operating the induction hob, including starting, finishing, boost, locking, and timer functions.
How to activate and deactivate the boost function for increased power.
How to lock the controls to prevent unintended operation.
Instructions for using the timer as a minute minder or to switch off zones.
Information on automatic shut-down times for safety.
General advice for efficient and effective cooking.
Techniques for simmering and cooking rice.
Method for searing steaks to achieve desired doneness.
Steps for preparing food using the stir-fry method.
Recommended heat levels for various cooking tasks.
Method for cleaning fingerprints, marks, and spills on the glass surface.
Procedures for removing difficult spills and melts from the glass.
How to clean spills on the touch control area.
Solutions for common problems like the hob not turning on or unresponsive controls.
Explanations for noises from pans, humming, and fan operation.
Reasons why pans may not be detected or heat properly.
Guidance on diagnosing and resolving common error codes and failures, including auto-recovery and specific issues.
Guidelines for selecting work surfaces, space, and ventilation for installation.
Checklists for before and after installing the hob, including power supply and accessibility.
Important warnings during installation and detailed instructions for connecting to the mains power supply.
Information on the appliance's compliance with the WEEE directive for disposal.
Guidance on how to dispose of the product responsibly.
This document provides a comprehensive guide for the Gorenje Induction Hob, Model IT64ASC, covering its function, usage, and maintenance.
The Gorenje Induction Hob is a modern cooking appliance that utilizes electromagnetic vibrations to generate heat directly in the cookware. This method ensures efficient and economical cooking, as the glass surface itself only becomes hot indirectly from the pan. The hob features four cooking zones, each with varying power capabilities, and is controlled via a touch-sensitive panel. A key safety feature is the auto shut-down function, which automatically turns off cooking zones after a default working time if left unattended, preventing potential hazards. The appliance is designed for household use and similar applications, including staff kitchen areas, farmhouses, hotels, motels, and bed and breakfast environments.
The induction hob offers intuitive touch controls that respond to the ball of your finger, not its tip, with a beep confirming each touch. It's crucial to keep the controls clean and dry for optimal operation.
Starting and Finishing Cooking: To begin cooking, press the ON/OFF control for three seconds until the display shows "-" or "- -", indicating standby mode. Place suitable induction-compatible cookware on the desired cooking zone. Select a heat setting by touching the "-" or "+" controls. If no heat setting is chosen within one minute, the hob will automatically switch off. Heat settings can be adjusted at any time during cooking. To finish cooking on a zone, touch its selection control, then scroll down to "0" or touch "-" and "+" simultaneously until "0" is displayed. The entire cooktop can be turned off by touching the ON/OFF control.
Cookware Compatibility: Only cookware with a magnetic base suitable for induction cooking should be used. This can be identified by an induction symbol on the packaging or by performing a magnet test. Cookware made from pure stainless steel, aluminum, copper without a magnetic base, glass, wood, porcelain, ceramic, or earthenware is not suitable. Pans should have a smooth, flat base and match the size of the cooking zone for maximum efficiency. Pans smaller than 140 mm may not be detected. Always center the pan on the cooking zone and lift, rather than slide, pans to prevent scratching the glass surface.
Boost Function: The hob includes a Boost function for rapid heating. To activate, select a cooking zone and then touch the boost control; the zone indicator will show "b" and the power will reach its maximum. The Boost function automatically reverts to its original setting after 5 minutes. It can be canceled by touching the "Boost" control or the "-" button, or by touching "-" and "+" together to switch off the zone and cancel the boost.
Locking Controls: The controls can be locked to prevent unintended use, such as accidental activation by children. When locked, all controls except the ON/OFF control are disabled. The hob can still be turned off in an emergency using the ON/OFF control, but it must be unlocked for subsequent operations.
Timer Control: The timer can be used in two ways: as a minute minder or to turn off specific cooking zones.
Safety Features: The hob includes several safety features. A "H" indicator will appear on hot cooking zones, disappearing when the surface cools to a safe temperature. This also serves as an energy-saving function, allowing users to utilize residual heat. The hob automatically enters standby mode if an unsuitable or non-magnetic pan, or a small item, is left on the surface for one minute. A cooling fan operates to prevent overheating of the electronics and may continue running even after the hob is turned off.
Proper care and cleaning are essential for maintaining the induction hob's performance and appearance.
Everyday Soiling: For fingerprints, marks, or non-sugary spills, switch off the cooktop. Apply a cooktop cleaner while the glass is still warm (but not hot). Rinse and wipe dry with a clean cloth or paper towel, then switch the power back on. Avoid heavy-duty scourers or harsh abrasive cleaning agents, as they can scratch the glass. Never leave cleaning residue on the cooktop, as it may stain the glass.
Boilovers, Melts, and Sugary Spills: These should be removed immediately. Switch off the cooktop at the wall. Use a fish slice, palette knife, or razor blade scraper (suitable for induction glass cooktops) at a 30° angle to scrape the soiling to a cool area of the cooktop. Clean up the spill with a dishcloth or paper towel, then follow the steps for everyday soiling. Be cautious of hot surfaces and the razor-sharp blade of the scraper. Sugary spills, if left to cool, can permanently damage the glass surface.
Spills on Touch Controls: If liquid spills on the touch controls, the cooktop may beep, turn itself off, and the controls may not function. Switch off the cooktop, soak up the spill, wipe the control area with a clean damp sponge or cloth, and then dry it completely with a paper towel before turning the cooktop back on.
Troubleshooting: The induction hob has a self-diagnostic function that helps identify issues. If an error code is displayed, note the code, switch off the hob at the wall, and contact a qualified technician. Common issues and their solutions are provided in the manual, such as checking the power supply for "E1" (high voltage) or "E2" (low voltage), or waiting for the ceramic plate sensor temperature to return to normal for "E3" or "E4" (high temperature). For issues like unresponsive controls, ensure they are unlocked and dry. If the glass is scratched, it may be due to rough-edged cookware or unsuitable cleaning products. Fan noise is normal as it prevents overheating. If pans are not detected, ensure they are induction-compatible, correctly sized, and centered on the cooking zone.
| Hob type | Zone induction hob |
|---|---|
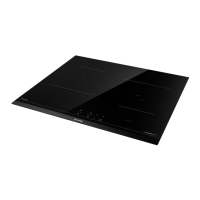
| Product color | Black |
| Hob width size | 59 cm |
| Top surface type | Glass |
| Appliance placement | Built-in |
| Cooking zone 3 type | Regular |
| Cooking zone 2 boost | 1500 W |
| Cooking zone 3 boost | 1800 W |
| Cooking zone 4 power | 1200 W |
| Cooking zone 1 position | Left rear |
| Cooking zone 2 diameter | 180 mm |
| Cooking zone 2 position | Left front |
| Cooking zone 3 position | Right rear |
| Cooking zone 4 position | Right front |
| Number of cooking zones | 4 zone(s) |
| Regular cooking zone shape | Round |
| Cooking zone 2 power source | Electric |
| Number of gas cooking zones | 0 zone(s) |
| Regular cooking zone diameter | 18 mm |
| Large cooking zone | 1.8 W |
| Regular cooking zone | 1.5 W |
| Number of power levels | - |
| Timer | Yes |
| Timer type | Digital |
| Control type | Touch |
| Timer duration | 99 min |
| Control position | Front |
| Built-in hood | No |
| Connected load (gas) | - W |
| Connected load (electric) | 7000 W |
| Package depth | 645 mm |
| Package width | 690 mm |
| Package height | 115 mm |
| Package weight | 11600 g |
| Depth | 60 mm |
|---|---|
| Width | 590 mm |
| Height | 520 mm |
| Installation compartment depth | 494 mm |
| Installation compartment width | 564 mm |
| Installation compartment height | 50 mm |