This document provides instructions for the use, installation, and connection of a glass ceramic induction built-in cooking hob, intended solely for household use. The product is designed with environmental considerations, using recyclable materials for packaging. Users are advised to dispose of outdated appliances at authorized collection centers.
Function Description
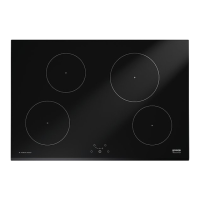
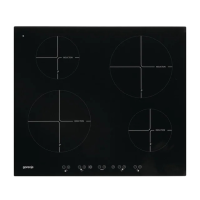
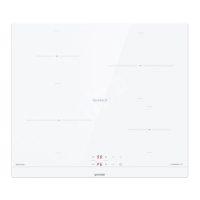
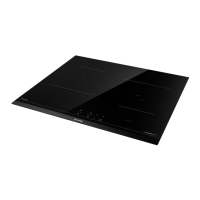
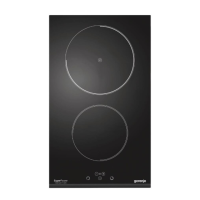
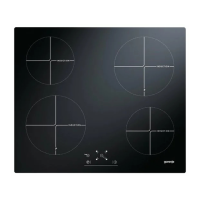
The cooking hob features four high-power induction hotplates integrated into a flat glass ceramic surface. Unlike traditional heaters that operate on radiation, induction hotplates generate heat directly at the bottom of the dish through a magnetic field created by an induction coil underneath the glass ceramic surface. This method ensures that heat is generated where it is most needed, minimizing energy loss and requiring considerably less energy compared to conventional methods. The glass ceramic surface itself is not directly heated but warms up from the return heat transmitted by the dish, which is then indicated as "remaining heat" after the hotplate is turned off.
The hob is equipped with electronic sensors activated by touch, confirmed by a beep. It includes a control panel with an on/off sensor, power level/residual heat displays, cooking zone selection sensors, and a clock display. A decimal point on the power level display indicates an activated timer function.
Usage Features
- Switching On/Off: To switch on the hob, touch and hold the on/off sensor for at least 1 second. "O" will appear on all power level displays, and decimal points will flash. The hob will switch off automatically if no settings are made within ten seconds. To switch off, simply touch the on/off sensor (A) at any time; all settings, except the minute minder, will be deleted.
- Turning Hotplates On/Off: After switching on the hob, select the desired cooking zone by touching its sensor (C). The "O" on the relevant power level display will light up more intensely. Use the "-" and "+" sensors (E) to set the power level from 1 to 9 or "P" (Power Boost). Continuous pressing of these sensors will automatically increase or reduce the power level. To switch off a hotplate, select the cooking zone and set its power level to "O" using the "-" sensor. If all cooking zones are set to "O", the hob will switch off after 20 seconds.
- Power Regulation: Heat power can be set to ten different levels, from 0 (off, using remaining heat) to 9 (cooking large amounts, searing/braising), and "P" (Power Boost).
- Power Boost: This function provides extra power for rapid cooking of large amounts of food. It can be activated for any cooking zone by selecting the zone, setting it to level 9, and then immediately pressing "+" again. "P" will appear on the display. For front left and rear right zones, Power Boost is active for five minutes before switching to level 9. To deactivate, select the zone and immediately press the "-" sensor; "P" will disappear, and the zone will revert to level 9.
- Pan Recognition: The induction hob automatically recognizes cookware. If no cookware is present or if a pan is too small, no heat is wasted. A "U" symbol will light up on the power level display if a pan is not recognized. If cookware is placed within ten minutes, the hob will recognize it and power up to the set level.
- Remaining Heat Indicator: The hob features an "H" symbol to indicate remaining heat after a hotplate is switched off. This heat can be used for warming food or melting. Even after "H" disappears, the hotplate may still be hot, so caution is advised.
- Operation Time Limit: Each hotplate has a maximum continuous operation limit, after which it will automatically switch off for safety. The duration varies depending on the power setting.
- Overheating Safety Device: The hob includes an overheating protection device that safeguards electronic parts. If the temperature rises too high, cooking power is automatically reduced or shut off, indicated by "E2" on the display. The hob also has a cooling fan that may continue to operate after cooking.
- Timer Function: The timer can be set from 1 to 99 minutes and offers two modes:
- Shut-off timer: Connected to a specific cooking zone, it automatically switches off the zone when the time expires. A decimal point next to the power level indicates activation.
- Minute minder: Functions as a warning/alarm. An acoustic signal is emitted when the time runs out. Two flashing decimal points indicate activation when no cooking zone is selected.
- To activate, simultaneously press the "-" and "+" sensors (E). The timer settings are displayed on the upper two display units (H). To set the time, press the "-" or "+" sensor. Pressing "-" first sets the timer to 30 minutes. Holding the sensor changes the setting at an increasing rate. To check remaining time, select the cooking zone and activate the timer function. When the time expires, "OO" will flash, and a short beep will sound. Press any key to stop the beep, or it will end automatically after 2 minutes.
- Control Unit Lock / Child Safety Lock: This feature prevents accidental operation. To activate, ensure the hob is off, then switch it on (all displays show "O"). Simultaneously press the sensor for the rear left cooking zone (C) and the "-" sensor (E) for approximately 3 seconds. "L" will appear on all displays, indicating the lock is active. To deactivate, switch on the hob ("L" appears), then simultaneously press the sensor for the rear left cooking zone (C) and the "-" sensor (E) for approximately 3 seconds. "O" will appear, and the lock will be deactivated.
Maintenance Features
- Cleaning: After each use, allow the glass-ceramic hob to cool down before cleaning. Regular cleaning with special conditioning agents helps form a protective layer and shields against dirt. Before each use, wipe off any dust or particles to prevent scratches.
- Stain Removal:
- Light stains can be removed with a damp soft cloth, followed by drying.
- Water stains can be removed with a mild vinegar solution, but avoid using it on the frame as it may dull. Do not use aggressive sprays or decalcification agents.
- Heavier stains require special agents and utensils designed for glass-ceramic hobs, following manufacturer instructions.
- Stubborn and burnt residues should be removed with a scraper, held at a 45-60 degree angle and gently pressed against the glass. Avoid pressing perpendicularly or scratching the surface with the tip or blade.
- Important Cleaning Precautions:
- Avoid cleaning the cooktop while hot to prevent damage.
- Do not use steel wool, abrasive sponges, or abrasive detergents, as they can scratch the surface.
- Aggressive sprays or improperly mixed liquid cleaning agents can also damage the surface.
- Ensure all cleaning agent residues are thoroughly removed, as they can damage the hob when cooking zones heat up.
- Do not use steam cleaners or high-pressure cleaners.
- Promptly remove spilled sugar or heavily sweetened substances, even if the hotplate is hot, to prevent permanent damage to the glass-ceramic surface.
- Discoloration: Changes in the color of the glass-ceramic surface, often due to burnt food residues or cookware made of aluminum or copper, are aesthetic and do not affect operation or stability. Such discolorations are not covered by warranty.