Do you have a question about the Gotrax Shift S1 E-BIKE and is the answer not in the manual?
Avoid water as the bike is not waterproof; riding in wet conditions is dangerous and can void warranty.
Do not abuse, modify the bike, or neglect safety checks. Keep body parts away from moving parts.
Ensure brakes, safety labels, guards, and tire condition are checked before every ride.
Adhere to maximum load, age limits (16+), and maximum speed of 20 mph.
Hold the bike and unfold the front frame until it clicks into place.
Lock the frame clamp by turning it to the left to ensure it is tightened.
Use the 5mm Allen wrench to loosen the screw and the fixed cover on the tiller.
Carefully remove the protective sleeve from the tiller assembly.
Insert the tiller into the head tube and use the screw/cover to lock it securely.
Position the tiller fliplock upright to ensure the tiller is properly locked.
Turn the tiller fliplock upward and the safety lock counterclockwise to secure the fold.
Adjust the handlebar angle and secure it using the 6mm Allen Wrench.
Loosen the tiller clamp, adjust height, and re-tighten to secure the tiller.
Loosen the seat post clamp, adjust seat height, and tighten clamp to secure.
Use the 15mm spanner to mount pedals; left tightens counterclockwise, right tightens clockwise.
Press the power display button to check the battery level and locate the charge position.
Plug the charging cable into the charging hole, ensuring the connection is dry.
A green light indicates full charge, while a red light signifies charging in progress.
Cover the charging port after use to protect it from dust and debris.
Press the middle button for 2 seconds to turn the bike on or off.
Use +/- buttons to change gears (11, 15, 20 MPH) for different riding conditions.
Long press '-' button for 2 seconds to engage push mode for hill assistance.
Activate by holding throttle for 10 seconds; deactivate with handbrakes.
Start with one foot on the ground, push off, and press the throttle simultaneously.
Use the brake-throttle lever to slow down or bring the electric bike to a stop.
The bike performs best on smooth surfaces like carparks, roads, footpaths, and bike lanes.
Be aware of your terrain and watch out for curbs and obstacles while riding.
Wipe the bike clean with a soft damp cloth if dirty. Store in a dry, cool location.
Contact customer service for brake adjustments or service; do not self-repair.
Inflate tires to 35-45 psi and ensure both tires have the same pressure.
Do not use corrosive solvents or pressure washers; clean with a soft damp cloth.
Store in a dry, cool location away from sun exposure to protect battery and tires.
Only use the approved Gotrax power adapter to charge the bike to avoid fire risk.
Comply with disposal regulations. Store battery in conditions between -4°F and 122°F.
No user serviceable parts; UV rays, rain, and elements can damage materials. Store indoors when not in use.
User manuals are updated online at gotrax.com; contact support for issues.
Contact customer service team at gotrax.com for problems or detailed information.
90-day warranty covers defects in workmanship and material, excluding misuse or water damage.
Visit gotrax.com for warranty claims. Keep original shipping box for returns or repairs.
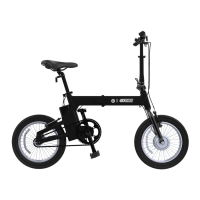
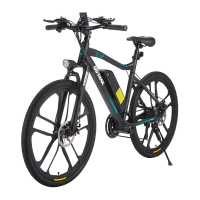
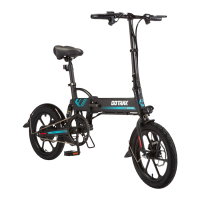
The device described in this manual is the GOTRAX SHIFT S1 E-BIKE, a foldable electric bicycle.
The GOTRAX SHIFT S1 E-BIKE is designed for personal transportation, offering an electric assist to pedaling. It is a foldable model, making it convenient for storage and transport. The bike features a motor control panel, head display board, headlight, and taillight, all controlled via three buttons. It includes a "Push Mode" for hill assistance and a "Cruise Control" function for maintaining speed.