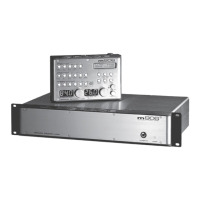
grace design m906
owner’s manual
24
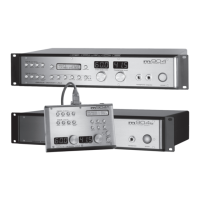
grace design m906
owner’s manual
25
by pressing the “Left” or “Right” buttons in the solo/mute button row. The
trim range for each channel is +/-10dB (screenshot 11).
Once you’re satised with the new cue output level values, you can enter
into a special “speaker 3 calibration mode” (see below), select a new
function to edit or exit CAL mode.
Exit CAL mode and return to the normal operating state by pressing the ashing CAL switch.
Calibrating Stereo Speaker 3 Output Levels
As noted earlier in this manual, the m906 provides access to a third stereo speaker output pair, known
as “speaker 3”. This is a mode that is controlled via the MON > CUE switch, and that uses the cue outputs
to drive a third pair of stereo control room monitors. The m906 allows you to calibrate these levels just
like any other speaker output set. The relative range of calibration is +/- 10dB in 0.5dB steps. If you are
in “speaker 3” mode, then the following steps will allow you to calibrate the Speaker 3 output level:
Enter CAL mode by pressing the CAL switch. The switch LED will begin to ash, indicating that you’re now in
calibration mode. All other switch LED’s on the remote control unit will be unlit. If you inadvertently entered
CAL mode, simply press the CAL switch again. You’ll be returned to the normal operating state of the m906
and the CAL switch LED will extinguish.
Press the MON > CUE switch. The switch LED will begin to ash.
“CAL” will be displayed in the headphone level LED display while the current speaker 3 set output offset level
will be shown in the ‘main level/edit’ LED window. A value of “0” indicates that there is no offset level currently
programmed. Speaker 3 Offset will be displayed in the LCD window
(screenshot 12)
Rotate the ‘main level/edit’ rotary encoder in a clockwise direction to
increase the value of level offset. Rotate the encoder in a counter-
clockwise motion to decrease the value.
If you’d like, you can also edit each of speaker 3’s left/right channel level
offsets. To do this, simply press the “left” or “right” solo/mute switch and
enter the desired values (screenshot 13).
Once you’re satised with the new speaker 3 output and/or channel level offset values, you can select a new
function to edit or exit CAL mode.
Exit CAL mode and return to the normal operating state by pressing the ashing CAL switch.
Setting the Fixed Level DAC Outputs
The DAC outputs are great to use when you need to make transfers to other machines or for mixing or
mastering purposes. Each of the DAC outputs (6 channels) can be adjusted individually in CAL mode.
The absolute range of calibration is from -96dB to +31.5dB in 0.5dB steps. Note that the m906 factory
default setting for the DAC outputs is 0dB. At this setting, the DAC will output +16dBu or +24dBu for
0dBFS depending on the output amplier gain jumper settings (please contact us for making changes
to these jumper settings). Triming the DAC output level is done as follows:
Enter CAL mode by pressing the CAL switch. The switch LED will begin to ash, indicating that you’re now in
calibration mode. All other switch LED’s on the remote control unit will be unlit. If you inadvertently entered
CUE channel offset
screenshot 11
speaker 3 mode
screenshot 12
speaker 3 channel offset
screenshot 13
 Loading...