Reassembly
309577D 15
Reassembly
Coat all non-Loctited parts with Graco 217374
ISO Pump Oil before reassembly, to ease future
disassembly.
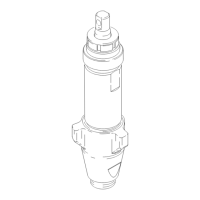
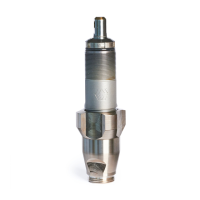
1. Install ball (16*) in rod (1). Center u-cup (13*) on
rod (1). Lips of u-cup must face up. Use piston
(7) to evenly push u-cup onto rod, then remove
piston. Slide bushing (14*) onto rod (1). Wide
end of bushing must face up, toward u-cup.
Sealing patch on piston threads is good for four
repackings. Use Loctite® on piston threads
after four repackings; be sure none gets on ball.
2. Install piston (7). Be careful not to damage seal-
ing edges of u-cup. Torque as specified below.
Model Torque
ft-lb (N•m)
246830 and 245970 24-30 (32-40)
246831 and 245971 47-53 (63-71)
246832 and 245972 47-53 (63-71)
TI2666A
1
16*
14*
*13
7
TI2818A
1
Lips face up.
1
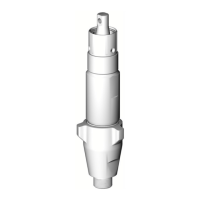
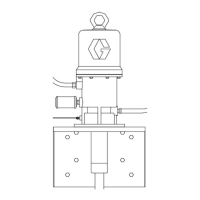
3. Install throat u-cup as follows:
a. Models 246831, 246832, 245971, and
245972: Grease u-cup (20*) and cylin-
der (2). Place u-cup in cylinder with lips
facing down. Be careful not to damage
sealing edges of u-cup. Install packing
nut (19) to properly insert and align
u-cup, then remove packing nut.
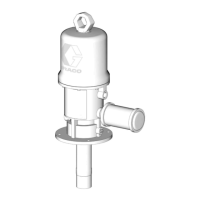
b. Models 246830 and 245970: Grease
u-cup (20*) and cylinder (2). Place seal
installation tool (23*) in cylinder. Place
u-cup in tool with lips facing down. Be
careful not to damage sealing edges of
u-cup. Press u-cup in place with 7/8 in.
deep-well socket (S). Remove socket
and tool.
TI2675A
19
20*
2
TI2818A-1
1
Lips face down.
1
TI2700A
23*
20*
2
S
 Loading...