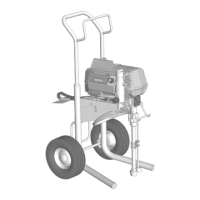
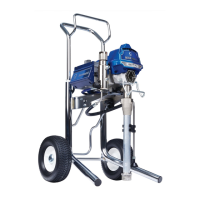
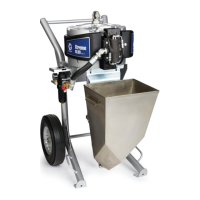
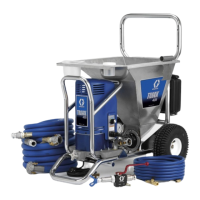
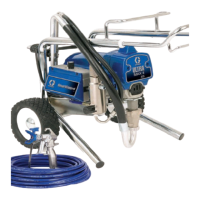
The Graco Airless Sprayer 495 is a robust and efficient device designed for various spraying applications, particularly for paint. This manual provides comprehensive guidance on its operation, setup, cleaning, and safety, ensuring users can effectively and safely utilize the equipment.
Function Description:
The Graco Airless Sprayer 495 is an airless paint sprayer that uses a pump to pressurize paint, forcing it through a small tip at high velocity. This process atomizes the paint into a fine spray without the need for compressed air, allowing for a smooth and even finish on various surfaces. The sprayer is equipped with a pressure control system, enabling users to adjust the spray intensity to match the specific requirements of the paint and surface. It features a siphon tube for drawing paint from a container and a drain tube for flushing and cleaning. The device is designed for both water-based and oil-based paints, with specific cleaning procedures for each type. Its primary function is to provide a fast, efficient, and high-quality method for applying coatings, making it suitable for professional painting tasks.
Usage Features:
The Graco Airless Sprayer 495 is designed for ease of use and efficiency, with several features that enhance its operational capabilities.
- Setup and Installation: The setup process involves connecting the Graco airless hose to the sprayer and then to the gun, ensuring all connections are securely tightened. Before operation, users must check the inlet strainer for clogs and debris and fill the throat packing nut with TSL (Throat Seal Liquid) to prevent premature packing wear. The power supply cord is then plugged into a properly grounded electrical outlet. A crucial step involves placing the siphon tube in a grounded metal pail partially filled with flushing fluid and attaching a ground wire to flush out storage oil from the sprayer. This initial flush is essential for preparing the sprayer for use with either water-base or oil-base paints.
- Priming and Startup: To start the sprayer, the pressure control is set to the lowest pressure, and the power is turned ON. The pressure is gradually increased to start the motor and allow fluid to circulate through the drain tube for about 15 seconds, after which the pressure is turned down. The prime valve is then set to the horizontal position, and the spray gun trigger safety is turned OFF. The gun is held against a grounded metal flushing pail, triggered, and the fluid pressure is increased to 1/2 for one minute to flush any remaining contaminants. After inspecting for leaks, the siphon tube is moved to the paint pail, and the gun is triggered into the flushing pail until paint appears, then moved to the paint pail and triggered for 20 seconds. Finally, the gun safety is set to ON, and the tip and guard are assembled.
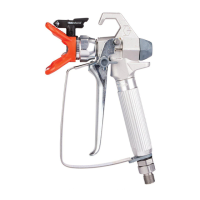
- Spray Tip Guard Assembly: The assembly of the spray tip guard involves inserting a metal seal and OneSeal, followed by the SwitchTip, and then screwing the entire assembly onto the gun, tightening it securely.
- Spraying Techniques: For optimal results, users are advised to perform a spray test pattern, starting with the lowest pressure and gradually increasing it until a consistent spray pattern without heavy edges is achieved. If heavy edges persist, a smaller tip size may be required. The gun should be held perpendicular to the surface, 10-12 inches away, and moved back and forth with a 50% overlap to prevent heavy spots. To avoid drips, the gun should be moved before pulling the trigger and continued to be moved for a few seconds after releasing the trigger.
- Clearing Blocked Spray Tip: In case of a blocked spray tip, the user must release the trigger, put the safety ON, rotate the SwitchTip, take the safety OFF, and trigger the gun to clear the clog. It is critical never to point the gun at one's hand or into a rag during this process due to the risk of high-pressure injection. After clearing, the safety is put ON, the SwitchTip is returned to its original position, the safety is taken OFF, and spraying can resume.
Maintenance Features:
Proper maintenance is crucial for the longevity and performance of the Graco Airless Sprayer 495.
- Cleaning Paint from Machine: After each use, the sprayer must be thoroughly cleaned. This involves turning the power OFF and unplugging the sprayer, then setting the pressure to the lowest setting and triggering the gun to relieve pressure. The drain tube is placed in a pail, and the prime valve is turned down. The guard and SwitchTip are removed. The siphon tube is removed from the paint and placed in flushing fluid (water for water-base paint, mineral spirits for oil-base paint). The sprayer is plugged in, power turned ON, and the prime valve set to horizontal. The gun is held against a paint pail, trigger safety OFF, and triggered with increasing pressure until flushing fluid appears. The gun is then moved to a flushing pail and triggered to thoroughly flush the system, after which the trigger is released, and safety is put ON. The prime valve is turned down to allow flushing fluid to circulate through the drain tube for 1-2 minutes. The siphon tube is raised above the flushing fluid, and the sprayer is run for 15-30 seconds to drain fluid, then the power is turned OFF. The drain valve is closed, and the gun is triggered into a flushing pail to purge fluid from the hose. Finally, the prime valve is opened.
- Filter Maintenance: Filters from the gun and sprayer (if installed) should be removed, cleaned, inspected, and reinstalled.
- Protective Coating: If flushing with water, it is recommended to flush again with mineral spirits or Pump Armor to leave a protective coating that prevents freezing or corrosion.
- External Cleaning: The sprayer, hose, and gun should be wiped down with a rag soaked in water or mineral spirits.
Safety Warnings:
The manual emphasizes several critical safety warnings to prevent injury or damage:
- Fire and Explosion Hazard: Flammable fumes can ignite. Use in well-ventilated areas, eliminate ignition sources, keep the sprayer 20 feet (6m) away from explosive vapors, keep the work area free of debris, ground equipment, and stop operation immediately if static sparking occurs.
- Electric Shock Hazard: Improper grounding can cause electric shock. Turn off and disconnect power before servicing, use grounded outlets and 3-wire extension cords, ensure ground prongs are intact, and do not expose to rain.
- Skin Injection Hazard: High-pressure fluid can pierce the skin, leading to serious injury or amputation. Never point the gun at anyone, put hands over the spray tip, or stop leaks with hands or rags. Engage the trigger lock when not spraying and follow the Pressure Relief Procedure before cleaning or servicing.
- Equipment Misuse Hazard: Misuse can cause death or serious injury. Do not exceed maximum working pressure, use compatible fluids, check equipment daily, repair with genuine Graco parts, do not alter equipment, use for intended purpose, route hoses safely, comply with safety regulations, keep children and animals away, and do not operate when fatigued or under the influence.
- Pressurized Aluminum Parts Hazard: Do not use 1,1,1-trichloroethane, methylene chloride, or other halogenated hydrocarbon solvents with pressurized aluminum equipment, as this can cause chemical reactions, equipment rupture, and severe injury.
- Toxic Fluid or Fumes Hazard: Toxic fluids or fumes can cause serious injury or death if splashed, inhaled, or swallowed. Read MSDS for fluids, store hazardous fluids properly, and dispose of them according to guidelines.
- Personal Protective Equipment: Always wear appropriate protective equipment, including eye wear, clothing, respirators, and gloves, when operating or servicing the equipment.