11306–667
Service
Adjusting the Needle
WARNING
INJECTION
HAZARD
Proper adjustment of the needle is essential to be
sure the trigger safety latch makes the gun inop
-
erative when engaged. Improper adjustment may
result in serious injury
, including fluid injection and
splashing in the eyes or on the skin.
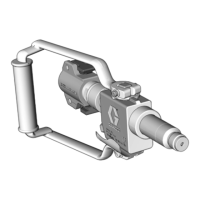
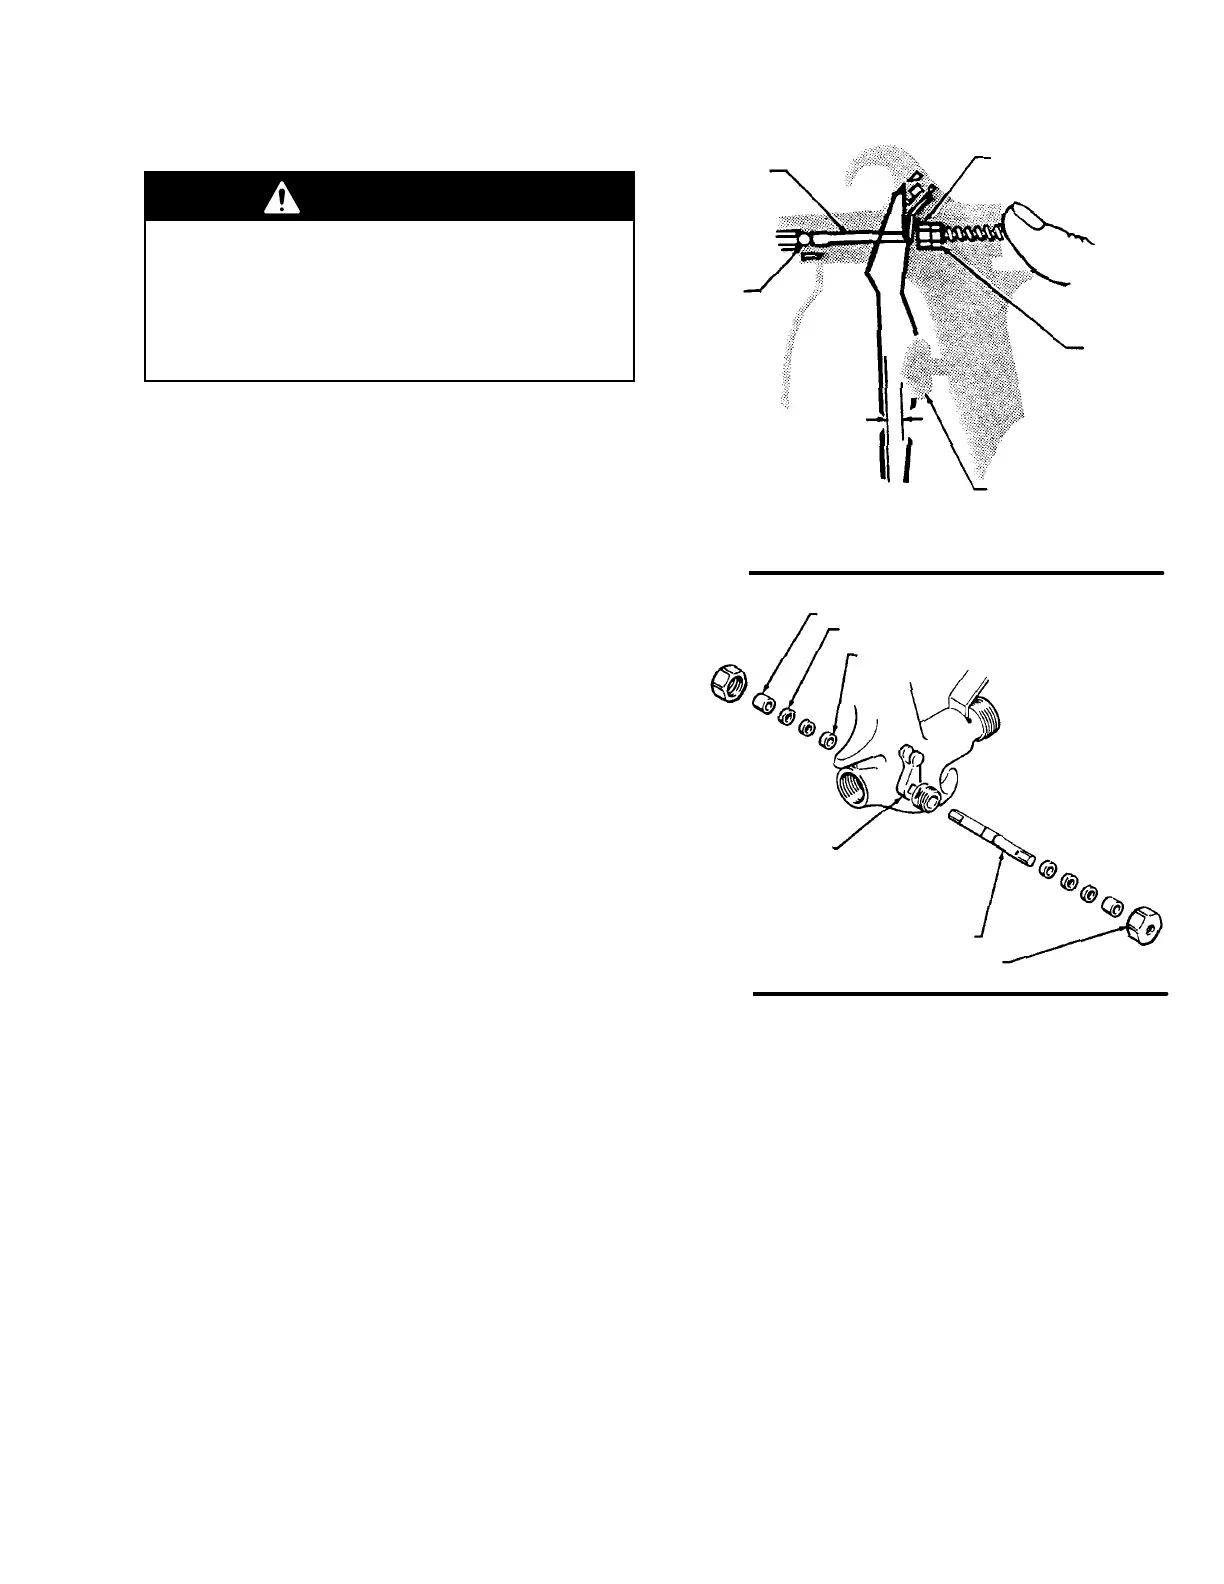
1. T
ighten the seat (23) to 23 N
ym (200 in-lb).
2.
Install the needle and spring in the gun and hold
them in place with your thumb. See Fig. 4.
3.
Check the travel of the trigger from the free posi
-
tion to when it stops against the safety latch (15).
The travel should be about 8.1 mm (0.32 in.).
4. T
o adjust the travel, turn the two nuts (20 and 21)
toward the front (clockwise) to increase travel, or
toward the back to decrease travel.
5. Connec
t t
h
e h
ose.
6. Instal
l t
h
e t
i
p g
uar
d a
n
d p
rim
e t
h
e s
ystem.
7. Trigger th
e g
u
n a
nd releas
e i
t. Th
e f
lui
d f
lo
w s
hould
sto
p i
mmediately
. N
o
w e
ngag
e t
h
e s
afet
y l
atc
h a
nd
tr
y t
o t
rigger th
e g
un
. N
o f
lui
d s
houl
d f
low
. If t
h
e g
un
fails
e
ithe
r t
est
,
reliev
e t
h
e p
ressure
, d
isconnec
t t
he
hose,
a
nd readjus
t t
h
e n
eedle.
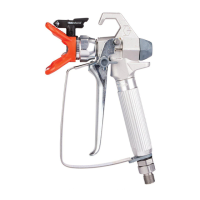
Gun Packings
1. Remove
the trigger (14) and screws (1). See the
Parts Drawing on page 12.
2.
Remove the packing nuts (13) on both sides of the
gun.
3.
Remove the packings (10), glands (9† and 1) and
camshaft (12).
Fig. 4
Fig. 5
24
23
21
20
15
0.32”
(8.1 mm)
PRESS NEEDLE AGAINST SEA
T T
O CHECK TRAVEL
11
10
9
12
13
CAM LEVER
4. Soak
the new leather packings (10*) in oil until
they are pliable, then install the packing, glands
(9† and 11†) and camshaft (12).
5.
Install the packing nuts (13) and tighten snugly
.
6.
Install the trigger (14) and screws (1). If the cam
-
shaft is too tight, loosen the spring retainer (19).
 Loading...