4 309277
Service
Repair When Pump Is Off The Sprayer
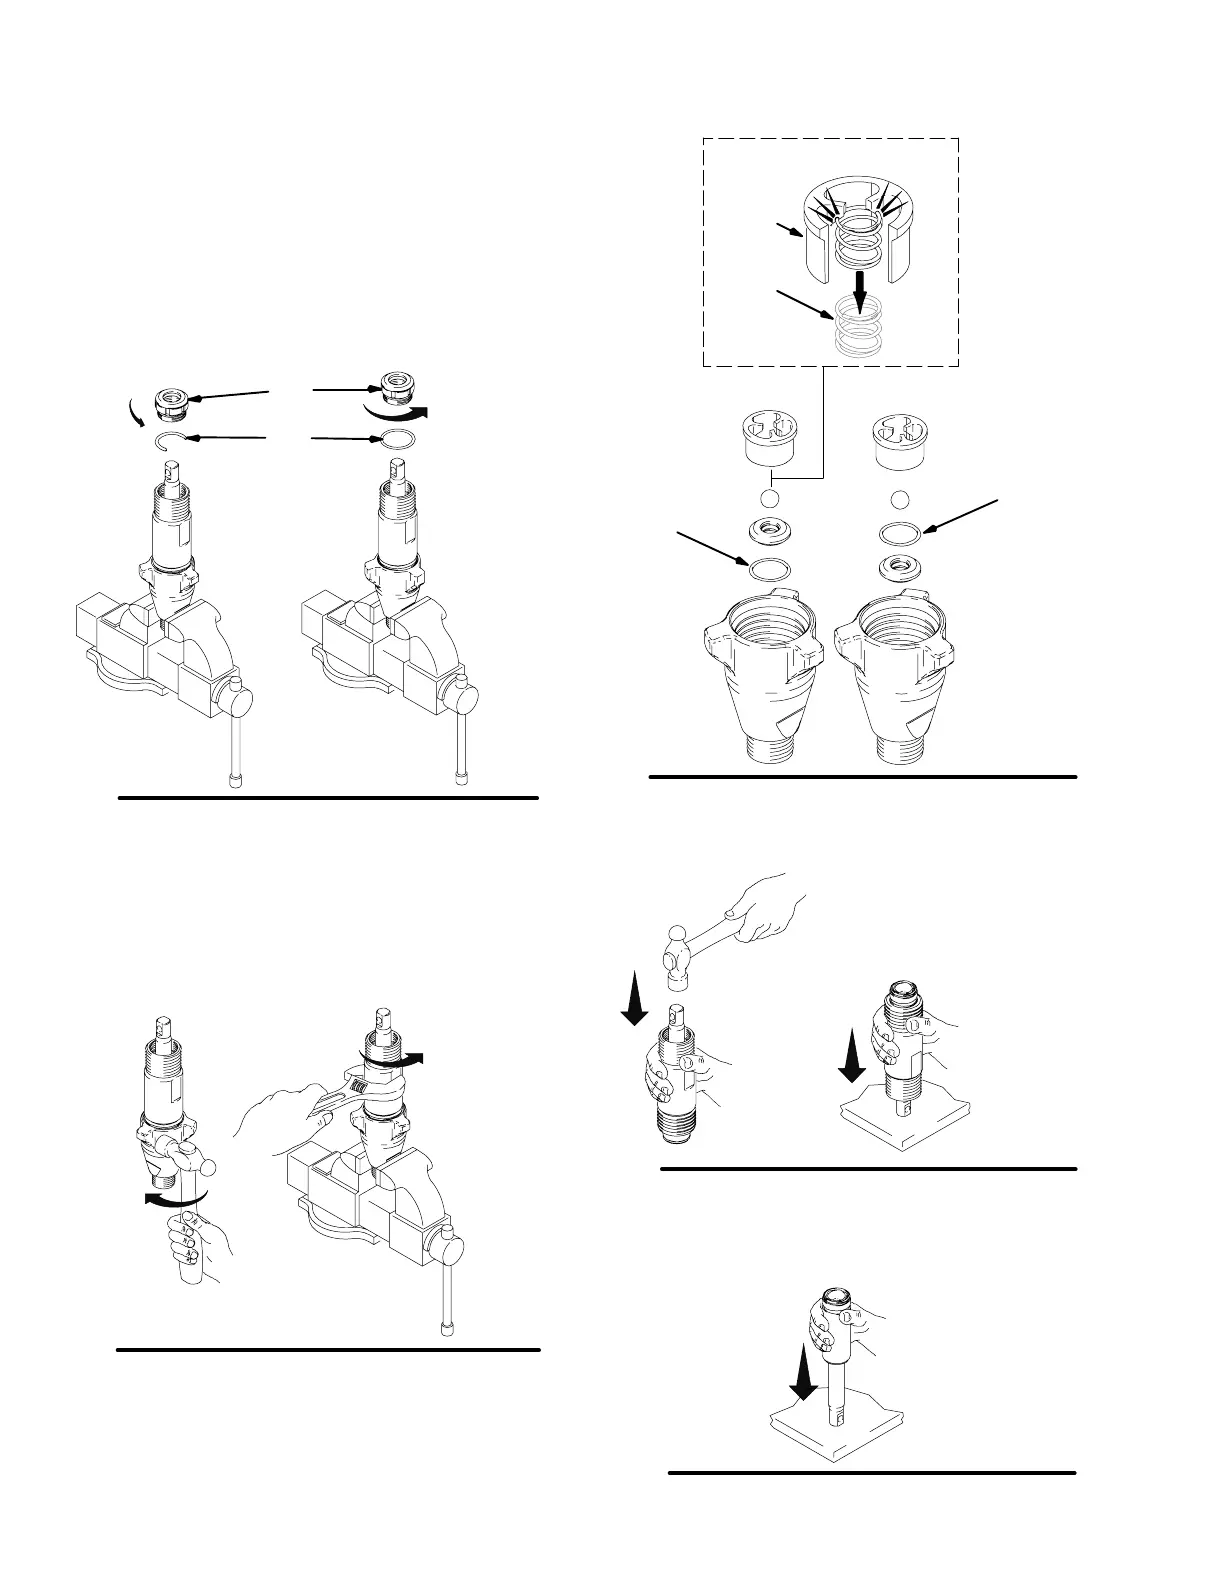
Disassembling the pump
Fig. 1. Remove packing nut (202) and throat adjust-
ment spacer (228).
Fig. 1
7568A
228
(228, o-ring
on 246257)
ti2332a
202
Fig. 2. Unscrew intake valve from cylinder.
Fig. 2
7569A
Fig. 3. Disassemble intake valve. Clean and inspect.
O-ring (227) may require a pick for removal.
Fig. 3
227
227
(o-ring on top
244957 only)
(o-ring on
bottom
all except
244957)
7570e
236
215
245889, 287946 only
Fig. 4. Tap piston rod out of cylinder with a hammer or
flip over and tap piston rod out against a bench.
Fig. 4
7571a
Note: Sleeve may come out
of cylinder with piston rod.
Fig. 5. Remove piston rod from sleeve, or remove
sleeve from cylinder.
Fig. 5
7572A
 Loading...