Repair
3A7469D 13
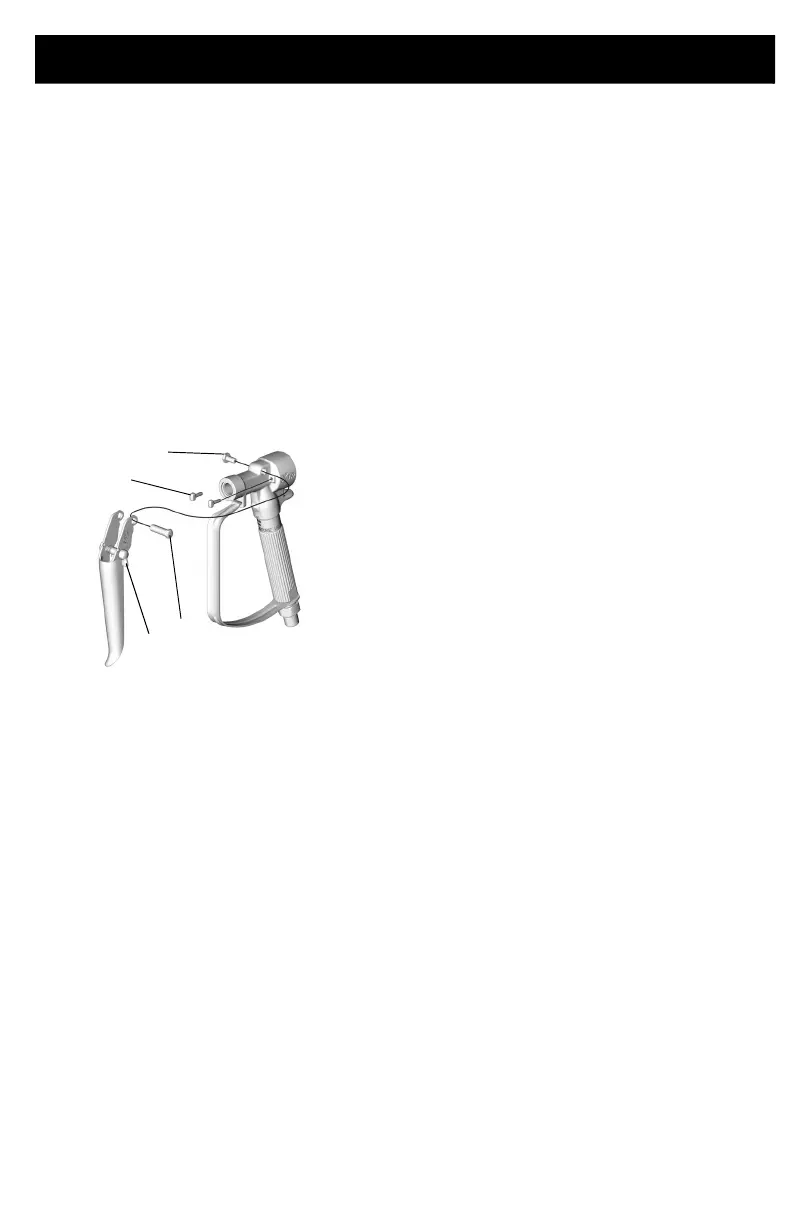
Trigger Removal
NOTE: To avoid losing parts, be ready for
two actuator pins (7) to fall out of the gun
body when the trigger (16) is removed.
XTR7+ Guns
1. Using a wrench, remove screw (16b)
from the pivot pin (16a).
2. Slide the pivot pin (16a) out of the gun
body, and remove the trigger (16).
3. Before reinstalling the trigger, grease the
actuator pins (7) and the pivot pin (16a).
XTR5+ Guns
1. Using a socket wrench, remove screw
(16c) from each side of the gun body and
remove the trigger.
2. Before reinstalling the trigger, grease the
actuator pins (7).
Assembly
1. Press a new gasket (3*) into the gun
body. Lightly grease the seal retainer
(2*) and install. Torque to 48–72 in-lb
(5–8 N•m).
2. Lightly grease and replace the needle
(8*). Press the needle through the seal
retainer.
3. Apply light-strength Loctite
™
to needle
threads. Ensure Loctite does not spread
to the needle shaft. Ensure the needle
(8*) is seated in gun body.
4. Install needle retainer (6). Tighten until it
bottoms out. Do not overtighten.
5. Lightly grease valve seat (10*) threads.
Squeeze the trigger to retract the needle
and install gasket (9*) and valve seat
(10*). Torque valve seat to 26–32 ft-lb
(34–43 N•m).
6. Grease and install the spring (5) and cap
(4). Tighten the cap to 10–13 ft-lb (8–10
N•m).
Test Gun Before Using
1. Engage the trigger lock.
2. Connect the fluid hose to the gun.
3. Start and prime the pump.
4. Disengage the trigger lock.
5. Trigger the gun into a metal waste
container.
6. Release the trigger. The gun should
immediately stop spraying and there
should be no leaks. If there is a problem,
follow the Pressure Relief Procedure,
page 9. Check through the Assembly
procedure and correct any problem.
7. Install the tip and tip guard before regular
use.
16a
16
16b
7