Repair manual GRAMMER seat suspension MSG95EAC – November 2012
Material no. 1 277 338
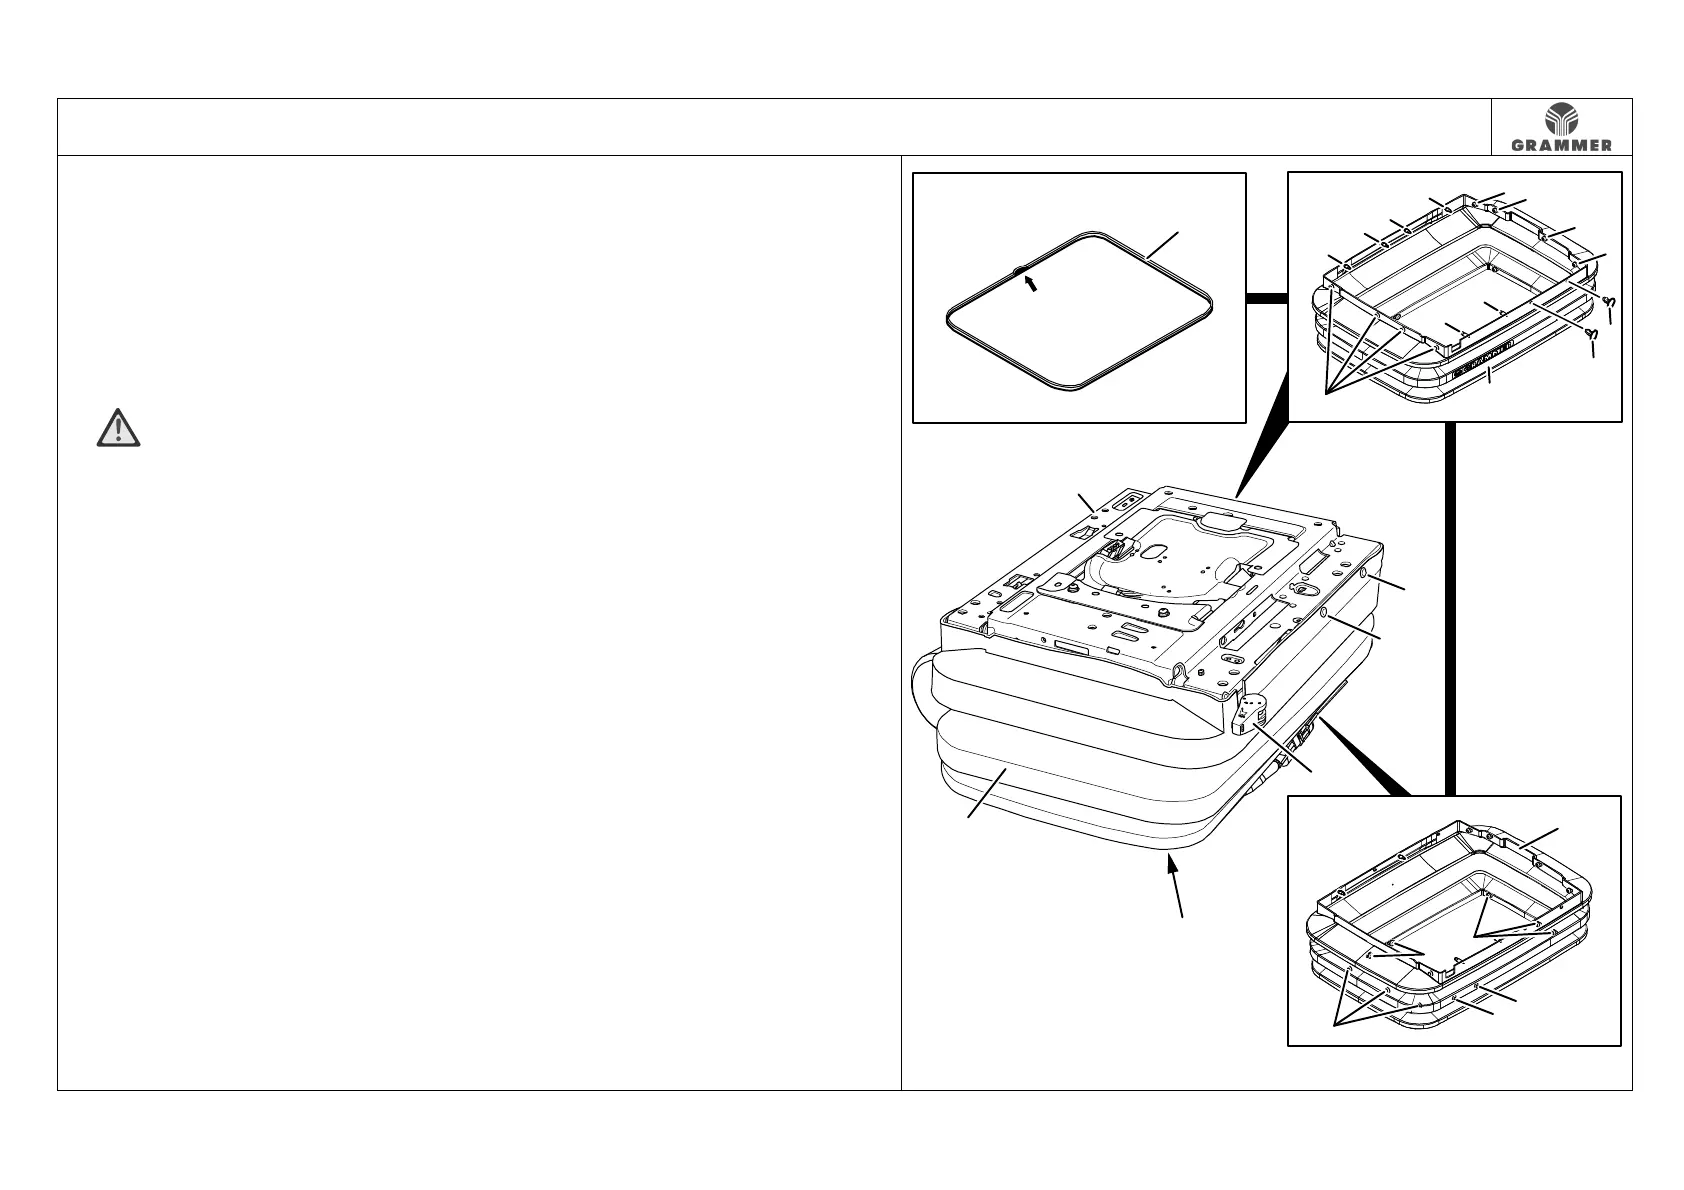
3.3 Bellows – removal and installation
Page 1 of 1
Removal and installation
1 Remove the seat (see Chapter 3.1).
2 Pull out two bellows pins (6) from the
upper suspension part (2).
3 Detach eight keyhole nubs (4) at the
upper suspension part (2).
4 WARNING Damage!
In order to prevent tearing off the
mushroom-shaped nub (5) when
pulling it out, longitudinally stretch the
mushroom-shaped nub (5).
Insert an appropriate tool, e.g. a
mandrel (size 3) into the mushroom-
shaped nub (5) through the
corresponding opening at the outside
of the bellows (1) and slightly pull the
bellows (1) against the mandrel. Pull
out the stretched mushroom-shaped
nub (5) at the upper suspension part
(2).
Pull out six mushroom-shaped nub (5)
at the upper suspension part (2).
Note:
In case of defective mushroom-shaped
nubs (5), the bellows (1) has to be
fastened by means of bellows pins (6).
5 Take off the keyhole nubs (4) from the
lower part of the suspension (8).
6 Pull the bellows (1) in downward
direction over the lower suspension
part (8) and remove it.
Installation note:
The cable harness for vehicle
connection is guided along the right
side of the lower suspension part (8)
and out under the bellows (1).
7 Wire insert (3) is defective:
Remove the wire insert (3) at the
bellows (1).
Installation notes:
• Place the wire insert (3) in the middle
fold of the bellows (1).
• The welding joint (arrow) of the wire
insert (3) must be inside the bellows (1)
on the right side.
8 Re-install the components in the
reverse order of their removal.
2
8
7
1
6
6
4
4
4
4
4
1
4
4
5
6
6
4
4
4
5
5
5
5
5
1
3
2847