Repair manual GRAMMER seat suspension MSG95EAC – November 2012
Material no. 1 277 338
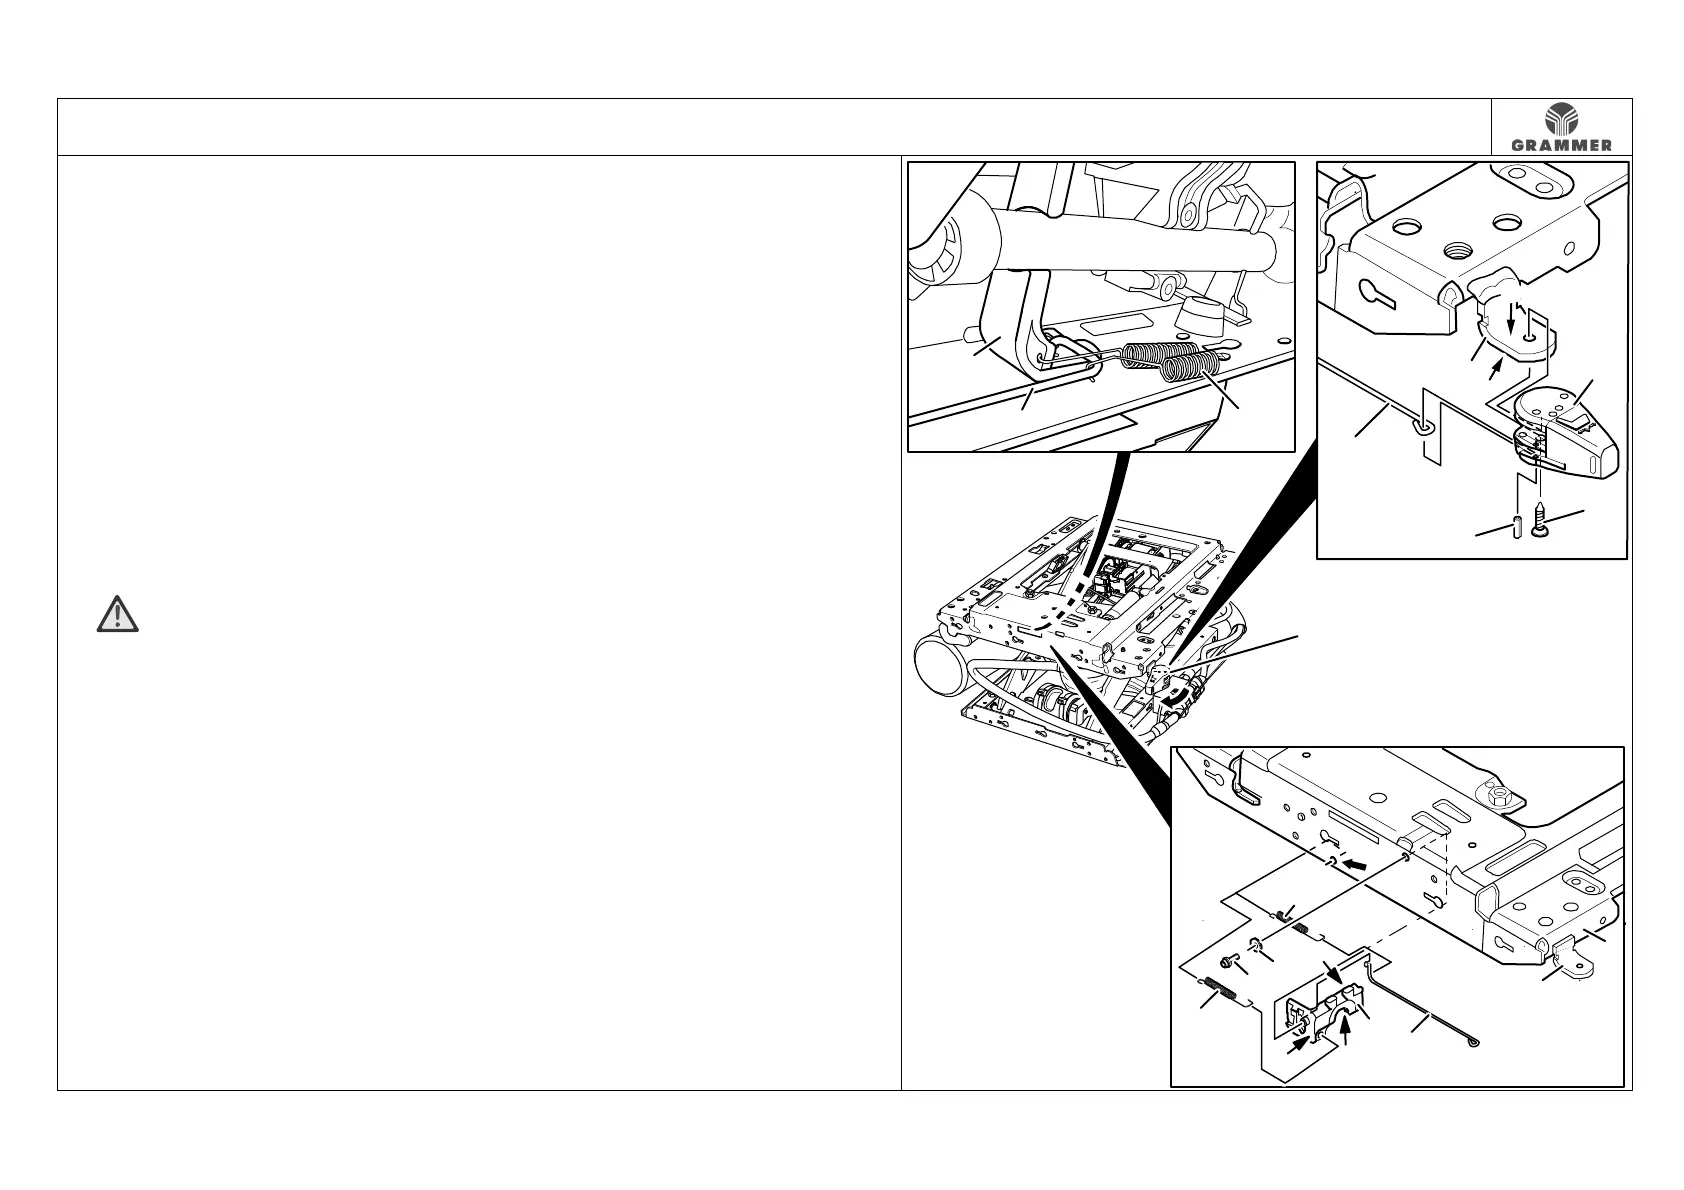
3.5 Locking mechanism for fore/aft isolator – removal and installation
Page 1 of 2
Removal and installation
1 Remove the upper seat part at the seat
suspension and put it aside (see
Chapter 3.1).
Notes:
• Cable ties at cable harness for upper
seat part need not be removed and the
electrical connection need not be
disconnected.
• Do not overstretch the cable harness
for the upper seat part when putting it
aside.
2 Detach the bellows at the front and on
the left of the upper suspension part
(see Chapter 3.3) and press it down.
3 WARNING Risk of crushing!
Move the seat suspension to the
highest position and secure at the back
between the swinging structure and the
lower suspension part by means of
suitable spacers.
4 Turn the handle for the fore/aft isolator
(9) forwards.
5 Unscrew the rounded head screw (10).
Installation note:
Rounded head screw (10), 2.5 Nm.
6 Mark the drill hole for the clamping
sleeve (11) and drive out the clamping
sleeve (11).
Installation note:
Install the clamping sleeve (11)
according to the marking.
7 Carefully pull off the linkage rod (3) at
the handle for the fore/aft isolator (9).
8 Remove the handle of the fore/aft
isolator (9) at the L-bar (2).
Installation note:
Apply acid-free multi-purpose lubricant
to the L-bar (2) in the rotary motion
area (F).
9 Mark the drill hole (arrow) for hanging
in the tension springs (5, 8) and hang
out the tension spring (8) at the upper
suspension part (1) and the linkage rod
(3).
Installation note:
Hang in the tension spring (8)
according to the marking.
10 Detach the linkage rod (3) at the stop
lever (4).
6
5
8
3
2
4
7
F
F
F
1
8
3
4
3
9
11
10
2
F
F
9
2861