Repair manual GRAMMER seat suspension MSG95EAC – November 2012
Material no. 1 277 338
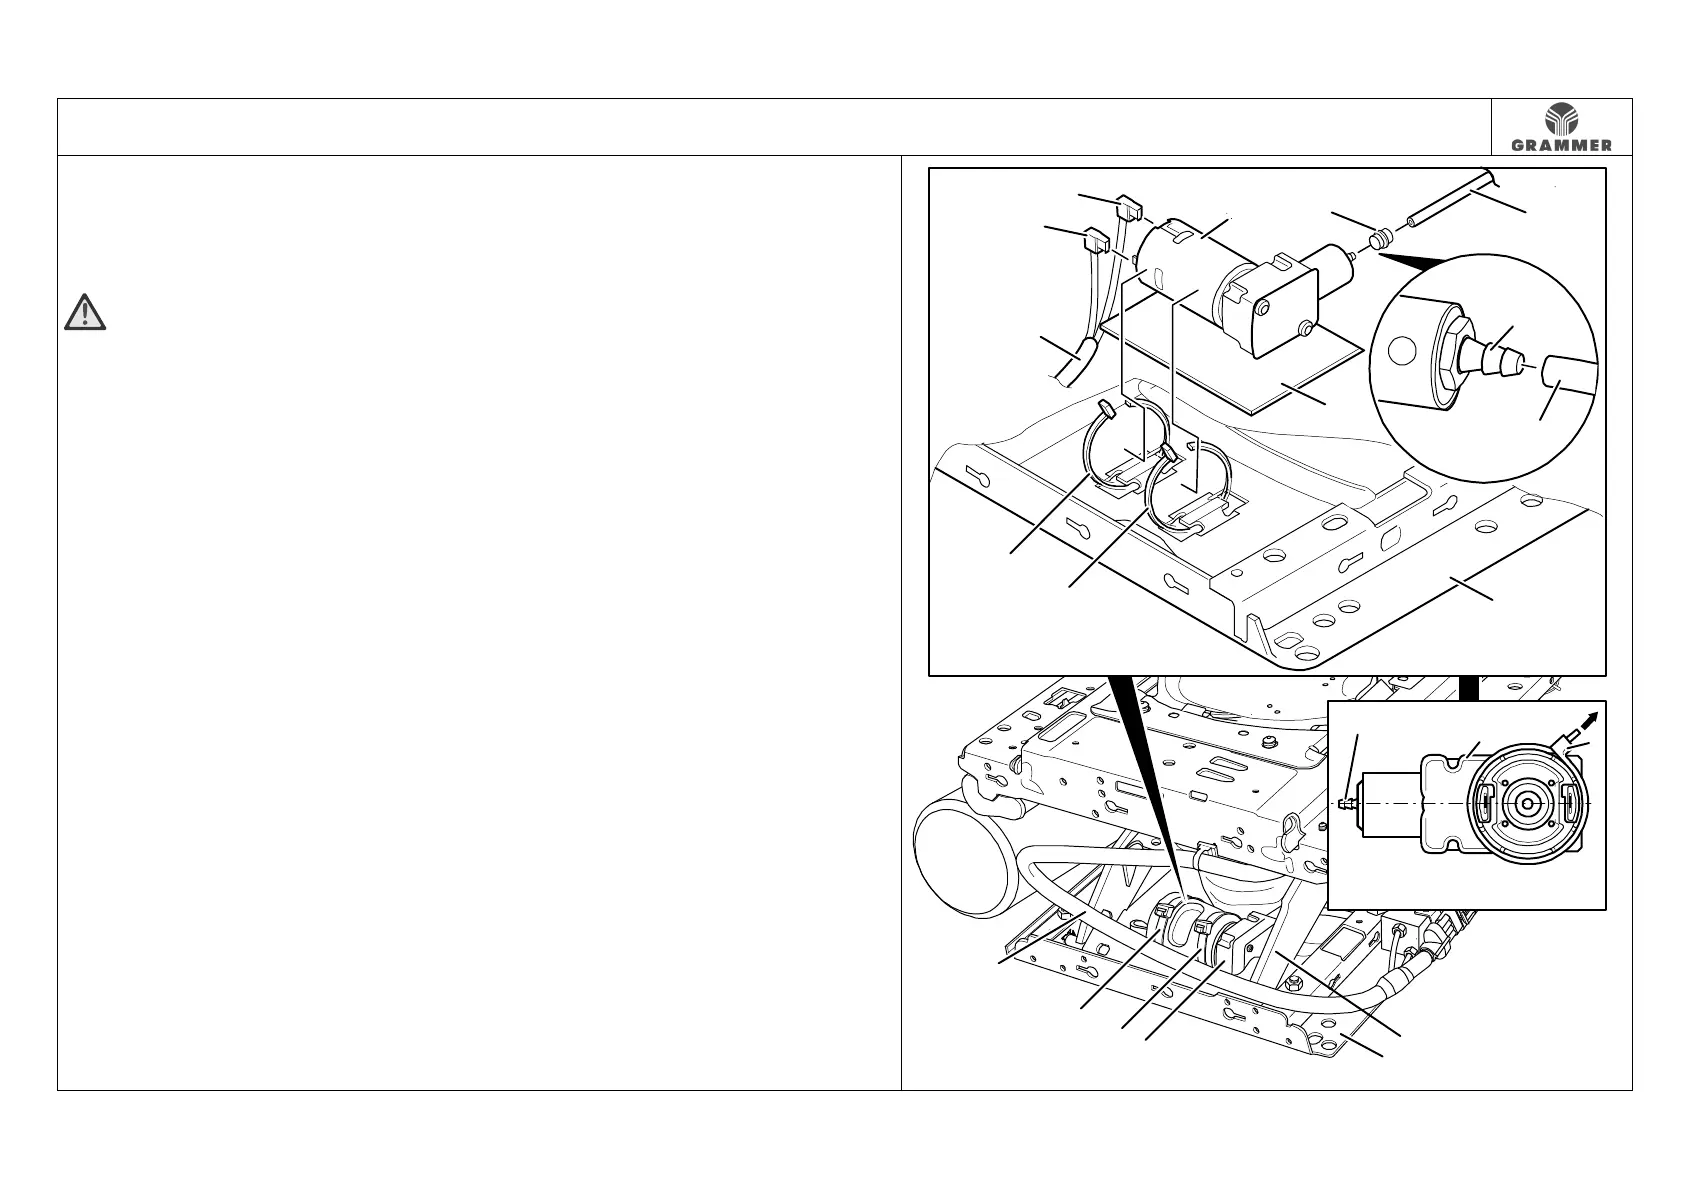
3.8 Compressor – removal and installation
Page 2 of 2
7 Pull off the hose nozzle (2) at the
connection (10) of the compressor (1)
and push it backwards at the air hose
(3).
ATTENTION Do not damage the
connection (10) at the compressor (1)!
Do not use a screwdriver or similar tools to
lift off the air hose (3) at the connection
(10) of the compressor (1).
8 Cut off the air hose (3) with a sharp
knife in a clean and straight way
directly behind the connection (10) of
the compressor (1).
Notes:
• The air hose (3) can be cut off only
once.
• After cutting off, mark the air hose (3)
in order not to cut it several times.
Installation note:
Push the air hose (3) completely onto
the connection (10) of the compressor
(1).
9 Pull off the hose nozzle (2) at the air
hose (3).
10 Remove the compressor (1) in
forward direction and remove the rest
of the hose at the connection (10).
11 Remove the washer (4) from the
lower suspension part (5).
Installation note:
Place the pad (4) between the lower
part of the suspension (5) and the
compressor (1) in such a way that
the compressor (1) cannot come into
contact with the lower part of the
suspension (5).
12 Re-install the components in the
reverse order of their removal.
2864
1
8
6
6
4
7
5
8
2
3
3
1
2
1
6
1
5
6
6
7
9
1
10
10