Repair manual GRAMMER seat suspension MSG95EAC – November 2012
Material no. 1 277 338
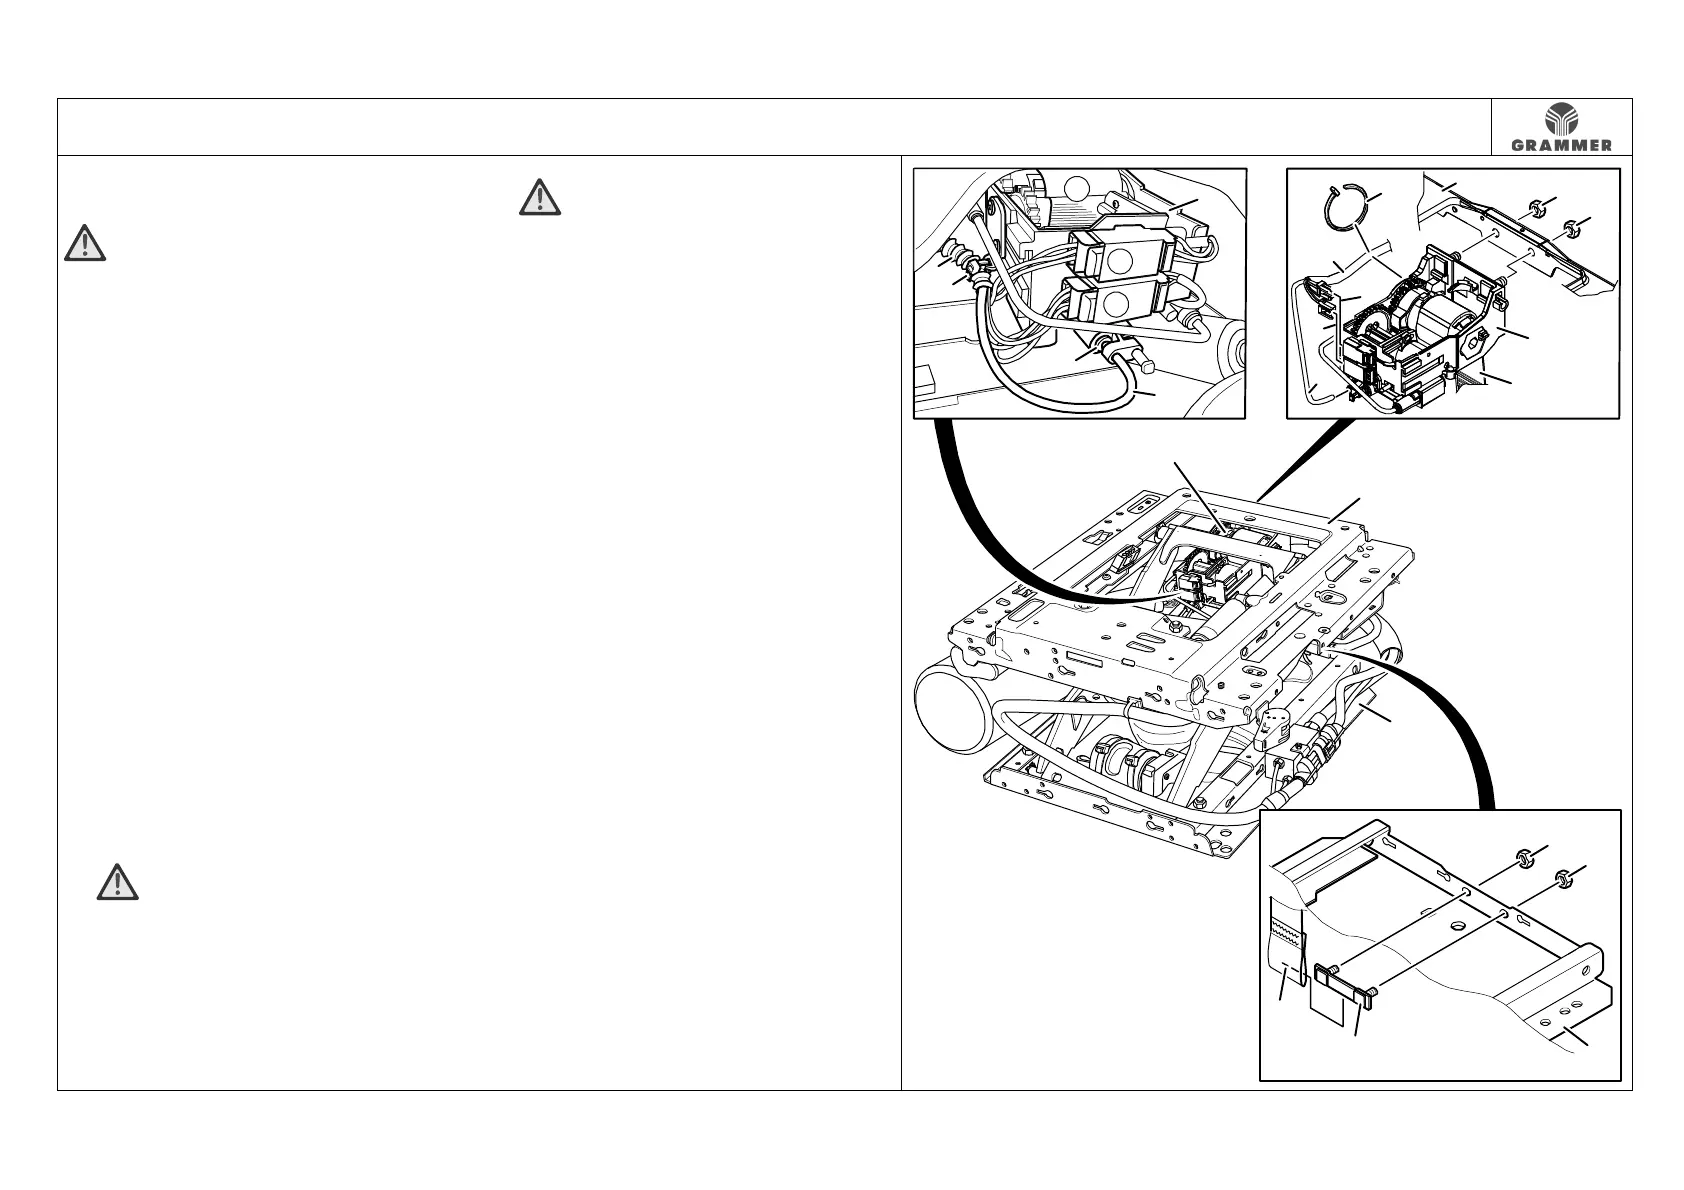
3.9 Sensor module – removal and installation
Page 1 of 2
Removal and installation
ATTENTION Leak test!
Hydraulic test of the seat suspension
should be performed upon installation of
the sensor module (1). To do this, apply a
60 kg load to the seat suspension for 24
hours. The lowering within this time must
not exceed 15 mm.
1 Remove the upper seat part at the seat
suspension and put it aside (see
Chapter 3.1).
Notes:
● Cable ties at cable harness for upper
seat part need not be removed and the
electrical connections need not be
disconnected.
● Do not overstretch the cable harness
for the upper seat part when putting it
aside.
2 Remove the top cover (Chap. 3.2).
3 Remove the bellows at the upper
suspension part (see Chapter 3.3) and
press it down.
4 WARNING Risk of crushing!
Move the seat suspension to the
highest position and secure at the back
between the swinging structure and the
lower suspension part by means of
suitable spacers.
5 WARNING The pressure in the
pneumatic system may cause injury!
Vent the pneumatic system before
removing the sensor module (1).
6 Unscrew two hexagon nuts (9).
Installation notes:
• Hexagon nut (9), 25 Nm.
• Make sure not to squeeze the
webbing (8) when tightening the
hexagon nuts (9).
7 Pull out the plate (10) at the lower
suspension part (3) while holding the
webbing (8) in position and slowly
guiding it upwards to the sensor
module (1).
8 Pull out the plate (10) at the webbing
(8).
9 Push the retaining ring (11) of the quick
coupling toward the sensor module and
pull out the air hose (7) from the quick
coupling. Installation note:
Completely push the air hose (7) with
pressure into the quick coupling.
10 Check the air hose (7) for damage
(scoring).
2865
10
8
3
9
9
7
11
5
6
1
8
A
B
4
4
7
B
8
1
5
2
6
A
1
2
3