Repair manual GRAMMER seat suspension MSG95EAC – November 2012
Material no. 1 277 338
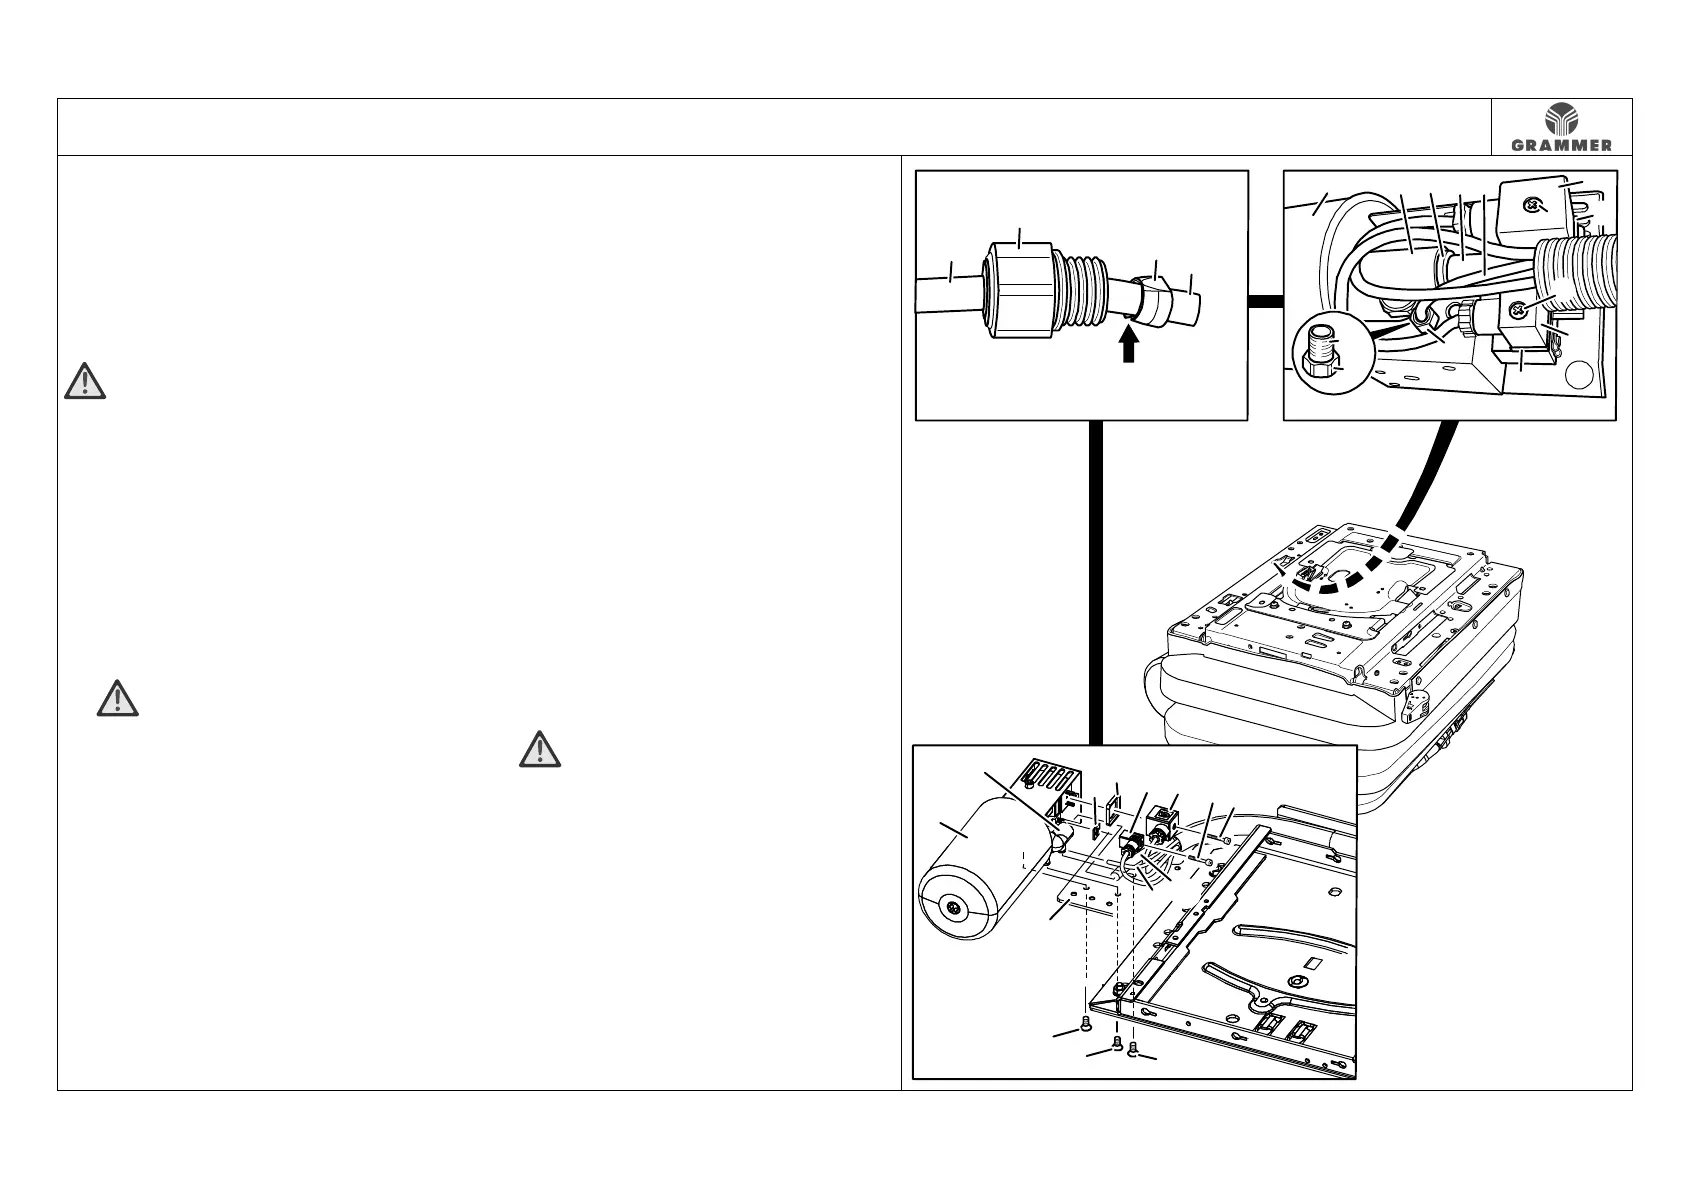
3.13 Active module – removal and installation
Page 1 of 2
Removal and installation
Note:
For the removal and installation of the
active module at the vehicle, ask the
vehicle manufacturer for the necessary
assembly work to be carried out.
ATTENTION Leak test!
Perform a hydraulic test of the seat
suspension upon installation of the active
module (1). To do this, apply a 60 kg load
to the seat suspension for 24 hours. The
lowering within this time must not exceed
15 mm.
1 Remove the active module (1) in the
driving cab (see vehicle manufacturer’s
manual).
2 WARNING The pressure in the
pneumatic system may cause injury!
Vent the pneumatic system before
removing the active module (1).
3 Mark the screw positioning diagram at
the adapter plate (2) and unscrew
three countersunk screws (3) at the
active module (1).
Installation notes:
• Countersunk screw (3), 10 Nm.
• Screw the active module (1) tightly
onto the adapter plate (2) according to
the marking.
4 Unscrew two rounded head screws (9).
Installation note:
Rounded head screw (9), 0.4 Nm.
5 Disconnect the electrical connection
between the connector plug (8) and the
active module (1) and remove the seal
(5).
6 Disconnect the electrical connection
between the connector plug (7) and the
active module (1) and remove the seal
(6).
7 Press the circlip (12) back at the elbow
(4) and pull the air hose (10) out of the
elbow (4).
Installation note:
Insert the air hose (10) into the circlip
(12) of the elbow (4) as far as possible.
8 Unscrew the quick-release fastener
screw (13).
9 ATTENTION Damage!
Take care not to damage the air hose
(11).
Bend open the retaining ring (14) at the
opening (arrow) and pull it off at the air
hose (11).
2869
11
11
13
14
9
5
9
11101241
8
15
13
13
6
7
2
11
3
3
9
9
8
7
6
5
1
4
3
10
2