Repair manual GRAMMER seat suspension MSG95EAC – November 2012
Material no. 1 277 338
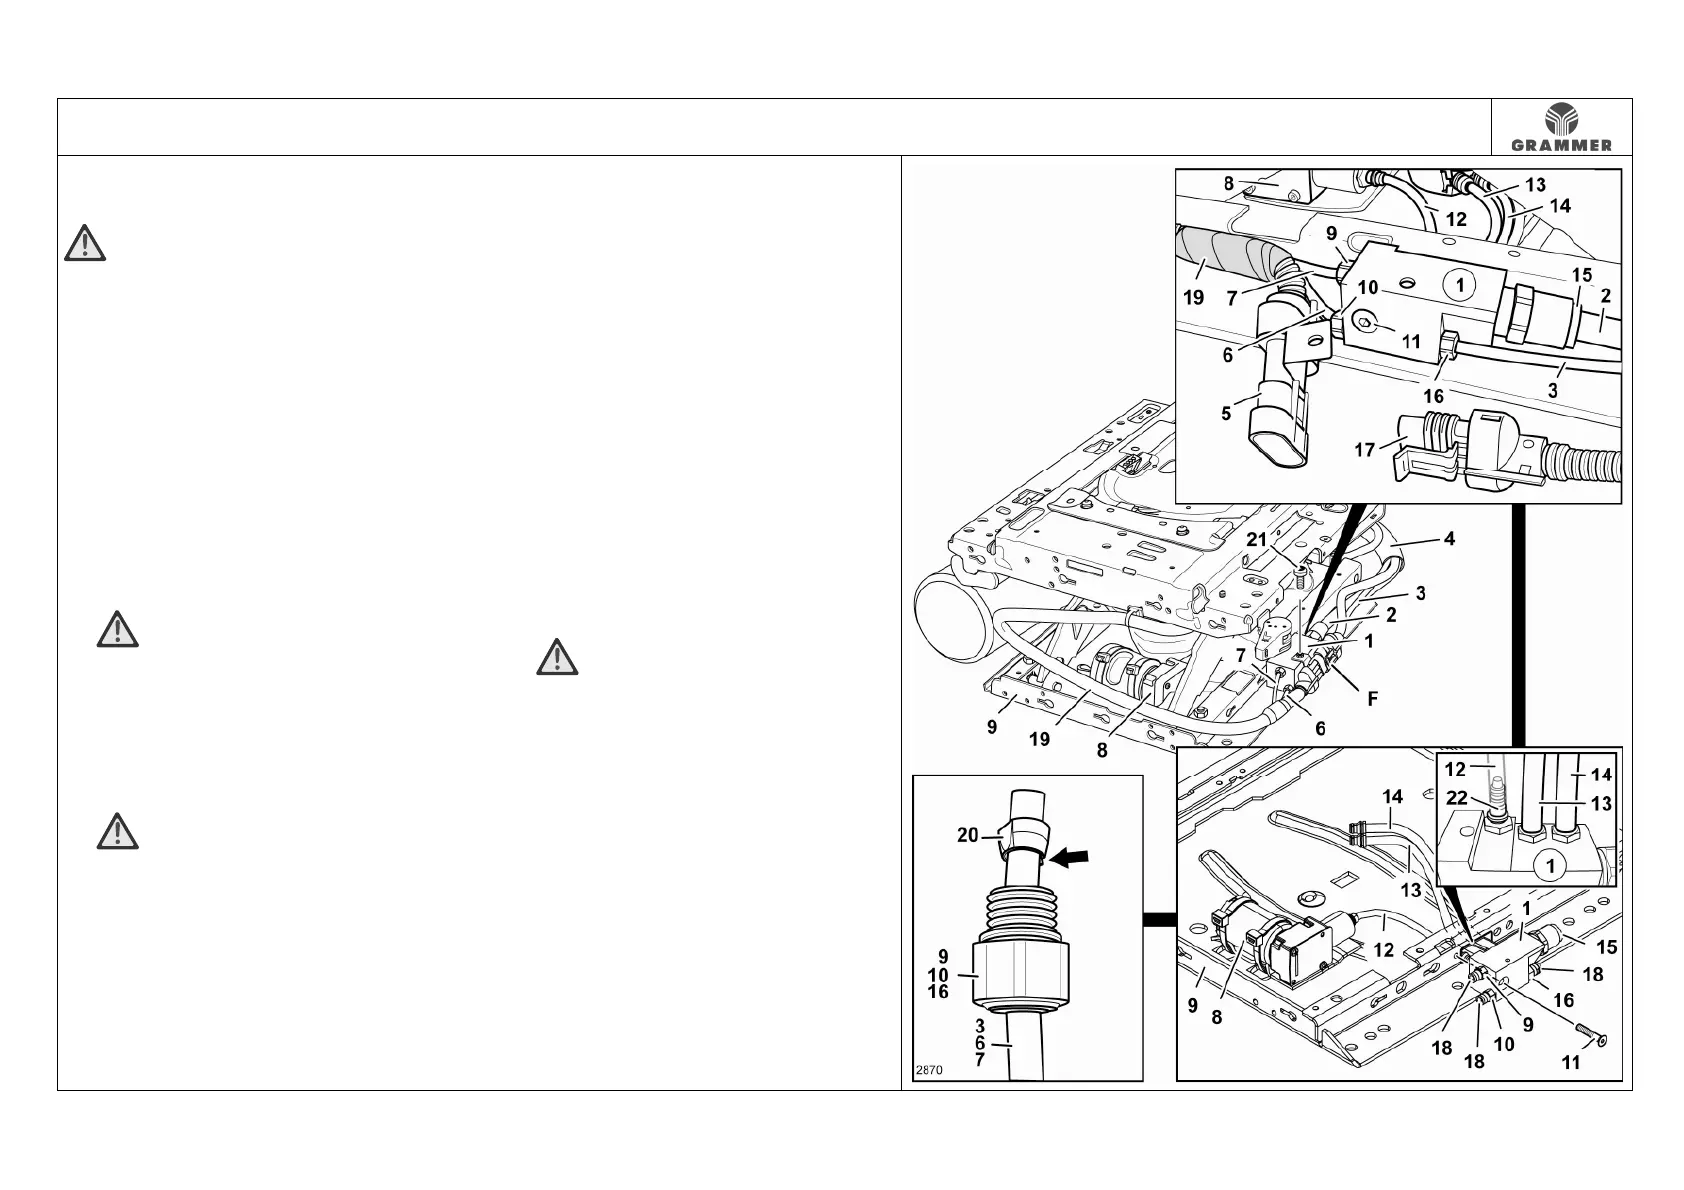
3.14 Air distributor – removal and installation
Page 1 of 2
Removal and installation
ATTENTION Leak test!
Perform a hydraulic test of the seat
suspension upon installation of the air
distributor (1). To do this, apply a 60 kg
load to the seat suspension for 24 hours.
The lowering within this time must not
exceed 15 mm.
1 Remove the seat (see Chapter 3.1).
2 Remove the bellows at the lower
suspension part (see Chapter 3.3),
push it upwards and fix it in this
position.
3 WARNING Risk of crushing!
Move the seat suspension to the
highest position and secure at the back
between the swinging structure and the
lower suspension part by means of
suitable spacers.
4 WARNING The pressure in the
pneumatic system may cause injury!
Vent the pneumatic system before
removing the air distributor (1).
5 Remove the air hose (12) from the
compressor (8) (see Chapter 3.8).
6 Remove the air hoses (13 and 14) from
the air spring (see Chapter 3.10).
7 Disconnect the electrical connection
between socket (17) and plug (5).
8 Remove the screw (21) from the air
distributor (1) and remove the plug (5)
from the air distributor (1).
Installation note:
Screws (20), 3.5 ± 0.5 Nm
9 Unscrew countersunk screw (11).
Installation note:
Countersunk screw (13), 10 ± 2 Nm
10 Mark three quick-release fastener
screws (9, 10, 16) and unscrew them
from the air distributor (1).
11 ATTENTION Damage!
Take care not to damage the air
hoses (3, 6, 7).
Bend open the retaining ring (20) at
the opening (arrow) and pull it off the
air hoses (3, 6, 7).