10
Plumbing Systems
7. PLACE the end of the Suction Line into a container
of RV antifreeze.
8. TURN the Winterize Valve to the OPEN position.
◦ As shown on page 23.
9. Turn ON the 12-volt Water Pump.
10. OPEN the * hot water line at each faucet.
(Kitchen, Lavatory, Shower, & Outside Faucet/Spray Port)
◦ CLOSE each * hot water line faucet when
RV antifreeze begins to flow continuously.
11. REPEAT Step 10 with the * cold water lines on
all faucets. It is also important to run RV antifreeze
through the Toilet and the Sink/Shower Drains.
12. Turn OFF the 12-volt Water Pump.
When you are done adding RV antifreeze
13. REMOVE the Suction Line from the container
of RV antifreeze.
14. REPLACE the cap on the end of Suction Line.
15. BLOW OUT the black tank flush line at the outside
connection with compressed air (max 70 PSI).
16. To prevent staining, CLEAN any RV antifreeze from the
sinks, shower (or tub), and toilet using a soft, dry cloth.
17. OPEN then CLOSE kitchen hot water faucet
to release pressure in water line.
18. REMOVE the water heater drain plug and allow
RV antifreeze to drain.
19. DO NOT replace drain plug / SAVE drain plug for re-use.
DO NOT USE YOUR WATER HEATER WHILE THE SYSTEM
IS WINTERIZED. Heating when filled with antifreeze (or while
drained) may cause unwarrantable damage to the water heater
and/or other components of the plumbing system.
Next Season:
• Thoroughly FLUSH the water heater and system with clean
drinking water through the hot and cold side before using.
• FILL water heater at City Water Connection & DRAIN
several times. See draining steps 17-19 (above).
• SANITIZE the water system per the recommendations
of your coach manufacturer. See page 20.
It is important
to read all
instructions &
understand each
step before you begin the
winterization process. It
may be easier to winterize
the RV with a second
person to assist you.
If you still have questions
or concerns, contact your
dealer for assistance.
Before you begin
Winterizing:
If you have installed
an aftermarket Water Filter,
make sure that it is set to
the
bypassbypass position.
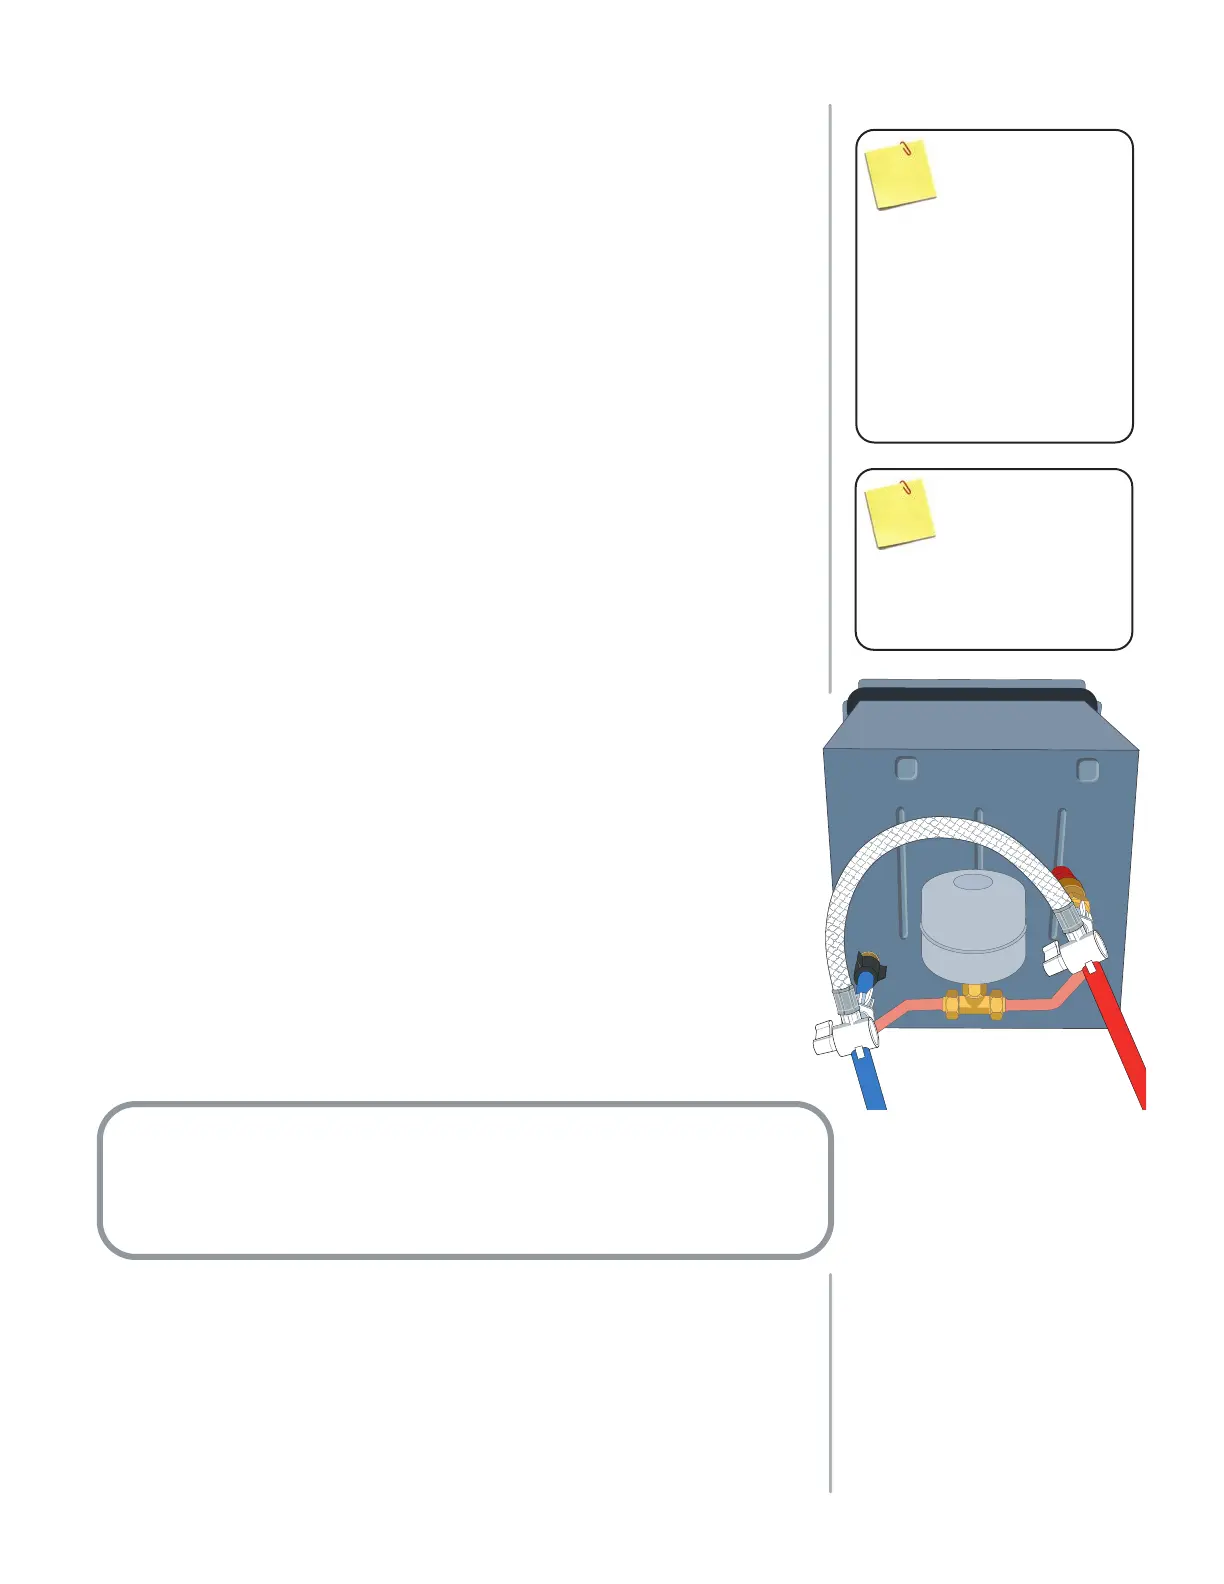
KEEP the Tankless
Water Heater
Bypass Valves in
the Normal Position
(Bypass Valve Handles
Turned Towards
The Water Heater)
 Loading...