4. Operation of PHMP / -4PHMP
4.1 Connect the external power supply unit to a grounded power socket and set the power switch
located on the rear panel of the unit to position I ("ON").
4.2 The display will turn on with the upper line (Set) showing time, speed and temperature set
earlier and the lower line (Actual) showing current readings of the same parameters
(thermoblock temperature °C, which automatically starts rising according to the temperature
set in the upper line). The time of temperature stabilisation depends on the initial temperature.
Setting the parameters
Use the readings in the upper line of the display (Set), while setting the necessary parameters.
Setting time (TIME)
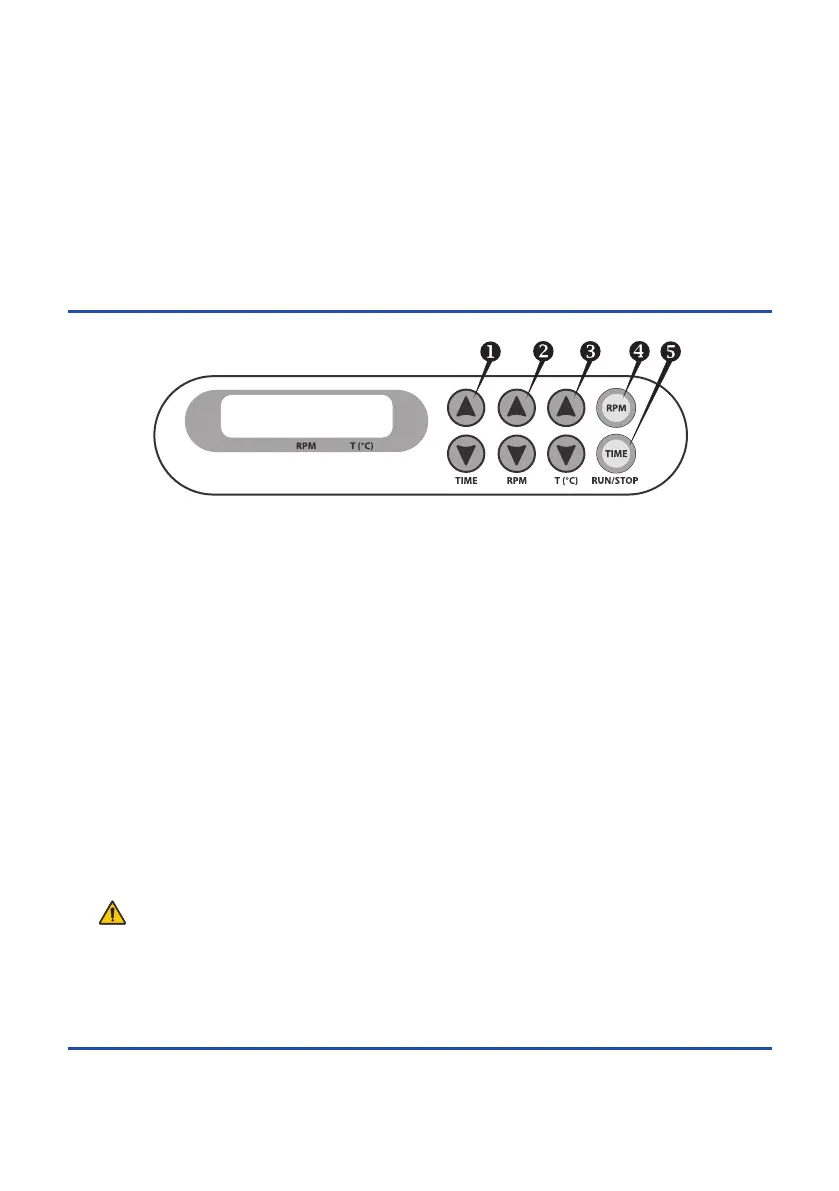
4.3 Using the p and q keys (Fig. 1/u) set the required working time interval in hours and minutes
(increment - 1 min). Pressing the key for more than 3 s will increase the increment.
Setting speed (RPM)
4.4 Using the p and q keys (Fig. 1/v) set the required speed (increment 10 RPM). Pressing the
key for more than 3 s will increase the increment.
Setting temperature (T,ºC)
4.5 Using the p and q keys (Fig. 1/w) set the necessary temperature (increment 0.1ºC).
Pressing the key for more than 3 s will increase the increment.
Caution! The platform heating can be turned off only by setting the required temperature
below 25°C (the display will show OFF – T,ºC – set point). It can be used in cold
rooms as a mixing device without thermal regulation in this mode.
While the platform is not shaking (STOP indication on the display), press Time RUN/STOP
key and hold for 8s to enter lid temperature mode (LID indication on the display). Press RPM
RUN/STOP key to exit the mode.
Page 7
Thermo shaker PHMP/PHMP-4
Operating instructions
Set
Actual
hr : min
Thermo-Shaker
00:00 1000 35.0
STOP 0000 35.0
Fig. 1 Control panel
Version 3.01 - May 2015