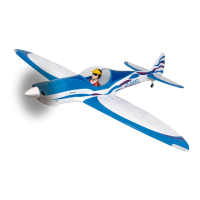
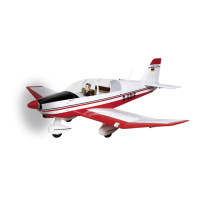
10
The tailplane and fin can now be glued to the fuselage, using UHU coll (white glue) or - better - UHU
plus endfest 300. Align the parts again as described at the start of this section. It is important that the
fin is at right-angles to the tailplane; this can be checked using a setsquare. This stage of the model’s
construction is concluded by fitting the in-fill piece to seal the tailplane slot (see pictures above).
Installing the elevator and rudder horns
Attach the three-point horns to the elevators and rudder using the spreader plates and pan-head
screws supplied, as described for the ailerons. The clevis linkage holes in the horns must line up
correctly with the hinge pivot line. Drill holes in the control surfaces for the horn retaining screws.
When the horns are in place, snip off the excess screw length at the spreader plates and file the
screws back flush with the plates.
When the three-point horns are securely fixed, screw the clevises for the elevators and rudder about
half-way onto the threaded shank of the 2 mm Ø steel pushrods.
Each elevator panel is actuated by its own servo, but the pushrods are crossed over inside the
fuselage, i.e. the pushrod for the left-hand elevator panel should be slipped through the slot in the
fuselage on that side, but connected to the right-hand servo in the fuselage. In the same way the right-
hand elevator panel is actuated by the left-hand servo. This method produces direct, free-moving
linkages. The rudder is operated by the centrally located servo.
Installing the tailwheel unit
The tailwheel unit should be fixed to the fuselage using two pan-head self-tapping screws, as shown in
the photo below.
Important: the rudder hinge axis must line up exactly with the pivot axis of the tailwheel unit. Fit the
driver pin into the U-shaped plastic guide. Attach the guide to the rudder using a pan-head self-tapping
screw (drill a pilot-hole for the screw first), then cut off the projecting end of the driver pin.
Installing the servos in the fuselage
Press the rubber grommets into the servo mounting lugs. Push the brass tubular rivets into the rubber
grommets from the underside, so that the flange is at the bottom. You may find it easier to insert the
tubular rivets if you fit them on a small screwdriver first.
Place the servos in the openings in the servo mounting plate, and drill 1.5 mm Ø pilot-holes for the
retaining screws. Fix the servos to the plate using the screws supplied with the servos, as described
for the aileron servos.
The output levers can now be fitted, after checking that the servos are at centre (neutral). Connect the
M2.5 clevises to the output arms (third hole). The steel pushrod must fit into the clevis to a depth of at
least 10 mm. Cut the rudder and elevator pushrods to length. Check once more that the servos, the
elevators and the rudder are at neutral, then solder the M2.5 clevises permanently to the pushrods.
Installing the switch in the fuselage
We recommend that you install a remote switch actuator. The first step is to drill a 1.8 mm Ø hole in
the switch slider.
Adjust the opening in the servo plate to accept the switch you wish to use, and install the unit using
the screws supplied with it.
Ensure that the switch is orientated in such a way that it is “OFF” when the actuating pushrod is
pushed in, towards the fuselage.
Drill a 2 mm Ø hole in the fuselage side, in line with the switch slider, and fit an M2-threaded pushrod
(not supplied in the kit) through it. Screw the rod into the hole in the switch slider. With the switch at
the “OFF” position, cut the rod off at a point about 10 mm outside the fuselage. Use a felt-tip pen to
mark the point where the rod exits the fuselage. Pull the pushrod out (switch to “ON” position), and
bend the rod at right-angles at the marked point.
Provided that you install the switch exactly as described, the receiving system will always be “OFF”
when the pushrod is pushed in - even accidentally.
Installing the glow motor and silencer
Before you install the motor you have to cut openings in the cowl to clear the cylinder head and needle
valve.
These instructions describe the installation of the OS MAX FS 91 II, but the procedure is exactly the
same with all the other motors which are recommended for this model.
Place the motor on the motor mount, with the mounting flanges positioned squarely on the arms.

 Loading...