10. Using the charger for the fi rst time
Connect the charger’s 100 - 240 V AC input to a mains wall socket, or connect the charger’s DC input to a 12 V car battery or an 11…15 V DC mains
PSU with a capacity of at least 12 A.
WARNING: Never connect both inputs at the same time!
The charger plays a welcome melody and shows the last selected battery memory in the display.
The ULTRA QUICK 70 is now ready for use. The charger is controlled using four buttons.
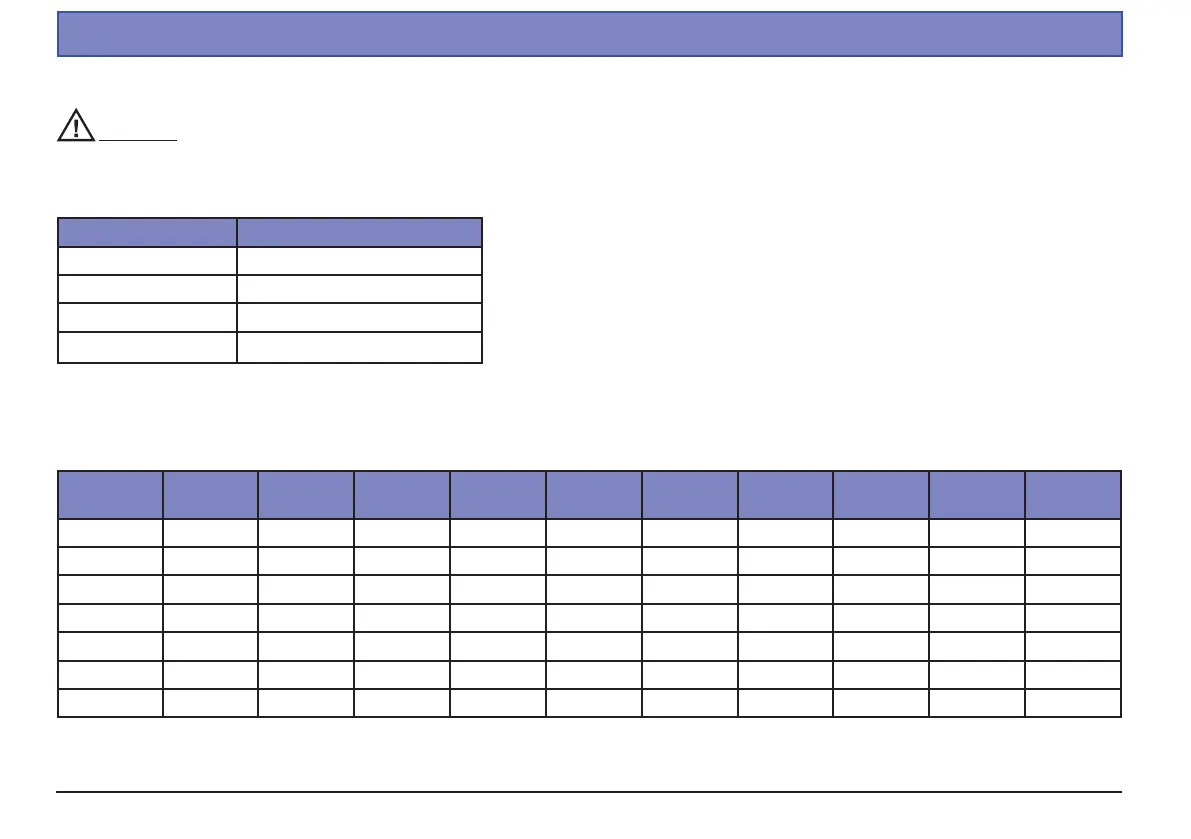
Button Description
CHANGE / START selection / start charging process
(+) INC up / increase value
(-) DEC down / decrease value
MODE
next
First press the CHANGE button and or to select a suitable battery memory (see table). If you have not yet programmed a suitable battery memory,
press the button to move to the BATT -SETUP- screen (see Fig. 11), and set up the battery memory to suit your requirements: press CHANGE to select
the desired parameter, which then starts fl ashing. The parameter can now be adjusted using the or button; press CHANGE again to save the new
values, and the fl ashing ceases. You can switch between all the parameters to be changed using the or button.
Memory
NO.
0123456789
Battery type NiMH NiMH NiMH RTU NiMH RTU LiFe LiPo LiPo LiPo LiPo LiIon
CELLS 6 6 8 4 2 2 2 2 3 2
Capacity 4200 mAh 3600 mAh 2000 mAh 2000 mAh 1800 mAh 6800 mAh 3000 mAh 1500 mAh 4000 mAh 1500 mAh
Current 6 A 4 A 2 A 2 A 1.8 A 6 A 3 A 1.5 A 4 A 1.5 A
Safety time 60 45 60 60 120 120 120 120 120 120
Delta peak 8 mV/C 8 mV/C 5 mV/C 5 mV/C x x x x x x
Trickle auto auto auto auto x x x x x x
Note: it is only possible to program the currently active memory.
32
Manual ULTRA QUICK 70