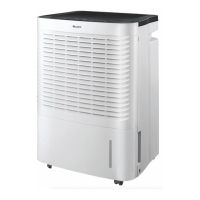
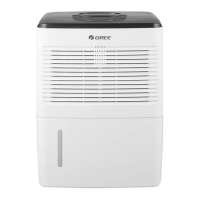
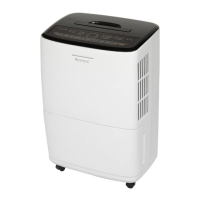
This document is an owner's manual for a GREE dehumidifier, specifically models GDN50AP-A3EBA1A and GDN70AP-A3EBA1B.
Function Description
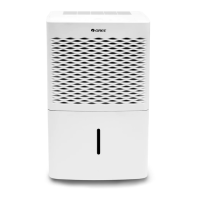
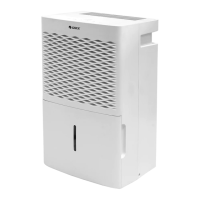
The GREE dehumidifier is designed for indoor residential applications to reduce humidity levels in a given space. It extracts moisture from the air, helping to prevent mold, mildew, and other humidity-related issues. The unit features various operating modes and settings to customize dehumidification based on user needs and environmental conditions. It is equipped with a water bucket for manual drainage and also supports continuous drainage via a hose.
Important Technical Specifications
- Models: GDN50AP-A3EBA1A, GDN70AP-A3EBA1B
- Operating Temperature Range: The dehumidifier should be placed in an area where the temperature will not go below 5°C or above 32°C. Operation outside this range may affect performance or trigger automatic defrosting.
- Timing Range: 0.5 to 24 hours for Timer On/Off functions.
- Humidity Setting Range: 35% to 80%, adjustable in 5% increments.
- Drain Hose (for continuous drainage): The hose thread should have an outer diameter of 11/16 inches (1.0625 inches or 27.0mm) and a pitch of 11.5 TPI. The hose is not provided with the unit.
Usage Features
The dehumidifier is designed for user-friendly operation with a control panel featuring several buttons and indicator lights.
Unit Placement:
- Intended for indoor residential use only; not for commercial or industrial applications.
- Must be placed on a smooth and level floor.
- Requires at least 30-45 cm of air space on all sides for optimal performance.
- Doors, windows, and other openings in the room should be closed to improve efficiency.
- Air inlet/outlet must be kept clean and unobstructed.
- Not suitable for use in bathrooms.
- Avoid direct sunlight.
- Equipped with rollers for easy placement, but avoid rolling on carpet or over objects to prevent water spills or the unit getting stuck.
Control Panel Buttons:
- POWER Button: Turns the dehumidifier on or off.
- HUMIDITY % (△/▽) Buttons: In free drying mode, these buttons adjust the desired humidity level between 35% and 80% in 5% increments. When setting Timer On or Timer Off, they adjust the time. Holding both simultaneously for 3 seconds locks/unlocks the buttons.
- FAN SPEED Button: Cycles through High, Medium, and Low fan speeds.
- TIMER Button: Sets Timer On or Timer Off, with a timing range of 0.5 to 24 hours. Time adjustments are in 0.5h increments for times within 10h, and 1h increments for times from 10h to 24h.
- MODE Button: Selects running modes: free drying, sleeping space, living space, basement, and continuous drying.
- CONTINUOUS Button: Sets the unit for continuous dehumidification. A drain hose must be installed for this mode, otherwise, the unit will stop when the water bucket is full.
- FILTER Button: Turns off the Filter Cleaning Indicator after cleaning.
Indicator Lights:
- Power On Indicator Light: Illuminates when the unit is on.
- Timer On Indicator Light: Illuminates when the timer function is active.
- Clean Filter Indicator Light: Lights up after 250 hours of operation to remind the user to clean the filter.
- Lock On Indicator Light: Illuminates when buttons are locked.
- High, Med, Low Fan Indicator Lights: Show the currently selected fan speed.
- Sleeping Space, Living Space, Basement Mode Indicator Lights: Indicate the active operating mode.
- Bucket Full Light: Indicates the water bucket is full, needs to be emptied, or is not in the proper place.
- Continuous Operation Indicator Light: Illuminates when continuous drying mode is active.
Other Instructions:
- Alarm Warning: A buzzer will sound for 10 seconds if the bucket is full or not locked in place for over 3 minutes.
- Auto Stop: The unit automatically stops when the bucket is full, removed, not placed correctly, or when the humidity is 5% lower than the set humidity.
- Memory Function: Retains control settings in case of power loss and resumes operation with previous settings when power is restored.
- On Light Control: The On light can be turned off or on by pressing "Filter" and "△" together for 3 seconds. It blinks continuously to indicate a full or improperly placed bucket.
Drainage Options:
- Option 1: Emptying Manually:
- Hold handles on both sides of the water bucket and pull it out carefully.
- Empty the bucket by grasping the handle on top and the bottom with the other hand.
- Replace the bucket in the dehumidifier.
- Note: Do not remove the bucket when the unit is in operation or has just stopped to avoid water drips. Do not use the hose if collecting water in the bucket.
- Option 2: Continuous Drainage (using a hose):
- Procure a suitable drain hose (specifications provided above).
- Remove the water bucket.
- Thread the drain hose onto the nozzle and secure it.
- Replace the bucket, ensuring the drain hose passes through the bucket's drain hole and is placed downward into a floor drain. Cover the drain hole with a lid. Ensure the hose is not compressed to allow proper drainage.
- Note: When removing the drain hose, prepare a receptacle to collect any residual water from the nozzle.
Maintenance Features
Regular maintenance ensures optimal performance and longevity of the dehumidifier.
Safety Precautions for Maintenance:
- Always turn off the unit and unplug it before cleaning to avoid electric shock.
- Do not wash the dehumidifier with water.
- Do not use volatile liquids (thinner, gasoline) to clean the unit, as this can damage its appearance.
Cleaning Procedures:
- Grill and Case:
- For dust, use a soft towel.
- For very dirty (greasy) housing, use mild detergent.
- For the grill, use a duster or brush.
- Water Bucket:
- Clean every few weeks to prevent mold, mildew, and bacteria growth.
- Use a soft brush and rinse thoroughly.
- To remove the handle: Pull the rotor shaft on the handle toward the hole of the buckle plate, then pull the buckle plate on the handle side in the direction indicated by the arrow.
- To remove the bucket: Press the 3 buckles down around the water bucket and lift up the drain lid.
- After cleaning, replace the drain lid and handle, ensuring the float is properly placed beneath the drain lid (do not remove foam from the float).
- Air Filter:
- The unit reminds you to clean the filter after 250 hours of operation. Clean more often in dusty environments.
- To remove: Pull the buckles and pull out the filter.
- To clean: Wash in warm, soapy water, rinse, and let it dry before replacing.
- Warning: Do not operate without a filter to prevent dust from affecting the evaporator. Do not dry the filter with heat or an electric hair dryer to avoid misshaping or fire.
Seasonal Checks:
- Before Use-seasonally:
- Check if the air outlet is blocked.
- Verify the power plug and socket are in good condition.
- Ensure the air filter is clean.
- Check if the drain hose is damaged.
- After Use-seasonally (Long-term Storage):
- Disconnect power.
- Clean the air filter and housing.
- Remove dust and obstacles from the dehumidifier.
- Empty the water bucket.
- Ensure the bucket is empty and the drain hose is removed.
- Unplug the dehumidifier and pack the power cord.
- Clean the unit and wrap it well to prevent dust accumulation.
Malfunction Codes and Troubleshooting
The manual provides a troubleshooting guide for common issues and a list of malfunction codes displayed on the unit.
Common Problems and Solutions:
- Dehumidifier not operating/Controls cannot be set: Check operating temperature (must be 5-32°C), ensure bucket is not full, check power supply, and unit placement (level floor).
- Noise suddenly starts: Compressor starting (normal), power supply issue, or unit on uneven floor.
- Humidity does not drop: Area too large, doors/windows open, vapor-producing device in room.
- Little or no effect in dehumidifying: Room temperature too low, humidity level improperly set, or unit is in defrosting mode (normal for temperatures 5-15°C).
- Musty odor when first turned on: Due to increased heat exchanger temperature (normal).
- Unit has noises: Operating on a wooden floor (can cause some noise).
- Swooshing sound: Normal sound of refrigerant flow.
- Water leakage when using drain hose: Examine drainage joint, unblock/reinstall drain hose correctly.
- Bucket full indicator lit up (but not full): Bucket not properly placed, or bucket has been removed.
- Unit functions normally but does not start up: Humidity set too high (lower humidity setting or use continuous mode).
- Dehumidifier does not dry air as intended: Obstacles around unit, dusty/blocked air filter, doors/windows left open, or room temperature too low (unit works best in warm temperatures, above 5°C).
Malfunction Codes:
- F1 (Ambient Temperature Sensor Malfunction): Indicates a loose/poorly connected sensor, a short-circuited display board element, or a damaged sensor/display board. Buttons for compressor, fan, and pump will not work.
- F2 (Tube Temperature Sensor Malfunction): Indicates a loose/poorly connected evaporator sensor, a short-circuited display board element, or a damaged sensor/display board.
- L1 (Humidity Sensor Malfunction): Indicates a short-circuited humidity sensor, a damaged humidity sensor, or a damaged display board.
- Limited Warranty: Covered for one (1) year from the date of original purchase in Canada against defects in materials and workmanship for specified residential applications.
- Warranty Service: GREE will repair or replace the unit free of charge within a reasonable time. Proof of purchase is required.
- Exclusions: Damage from accidents, misuse, tampering, failure to follow instructions, wear to finish, filter, unauthorized repairs, and freight costs are not covered.
- Implied Warranties: Limited to one year. GREE disclaims liability for consequential or incidental damages.
- Record Keeping: Users are advised to keep the manual and proof of purchase. Space is provided to record dealer name, address, model number, serial number, and date of purchase for future reference.