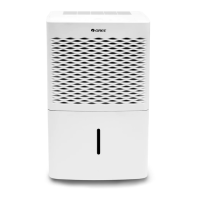
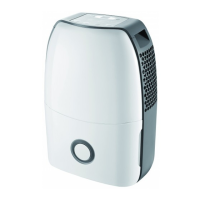
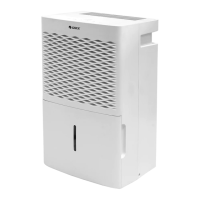
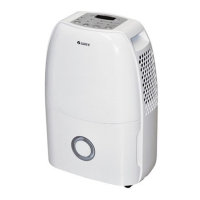
This document is the owner's manual for a Gree dehumidifier, specifically models GDN20AX-K4EBA1A and GDN20AX-K4EBA1B. It provides comprehensive instructions for safe operation, usage, maintenance, and troubleshooting of the appliance.
Function Description
The Gree dehumidifier is designed to reduce humidity levels in indoor environments. It operates by drawing in moist air, removing the excess moisture, and then releasing drier air back into the room. The device is intended for indoor applications only and should not be used for commercial or industrial purposes. It features a memory function, which means that in the event of a power failure, all previous settings are memorized, and the unit will resume operation according to those settings once power is restored. The dehumidifier also includes an auto-stop function that activates when the water bucket is full, removed, or not correctly placed, or when the room humidity drops 5% below the set humidity level.
The dehumidifier offers multiple operating modes to suit different needs:
- Smart Mode: In this mode, the unit intelligently selects a comfortable humidity level based on the current room temperature.
- Continuous Dehumidify Mode (Cont.): The unit will continuously dehumidify until the humidity is decreased to a level that is considered inapplicable for human comfort.
- Quiet Mode: Similar to Smart Mode, the unit selects a comfortable humidity level based on current temperature but operates at the lowest fan speed to minimize noise. The fan speed cannot be adjusted in this mode.
- Dry Mode: This mode is designed for drying clothes and maintaining room humidity within a specific range to prevent mildew. In Dry Mode, neither the fan speed nor the humidity level can be adjusted.
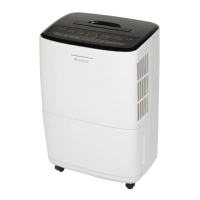
The dehumidifier is equipped with a control panel that includes a display window and various indicator lights for speed, dehumidify mode, timer, bucket full, and filter cleaning.
Usage Features
To ensure proper operation, users must first verify that the float in the water bucket is correctly placed. The manual provides clear steps for checking and adjusting the float's position. The dehumidifier should be placed on a smooth and level floor, in an area where the temperature is between 5°C and 35°C. Adequate space around the unit is required for optimal performance, and all doors, windows, and other outside openings of the room should be closed to enhance its effectiveness. The air inlet and outlet must be kept clean and unobstructed, and direct sunlight should be avoided.
The control panel allows users to:
- Turn On/Off: A dedicated ON/OFF button controls the power to the dehumidifier.
- Set Timer: The Timer button allows setting an on or off timer in 1-hour increments, up to 24 hours. Holding the button increases the time rapidly. Once set, the time is displayed for 5 seconds, and the timer indicator illuminates.
- Adjust Humidity: The Humidity button enables users to set their desired humidity level. Holding the button allows for 10% increments between 30% and 80% humidity. The set humidity is displayed for 5 seconds.
- Select Mode: The Mode button cycles through the four dehumidify modes: Smart, Cont., Quiet, and Dry.
- Adjust Fan Speed: The Fan button allows selection of high, medium, or low fan speeds, with a corresponding indicator light showing the current setting. Note that fan speed cannot be adjusted in Quiet or Dry modes.
The dehumidifier also features a child lock function, activated by pressing the Mode and Timer buttons simultaneously for 1 second. When activated, "LC" is displayed, indicating that the buttons are locked. Pressing the Mode and Timer buttons again for 1 second releases the child lock.
Water drainage can be managed in two ways:
- Water Bucket Drainage: The dehumidifier collects water in a removable bucket. When the bucket is full, the unit automatically stops, and a "Bucket Full" indicator illuminates. Users can easily remove the bucket by holding its handles, pour out the collected water, and then replace it. It's crucial not to remove the bucket while the unit is operating or immediately after it has stopped to prevent water spillage.
- Continuous Drainage: For continuous operation without manual bucket emptying, the unit can be connected to a drain hose. Users need to purchase a drain hose with an inner diameter of 14mm (1.3-1.5m length). The manual provides detailed steps for opening the continuous drain outlet, removing the drain cover and choke plug, and securely attaching a drainage adapter and hose. It emphasizes ensuring the drain hose's horizontal height is not higher than the drain outlet and that it is not blocked, allowing condensate water to drain smoothly into a floor drain.
Maintenance Features
Regular maintenance is essential for the dehumidifier's longevity and efficient operation. Before any cleaning, the unit must be turned off and unplugged to prevent electric shock. Volatile liquids like thinner or gasoline should not be used for cleaning, as they can damage the unit's appearance. The dehumidifier should not be washed directly with water.
Key maintenance tasks include:
- Grille and Case Cleaning: The case can be dusted with a soft towel or cleaned with a mild detergent if it's greasy. The air-in grille can be cleaned with a dust catcher or brush.
- Water Bucket Cleaning: The water bucket should be cleaned every few weeks to prevent mold, mildew, and bacteria growth. This involves removing the bucket, pouring out residual water, pressing down four buckles to lift the drain lid, cleaning with a soft brush, rinsing, and then replacing the drain lid, ensuring the float's foam plastic side is beneath the lid. The foam plastic on the float should not be removed.
- Air Filter Cleaning: The air filter needs regular cleaning. The manual details how to remove the front panel by opening clasps and then pulling up the panel. The air filter itself is removed by pulling its clasps outwards. Dust on the filter surface can be removed with a dust catcher. For very dirty filters, warm water with a neutral detergent can be used, followed by thorough drying. It is crucial not to operate the dehumidifier without a filter, as this can lead to dust accumulation on the evaporator and affect performance. The air filter should not be dried with fire or an electric hair dryer, as this can deform or ignite it. After cleaning, the filter is reinstalled by inserting its lower part into the unit and pressing it downwards until it clicks, then reassembling the panel. A "Filter Clean" indicator light signals when cleaning is needed, and it can be reset by pressing the Fan and Humidity buttons simultaneously.
The manual also outlines checks to perform before the use-season, such as verifying the air outlet is not blocked, the power plug and socket are in good condition, the air filter is clean, and the drain hose is undamaged. For long-time storage, users are advised to empty the water bucket, remove the drain hose, unplug the unit, pack the power cord, clean the unit, and wrap it to prevent dust accumulation.