42
Maintenance
Service Manual
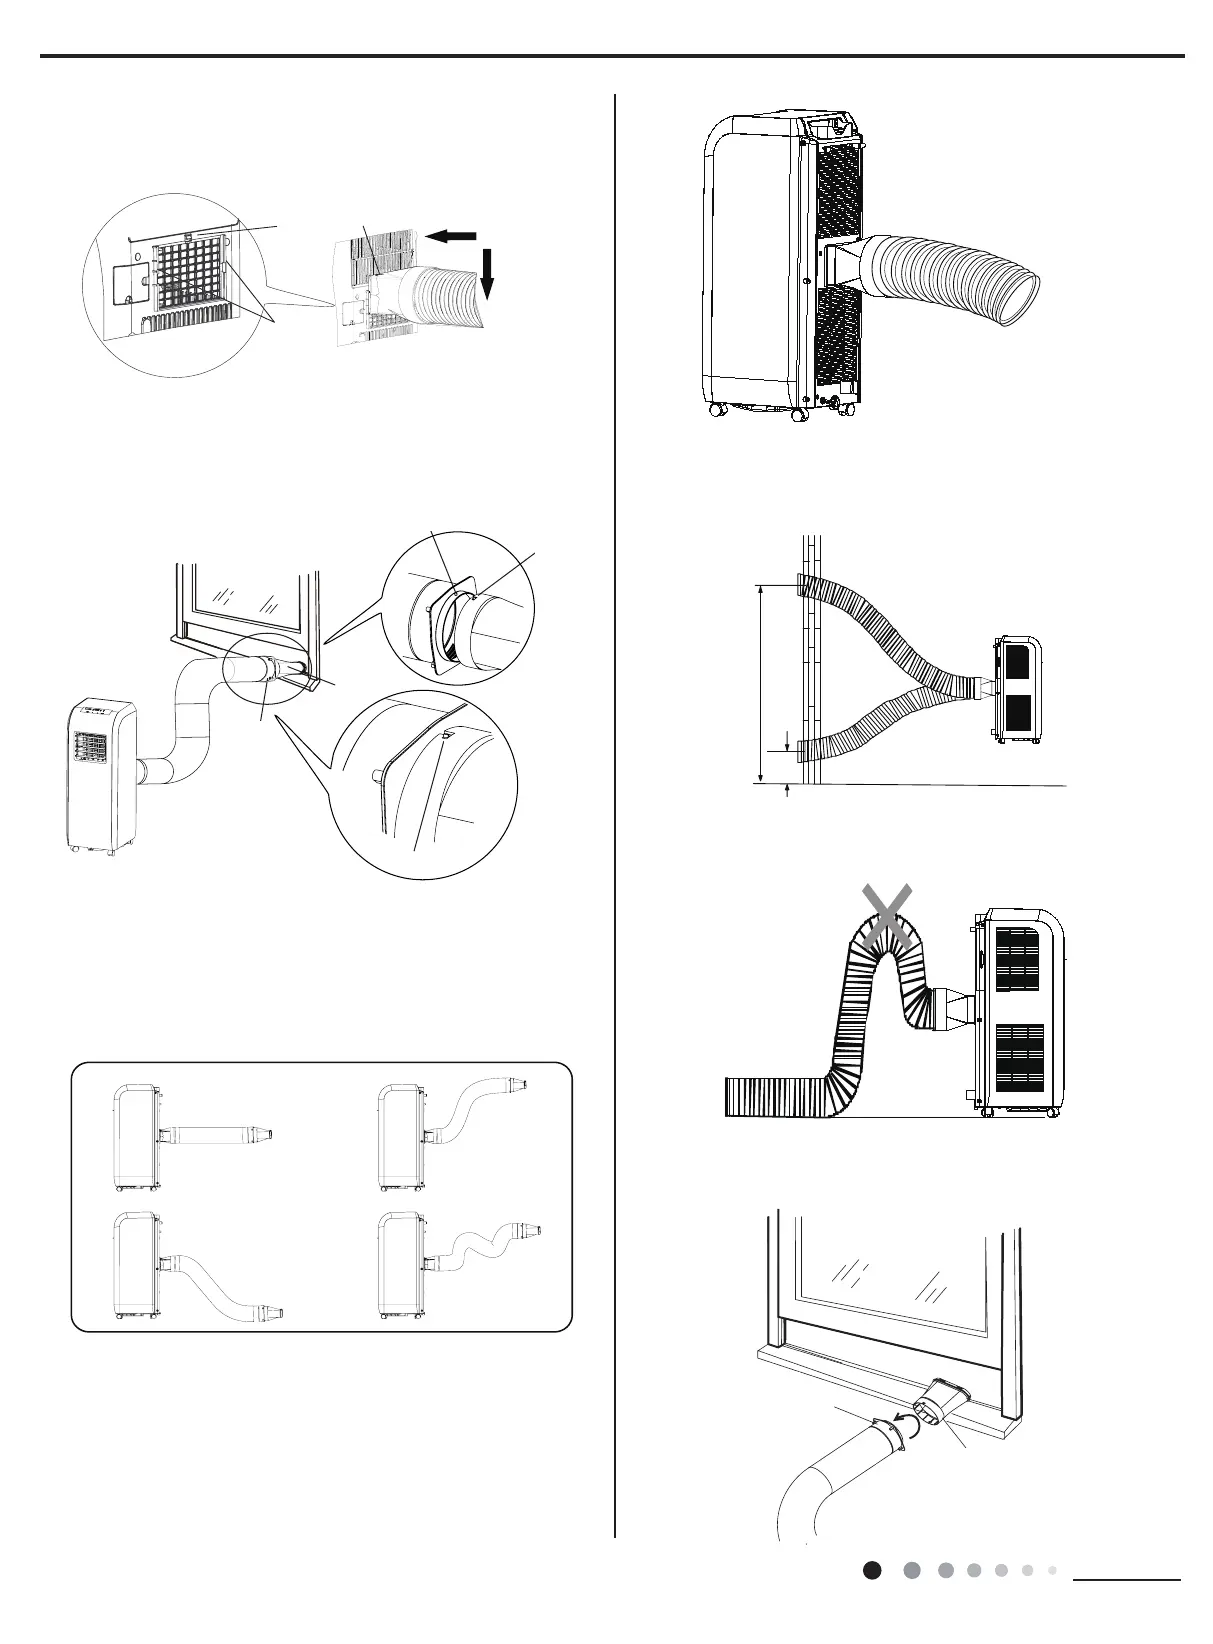
(2) Insert joint A of heat discharge pipe (the side with "TOP" is
upwards) into the groove until you hear a sound.(As shown in
following g)
(3) Aim the locating pole of joint B of heat discharge pipe at the
opening of joint C; rotate it slightly to make joint B and joint C
connect tightly.
clasp
groove
the side with "TOP" is upward
B. Disassemble heat discharge pipe
(1) Remove joint B from joint C.(As shown in following g)
In order to improve cooling efciency, the heat discharge pipe
should be as short as possible and at without curve to ensure
smooth heat discharge.(As shown in following g)
●The length of the exhaust pipe is less than 1m. It is
recommended to use it with shortest length.
●When installing, exhaust pipe should be as flat as possible.
Don't prolong the pipe or connect it with other exhaust pipe.
●Correct installation is as shown in gure (When installing it on
wall, height of hall should be about 40cm-130cm from oor).
●Wrong installation is shown in following figure (If the pipe is
bent too much, it would easily cause malfunction.)
joint B
joint C
joint B
joint C
tightened status
Note of Install heat discharge pipe
correct correct
correct
wrong
40cm
 Loading...