Do you have a question about the Gree GRP-E08SH-R4W and is the answer not in the manual?
Details on power cord, grounding, and electrical safety requirements.
Explanation of the power cord's current detection device and its test/reset function.
Preliminary checks and important notes before starting the installation process.
Guidelines for choosing a suitable and safe location for the unit.
Specifies electrical requirements, outlet types, and connection procedures.
Recommendations for unit placement, including clearance and surface requirements.
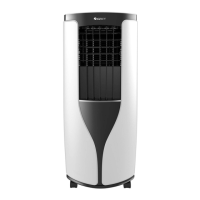
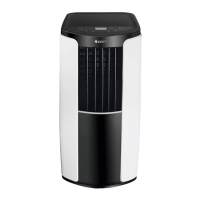
Identification and description of the main components and parts of the unit.
Lists all necessary parts and tools required for installation.
Instructions on how to install and use the cord hooks on the unit.
Steps for connecting and installing the drainage hose for water removal.
Detailed instructions for installing the unit in a vertical double-hung window.
Detailed instructions for installing the unit in a horizontal sliding window.
Detailed instructions for connecting the exhaust hose to the unit.
Instructions for safely removing the exhaust hose from the unit.
Overview of the various features and modes available on the unit.
Explanation of the control panel buttons, symbols, and display functions.
Instructions for operating the air conditioner using the remote control.
Guidance on adjusting the horizontal and vertical louvers for air flow direction.
General checks and considerations for maintaining the unit.
Step-by-step instructions for cleaning the air filter.
Instructions for cleaning the exterior of the air conditioner.
How to drain collected water using the lower hole continuous drainage option.
How to drain collected water using the middle hole continuous drainage option.
Instructions on how to replace the batteries in the remote control.
Description of sounds that are normal during operation and not considered malfunctions.
Explanation of error codes displayed by the unit and their solutions.
Information regarding the duration and coverage of the one-year limited warranty.
List of conditions and damages not covered by the product warranty.
Disclaimer regarding consequential or incidental damages and liability limitations.
This document is an owner's manual for a Gree Portable Air Conditioner, covering models GRP-E08SH-R4W, GRP-E08SH-R4, GRP-E09SH-R4W, GRP-E09SH-R4, GRP-EHP09SH-R4W, and GRP-EHP09SH-R4. It provides comprehensive instructions for safe operation, installation, maintenance, and troubleshooting of the unit.
The Gree Portable Air Conditioner is designed to provide cooling and dehumidification for indoor spaces. It features a programmable digital thermostat for precise comfort control, allowing users to select their desired temperature. The unit also includes a 24-hour programmable clock timer, which enables users to set specific times for the unit to turn on or off, enhancing energy efficiency and convenience.
For air circulation, the air conditioner offers a 3-speed fan with an additional Auto Fan mode. In Auto Fan mode, the unit automatically adjusts the fan speed based on the current room temperature and the thermostat setting to maintain optimal comfort. The Sleep Mode feature automatically increases the set temperature by 2°F after the first hour and another 2°F after the second hour, limiting compressor usage and conserving energy during sleep.
A key feature of this portable air conditioner is its Evaporative Exhaust Technology and Evaporative Dehumidifier (DRY Mode). This technology removes moisture from the air, which then drips onto the condenser. The condenser evaporates this water, expelling it with the hot air through the exhaust hose. If any water is not fully evaporated, it collects in a small pan and is then pumped back up to be evaporated by the condenser, ensuring efficient moisture removal.
The unit is also equipped with Loss of Power Protection with Auto Restart, which remembers all settings prior to a power interruption. When power is restored, the air conditioner will resume operation in the previously selected mode, temperature, and settings. A Child Lock Function is available, activated by simultaneously pressing the “+” and “-” buttons on the remote control, which prevents unintended changes to settings.
The portable air conditioner is controlled via an LCD remote control that displays all settings. The remote includes buttons for Power, Mode (Cool, Dry, Fan, Heat*), Temperature Increase/Decrease, Fan Speed (Auto, Speed 1, Speed 2, Speed 3), X-Fan, Sleep, and Timer. The X-Fan button, when pressed in COOL or DRY mode, activates a function where the interior fan continues to operate for a few minutes after the compressor turns off to disperse excess condensation, helping to prevent mold and mildew. This mode is not available in AUTO or FAN mode.
The unit's control display on the main unit also features buttons for Power, Mode, Temperature Increase/Decrease, Fan Speed, Timer, and Sleep. The display shows the set temperature or the time remaining on the Delay Timer. Temperature settings can be adjusted between 61°F (16.1°C) and 86°F (30°C) in COOL or HEAT* modes. The default temperature reading is in Fahrenheit (°F), but can be changed to Celsius (°C) by pressing the Mode and Temp Decrease buttons simultaneously on the remote control when it is turned off.
Airflow direction can be adjusted both horizontally and vertically. Users can hold the horizontal or vertical louvers as shown in the manual diagrams to direct the airflow. However, a caution is noted against adjusting the louvers to extreme left or right, or lowest/highest positions in COOL or DRY mode with low fan speed for extended periods, as this may cause condensation to form on the louvers.
Installation of the unit involves securing the exhaust hose and window panel. The manual provides detailed steps for installing the exhaust hose connection and nozzle, ensuring they are rotated clockwise into opposite ends of the exhaust hose. The exhaust hose connection then slides into grooves on the back of the unit. For window installation, the manual covers vertical double hung and horizontal sliding windows, providing instructions for using window panels, adjustment panels, and extension panels based on window width or height. Foam with adhesive is used to seal gaps, and brackets are used to secure the inner window.
Regular cleaning and maintenance are crucial for the optimal performance and longevity of the air conditioner. The manual emphasizes turning off and unplugging the unit before any cleaning to prevent electric shock. It also warns against washing the unit with water or using harsh cleansers.
Cleaning the Filter: The air filter(s) should be removed and cleaned regularly, ideally once every three weeks, or more frequently in dusty environments. The filters can be cleaned with water or a mild cleaner and then air-dried in a shady place. Users are cautioned against using a hair dryer to dry the filters or operating the unit without the filters installed.
Cleaning the Outer Case: The outer case can be wiped with a soft towel to remove dust. For dirtier surfaces, a mild detergent can be used. The grill should be cleaned with a cleaner or a soft brush.
Removing Collected Water: The unit features a continuous drainage option. During cooling or drying operations, water condenses and drains into the chassis. If the chassis becomes full, a buzzer will sound, and "H8" will display, causing the unit to shut off. The manual provides instructions for draining the collected water from either the lower hole or the middle hole. For the lower hole option, the drainage hose is removed from its pipe clip, and the rubber plug is pulled out to discharge the water. For the middle hole option, the continuous drain cap is turned counter-clockwise, the rubber plug is removed, and a drain connector (included) is screwed into the spout, into which the drainage hose is inserted. When using the continuous drainage from the middle hole, it's important to place the portable unit on a level surface and ensure the drainage hose is clear of obstructions and directed downward to prevent water from filling the chassis.
Remote Control Battery Replacement: The manual details how to replace the AAA 1.5V dry batteries in the remote control. This involves pressing the back side of the remote marked "OPEN," pushing out the battery cover, replacing the two batteries, ensuring correct polarity, and then reinstalling the battery cover. Users are advised to remove batteries if the remote control will not be used for extended periods.
The manual also includes a troubleshooting section to address common issues such as the unit not operating, insufficient cooling, ice formation, unusual noises, and water dripping. It provides solutions like checking power connections, adjusting temperature settings, cleaning filters, and ensuring proper installation. A malfunction code section helps users identify and resolve specific error codes displayed on the unit, such as "H8" for a full chassis or "F1" for a temperature sensor malfunction, often directing users to contact customer service if solutions fail.
| Power Supply | 220-240V, 50Hz |
|---|---|
| Compressor Type | Rotary |
| Type | Split System |
| Indoor Noise Level | 24 dB |
| Outdoor Noise Level | 50 dB |
| Noise Level (Indoor) | 24 dB |
| Noise Level (Outdoor) | 50 dB |
| Operating Temperature (Cooling) | 18°C to 43°C |
| Operating Temperature (Heating) | -7°C to 24°C |