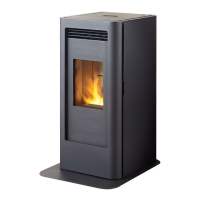
Figure 35: GF40 Heat Exchanger Tubes
heat exchanger tubeS (2-3 days)
• The heat exchanger tubes are located
behind the Louver assembly. To access
Heat Exchanger Scraper Rod, remove
middle two louvers by tipping up and
pulling out.
• Pull out the Scraper Rod shown in
Figure 35 in order to remove any fly
ash that may have collected on the
heat exchanger tubes. This will allow
for optimal heat transfer to convection
air.
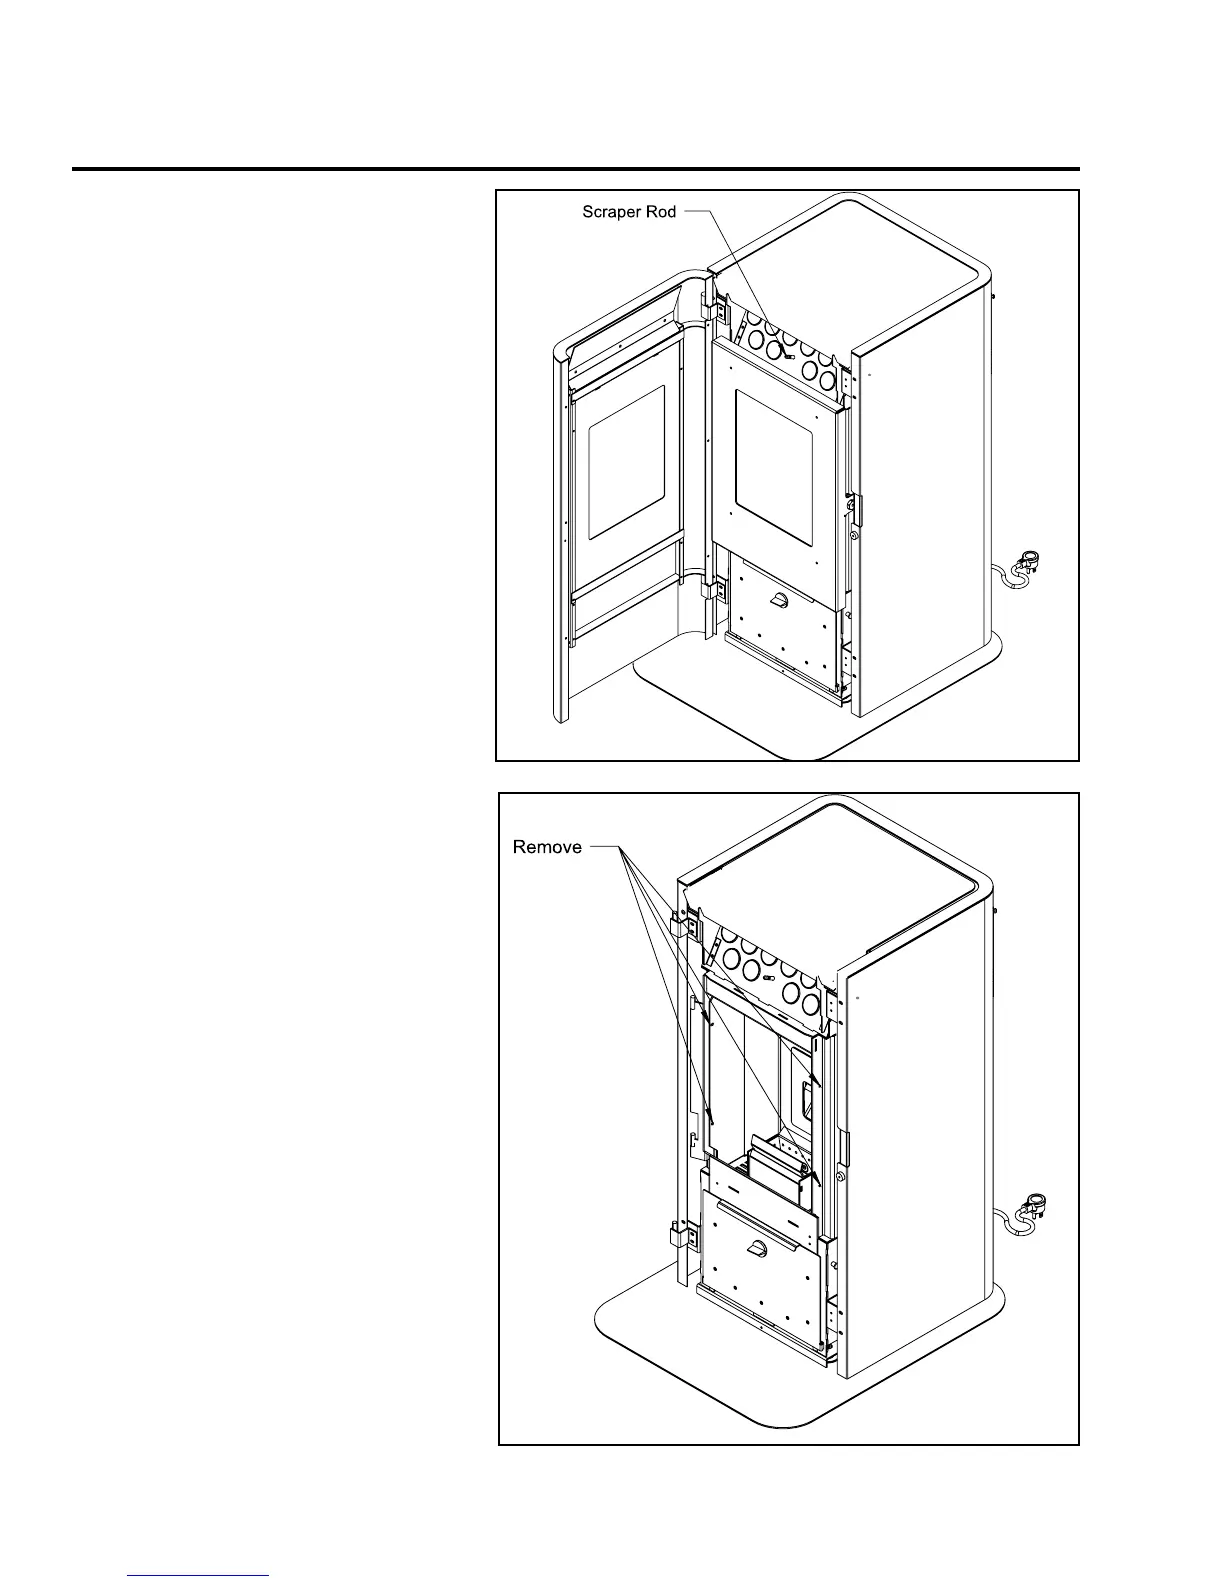
removal of fIrebox panelS
• Open the door, remove the door, burn
pot and burn pot liner.
• Lubricate all screws with penetrating
oil.
• Remove the four screws that hold the
side panels in place.
• With the tip of a flat screwdriver, gently
lift up the side panels and remove the
side panels.
• Pull the center panel out.
• Vacuum thoroughly.
• Re-install panel by inserting center
panel.
• Place the side panels back into the
firebox locking them into place and
re-install the two screws on each side.
• Clean thoroughly.
Note: Screws that secure left side
panel also secure hinge bracket
which holds the door. Remove door
before unscrewing.
• To remove and rotate the side covers
to open them.
• Vacuum out all three 3 chambers.
• Close all the clean-out covers and
Routine Cleaning and Maintenance
Figure 36: GF40 Firebox Panels
26 | GF40 Freestanding Pellet Stove
|
26
maintenance