555
®
Series Electric Benders
Greenlee / A Textron Company 4455 Boeing Dr. • Rockford, IL 61109-2988 USA • 815-397-7070
6
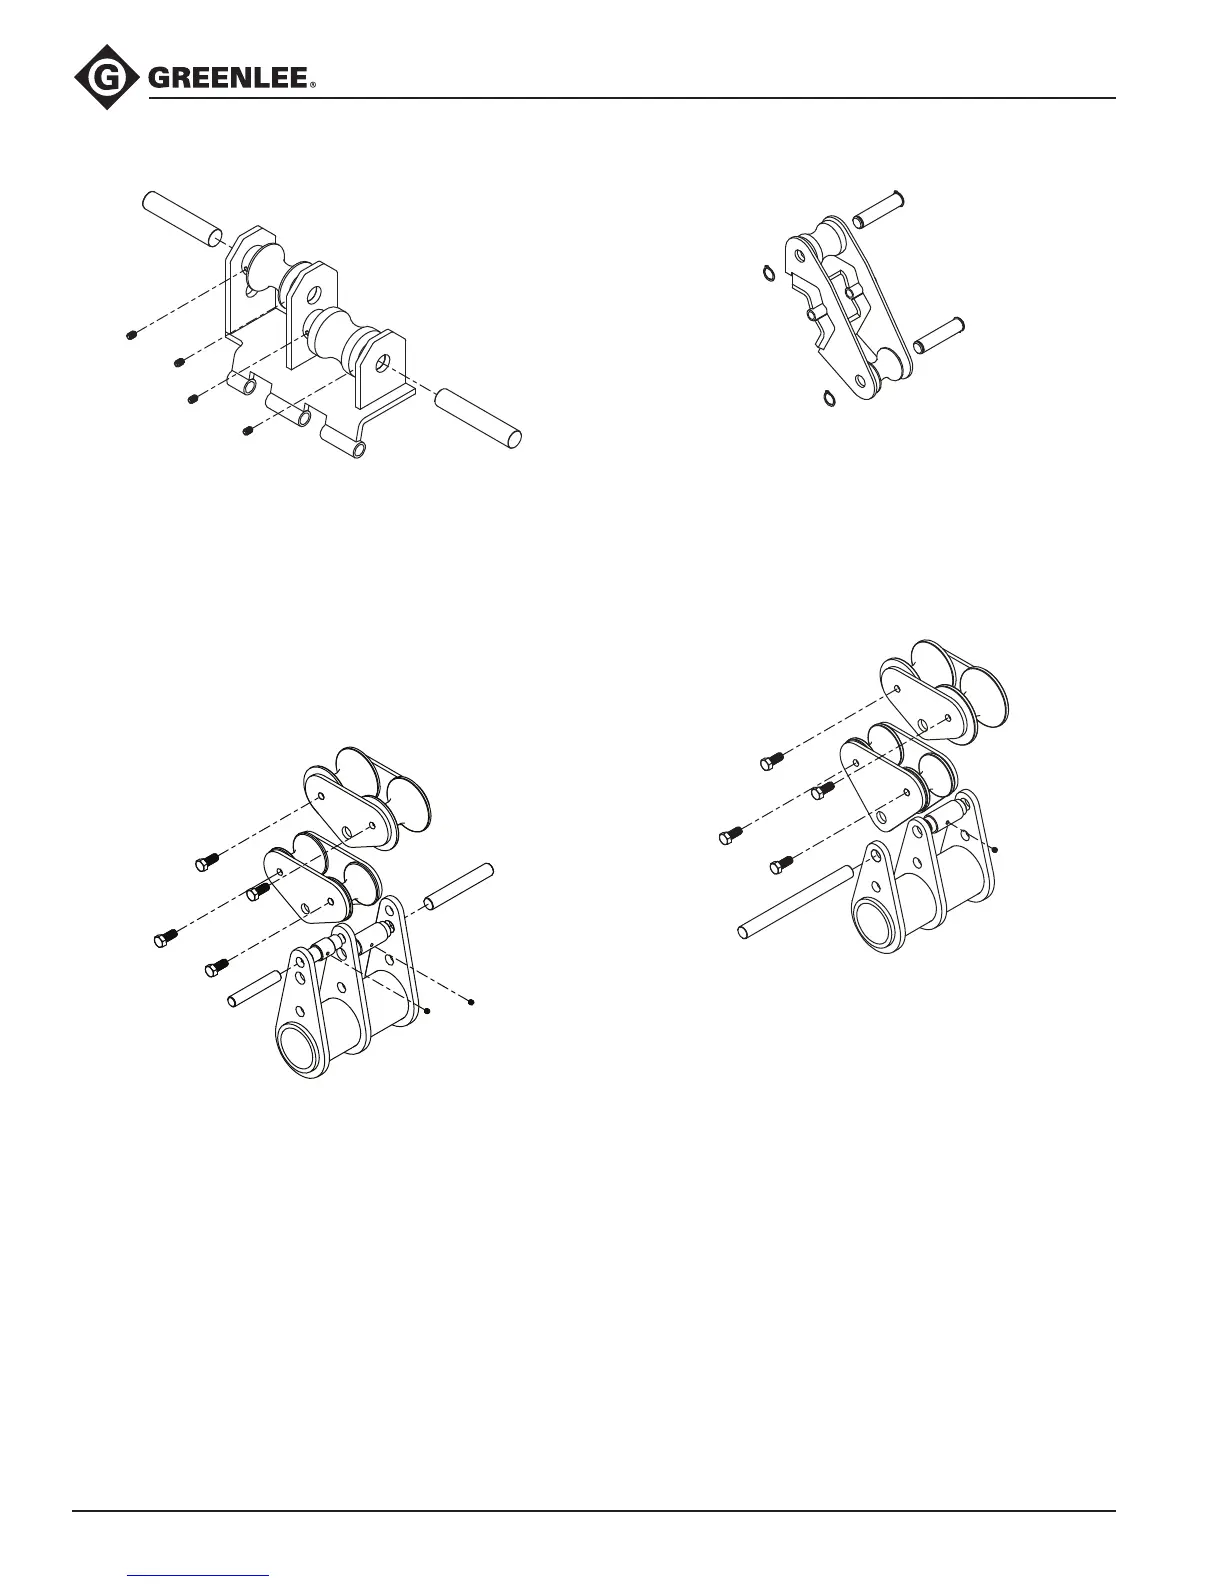
52047930 EMT and IMC Roller Support Assembly
(for combination shoes)
1. Loosen set screws on the four sleeves.
2. Push out axle shafts.
3. Reassemble in reverse order noting the following:
a. Position shafts so they are ush with the plates.
b. Slide the sleeves fully outward before locking the
set screws.
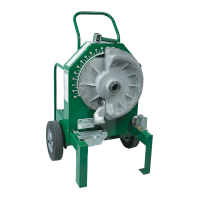
52055013 and 52055014 Roller Assemblies
(for combination shoes)
1. Loosen the two set screws on the pivot sleeves.
2. Push out the pivot shafts and remove the roller
assemblies.
3. Remove the hex bolts securing the outer plates.
4. Pull off the rollers.
5. Reassemble in reverse order noting the following:
a. Lubricate the roller shafts with molybdenum
grease.
b. For 2" EMT, the smaller diameter roller goes to
the left.
c. Position each pivot shaft so it is ush with the far
surface of the middle arm.
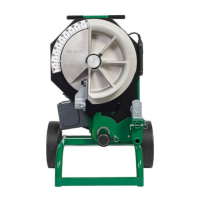
52055994 EMT and IMC Tail Roller Support Assembly
(for single-groove shoes)
1. Remove one retaining ring from each shaft.
2. Push out the shafts and remove the rollers.
3. Reassemble in reverse order noting the following:
Lubricate the roller shafts with molybdenum grease.
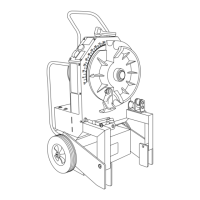
52044927 and 52044928 Roller Assemblies
(for individual shoes)
1. Loosen the set screw on the pivot sleeves.
2. Push out the pivot shaft and remove the roller
assemblies.
3. Remove the hex bolts securing the outer plates.
4. Pull off the rollers.
5. Reassemble in reverse order noting the following:
a. Lubricate the roller shafts with molybdenum
grease.
b. For 2" EMT, the smaller diameter roller goes to
the left.
c. Position the pivot shaft so an equal amount pro-
trudes from each side of the arm weldment.
Service Instructions