4
Congratulaons on your purchase of a Grifco® Electronic Wall Controller.
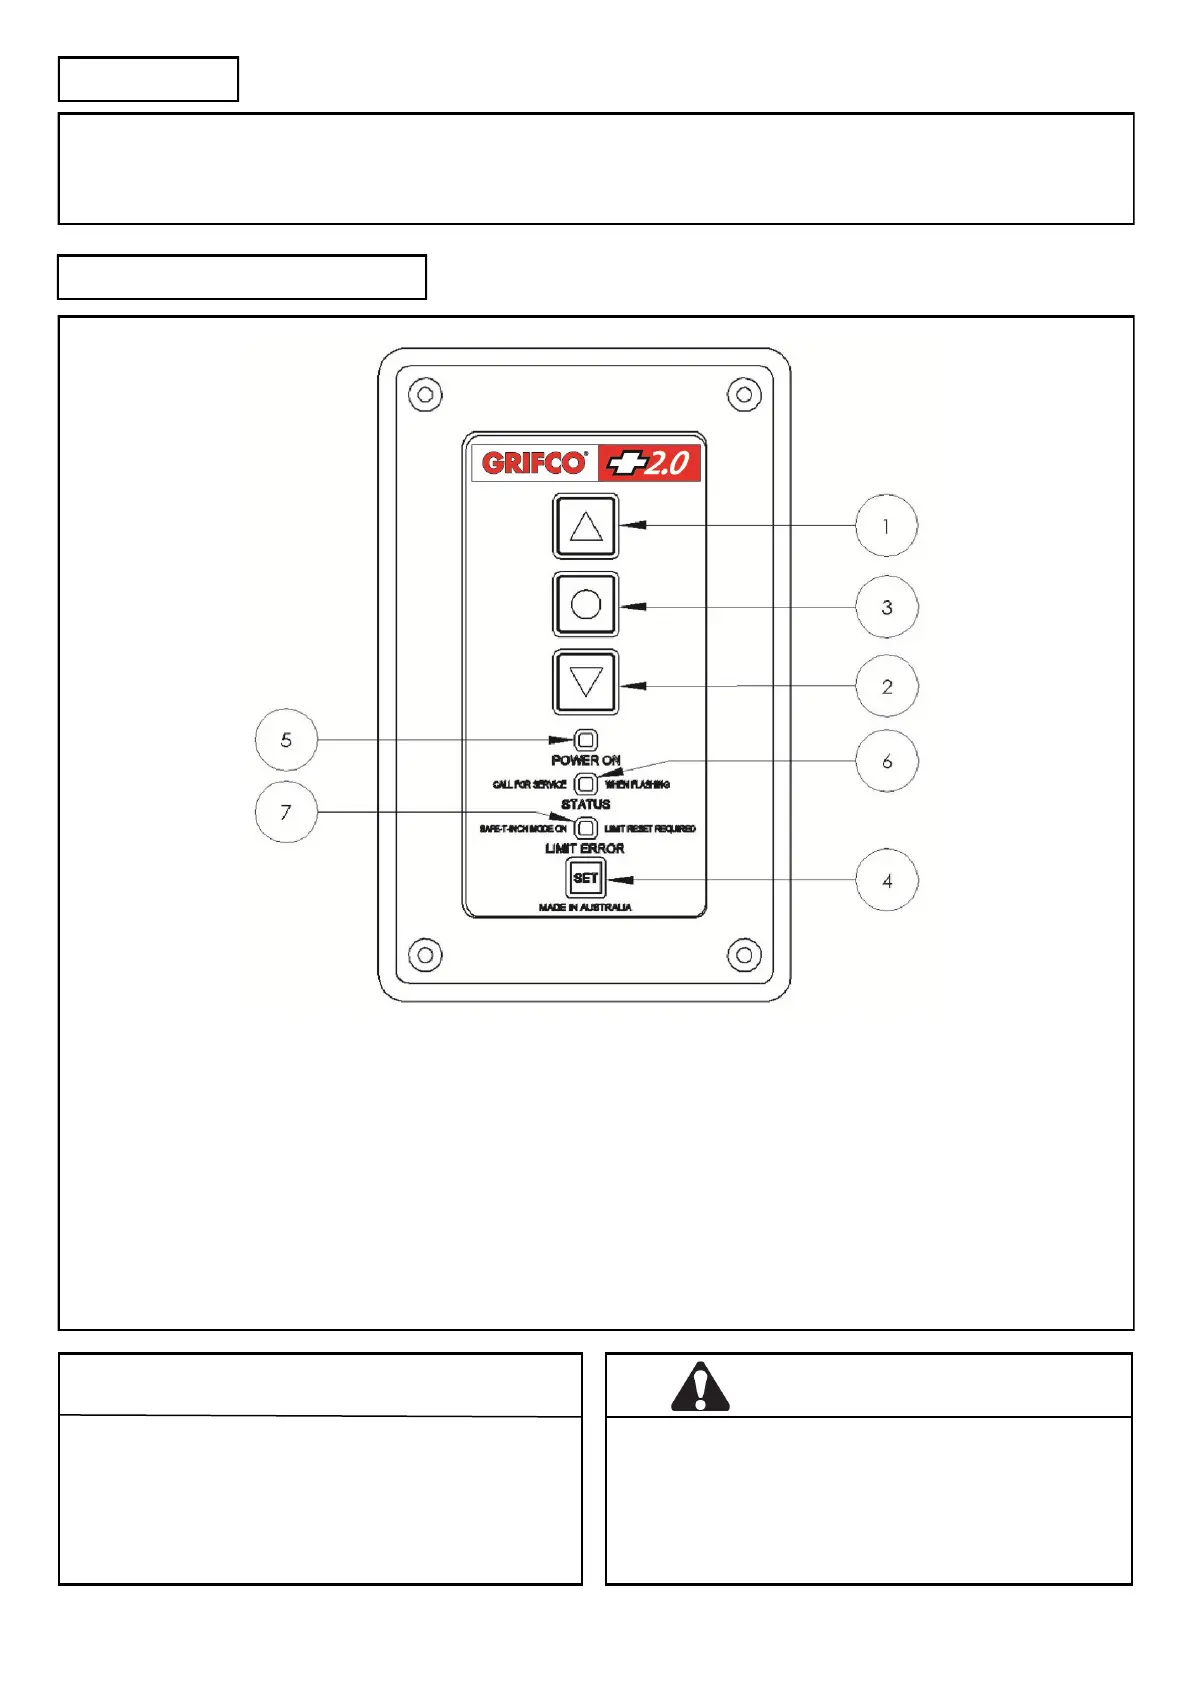
This controller is the user interface for the opener. It consists of four buons for control and setup, as well as three indicators to
display the opener status.
INTRODUCTION
IDENTIFYING YOUR CONTROLLER
WARNING
Make sure that people who install, maintain or
operate the door follow these instrucons. It is
advised that the instrucons be kept in a safe place
so that you can refer to them quickly when you
need to.
CAUTION
Please remove any locks ed to the door before
operaon in order to prevent damage to the door.
1) UP - Moves the door upwards
2) DOWN - Moves the door downwards
3) STOP - Stops the door
4) SET - Used to set limits, and other
programmable funcons
5) POWER ON - Shows when the unit is mains powered
(White LED)
6) STATUS - Shows the status of the unit (error codes)
(Green LED)
7) LIMIT ERROR – When lit indicates limits (or stopping
posions) are not set, the door will only
operate in SAFETY inch mode unl limits
are set (or reset).
(Orange LED)